


See https://www.youtube.com/video/l3TXQUvpkHo
How to stretch and/or compress kiln elements.

See https://www.youtube.com/video/aEfGj_eA8v0
This video shows how easy it is to change elements in an L&L kiln. The hard ceramic element holders protect the fragile firebrick while you are pulling element out and putting new elements in. See this link for more information on changing elements, wiring, and diagrams.

See https://www.youtube.com/video/UWwrcDccp7I?ecver=2
How to test the internal switches on the Dynatrol board.

See https://www.youtube.com/video/35oHh2b3zP4?ecver=2
How to change the On/Off switch in most L&L automatic kilns.

See https://www.youtube.com/video/Pi1MKfLXVNU?ecver=2
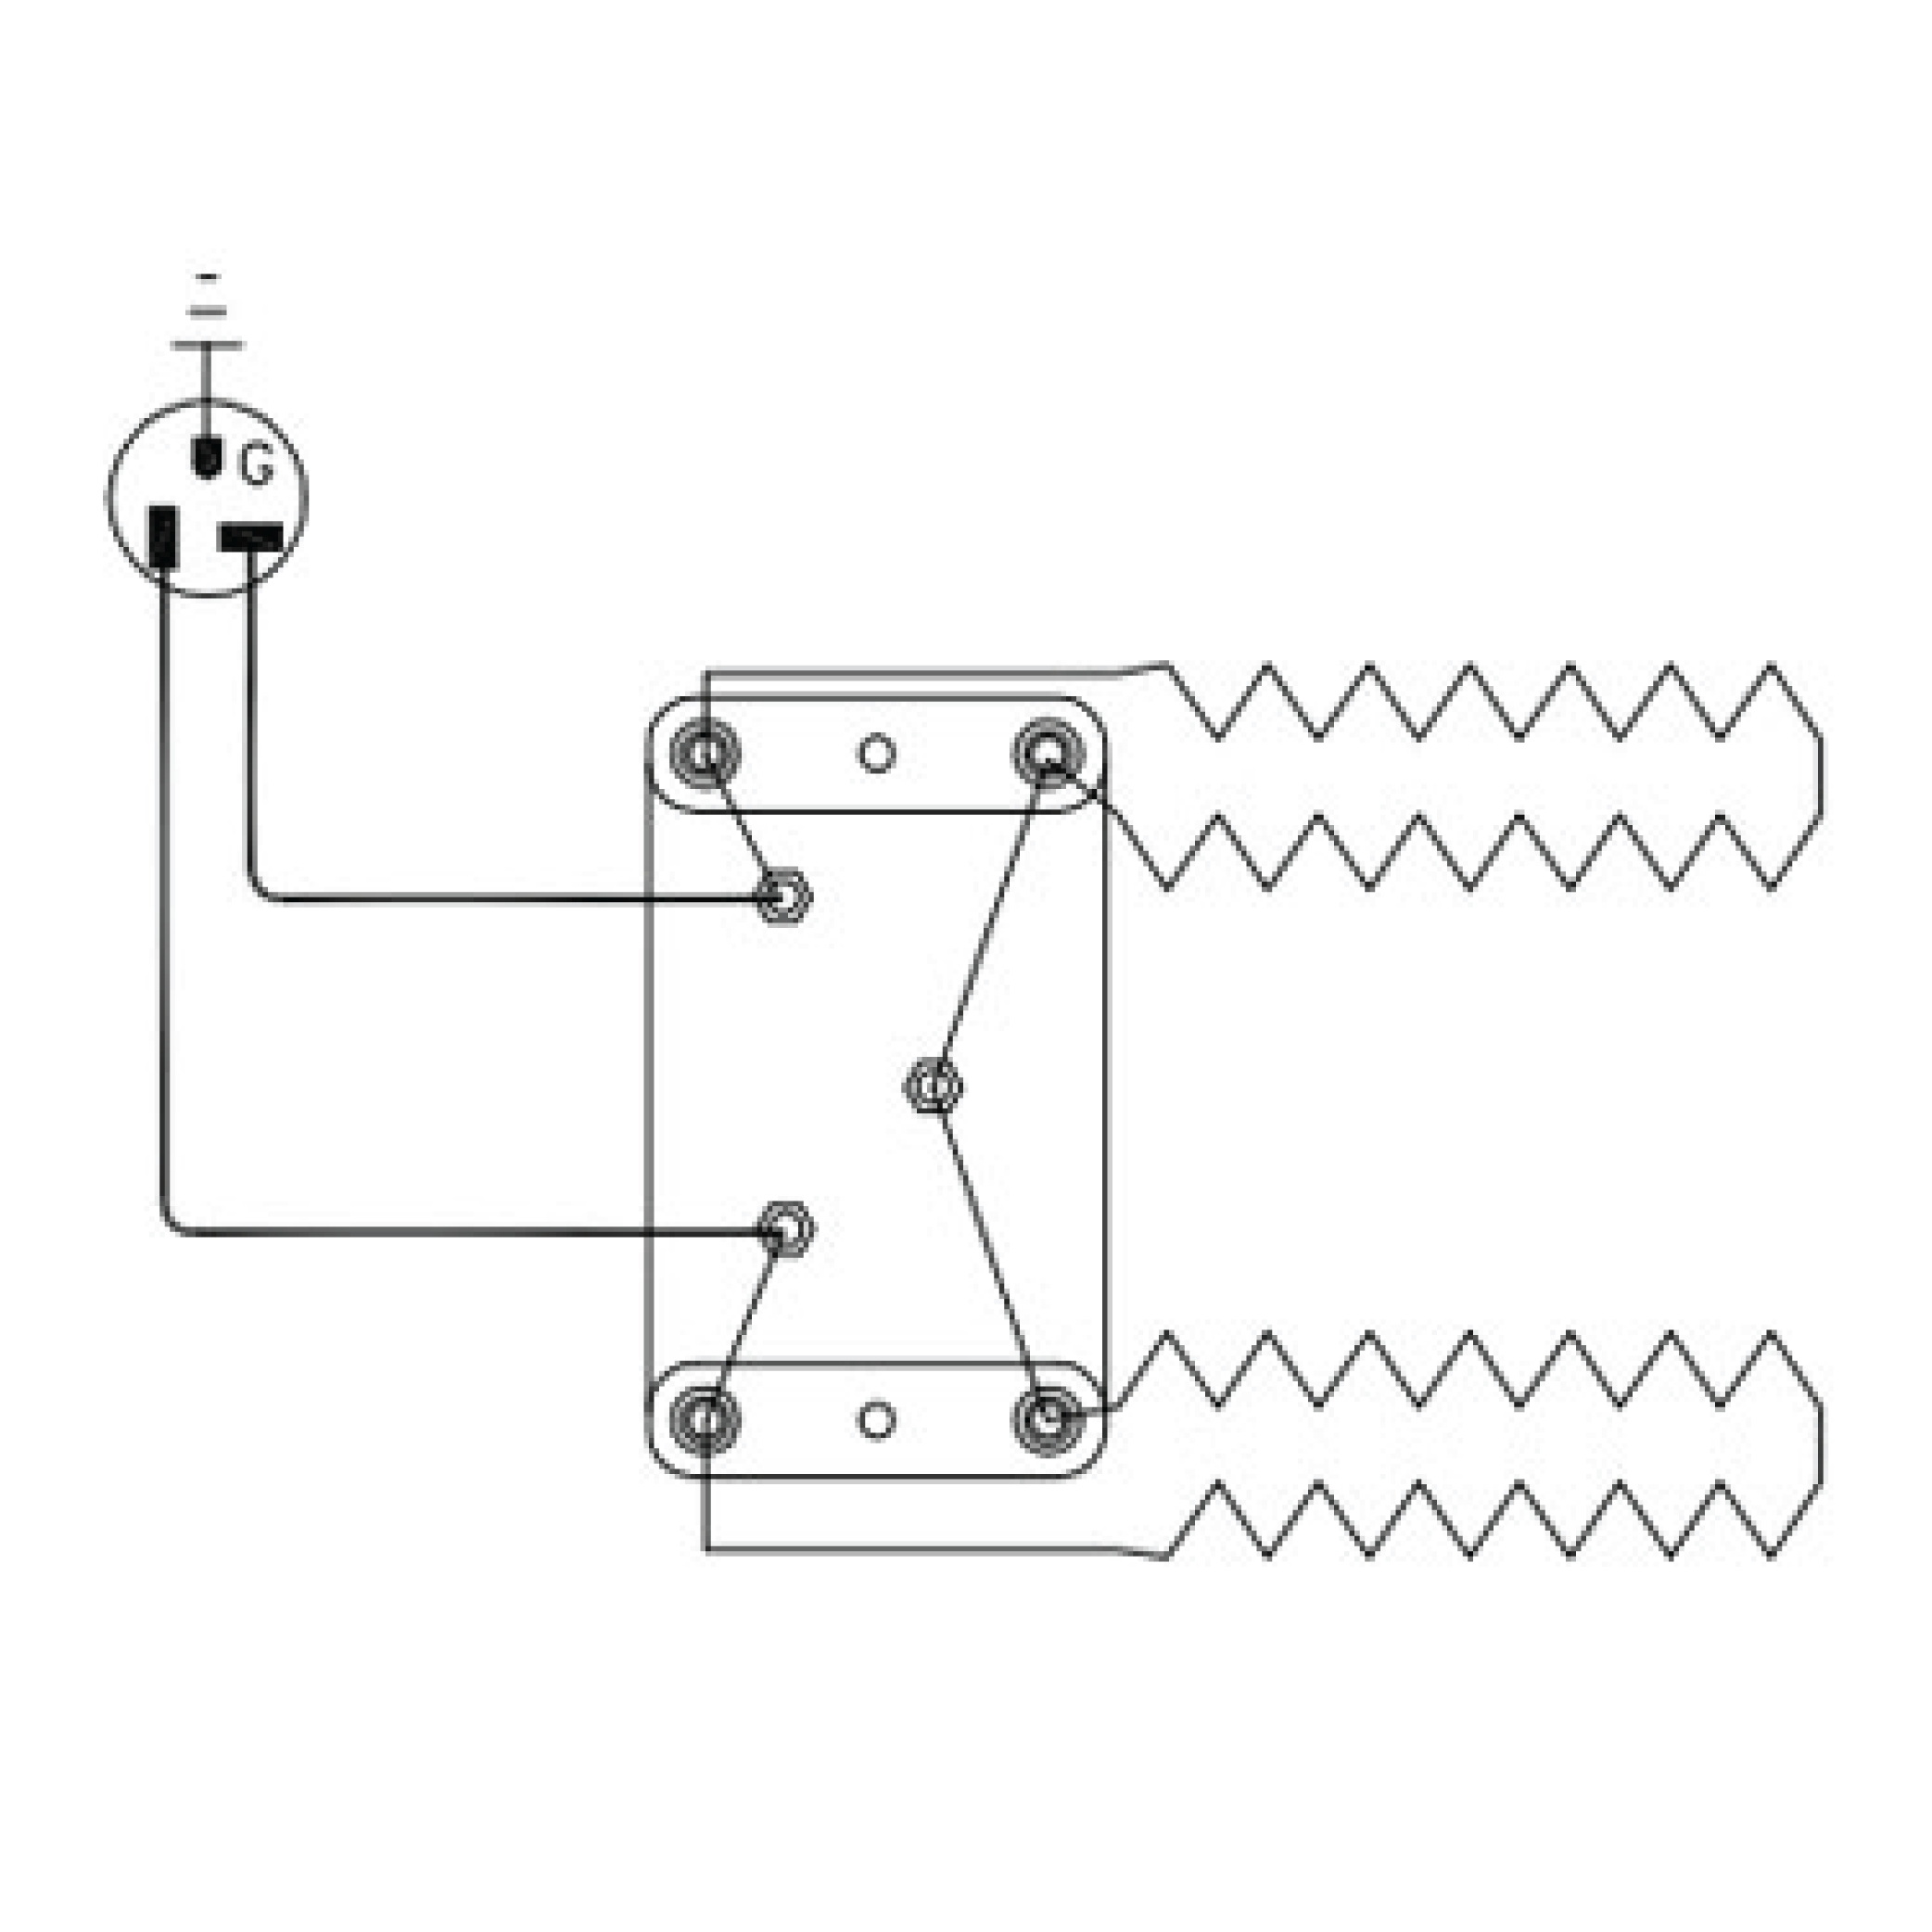
This video shows how to change phase on an L&L Easy-Fire kiln. It will similar on most other L&L kilns with power cords.
Parts
See https://www.youtube.com/video/dFIhqOI8en8
See this page for the 12-Volt 30-Amp relay we use for most kilns.
This page describes the 240-volt 30-amp relay we use as a control relay for 480-volt kilns.
See https://www.youtube.com/video/Z13V8k2XBNA?ecver=2 This video shows how to remove the wires in sequence while changing a transformer on an L&L automatic kiln. See this page for more detail.

See https://www.youtube.com/video/HRRjPWC_-_Q?ecver=2
How to check to see if a thermocouple is OK.

See https://www.youtube.com/video/m700BW3flYY?si=LfTkt4Um9E8LI7hm
This video is useful for changing a thermocouple on any L&L kiln - in particular an eQuad-Pro or a School-Master Kiln.
Be sure to maintain proper polarity.In the USA: Yellow Wire = PLUS (+) Red Wire = MINUS (-) The thermocouples are marked with a (+) and (-). Also the negative (-) is marked with a red marker. The negative wire is MORE magnetic than the positive wire.
For more information about thermocouple polarity, color coding, and markings see this page.
PartsSee this page for the standard type K thermocouple.

See https://www.youtube.com/video/ZvBiD2BPJ9w
This video shows you how to remove an L&L easy-fire, eQuad-Pro or School-Master panel to send to factory for service.
For the previous panel design with a thermocouple terminal strip, watch from the beginning.
For the new panel design without a thermocouple terminal strip, skip to 2:13

See https://www.youtube.com/video/6cfRNR2Tggw?ecver=2

See https://www.youtube.com/video/FDmUn-rbH_M
In this video we will demonstrate how to upgrade your kiln from Type K thermocouples to Type S.