
Resistance & Error 1
- Element aging and wear are the most common causes of kiln slowdown, E-1 messages, and failure to reach the target temperature. As your elements age, they increase in electrical resistance, measured in ohms.
- When resistance (in Ohms) increases, both Watts and Amperes (the amount of power) decrease, assuming the Voltage remains constant. If you don't have enough power, your kiln will fire slowly and may not reach the desired temperature.
What does this mean?
- Using resistance, we can tell exactly how much power your kiln has lost over the course of your element's life.
- For example, on an e23T that uses 240V, a brand-new kiln section would read about 14.5 ohms. If you measured this same kiln section after many cone 6 firings and the reading was 16.5 Ohms, you would know that this section of elements has lost approximately 14% of its power (16.5/14.5 = 1.138, or close to 14%).
- A general rule of thumb is that most people will typically begin to notice some slowdown once they've lost more than 10% of their power.
- The time will vary based on the kiln you have, your voltage, and the types of firing you perform. People who only do low-fire work will continue to get by on lower power than those who need to reach higher temperatures (cone 6).
EASY-FIRE, EQUAD-PRO, DOLL, SCHOOL MASTER, eFL SERIES
In these series of kilns, a piggy-backed control panel covers up the element terminals.
- Turn the power to the kiln completely OFF and unplug it. If it is directly wired, then turn off all power at the disconnect switch or circuit breaker.
- Open the outermost control panel by unscrewing it either from the element cover box in the case of Easy-Fire, eQuad Pro, School Master, newer Doll kilns, and Liberty Belle kilns or from the kiln body in the case of older Doll kilns.
- Once you open up the control panel, you will see the element power wire terminal strip. It will have numbered wires coming from the element terminal blocks and wires connecting to the power relays. There are two wires per kiln section or ring. Therefore, numbers 1 and 2 correspond to the top section, 3 and 4 to the middle section, and 5 and 6 to the bottom section of a three-ring kiln.
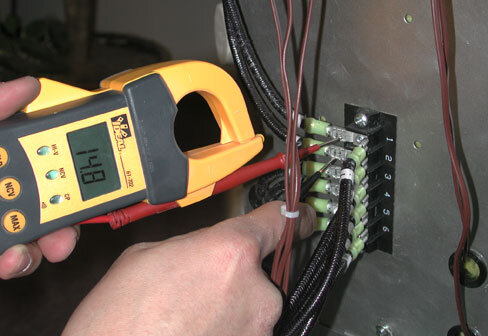
- Set your multimeter to Ohms (Omega symbol Ω), and using your testing leads, place one in between the two tabs/terminals w/ #1 wires connected. There is a small circular divot that the lead fits into (see picture). Place the other lead on terminal #2 and record the reading. Repeat the process for items 3 and 4, and then for items 5 and 6. Remember that each pair of wires represents one section.
- Compare your readings to those on the wiring diagram in your instruction manual. Keep in mind that the ohms on the wiring diagram are per ELEMENT, while your reading will be per SECTION. See above for more info on understanding the readings.
Ohms per Element vs. Ohms per Section (or Circuit).
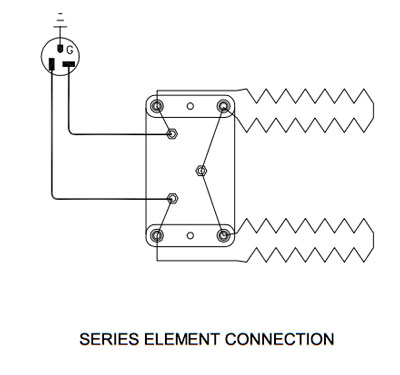
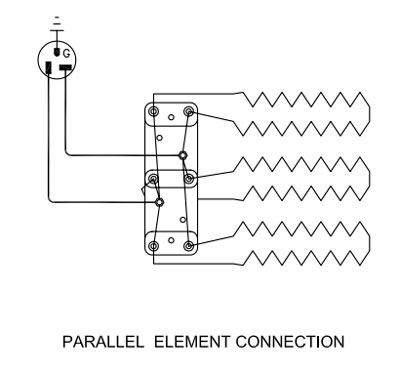
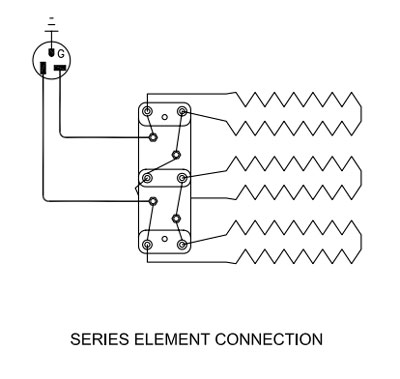
- How you figure out the section ohms depends on whether the elements are wired in Parallel or Series.
- Most kilns are wired in Parallel except for JD230V and most 18" kilns like the e18T.
- For a parallel kiln, you take the per-element ohms listed on your wiring diagram and divide them by the number of elements per section.
Example #1 (2 Elements in Parallel): e23T 240V 1 Phase: The elements are 28.9 Ohms each. Divide by two because they are in parallel, and you will get a reading of 14.5 Ohms per section.

Example #2 (2 Elements in Series): e18S 240V 1 Phase: The elements are 9.6 Ohms each. Multiply by two because they are in series, and you will get a reading of 19.2 Ohms per section.
Example #3 (3 Elements in Parallel): JD2927 240V 1 Phase - Each element is 36.5 Ohms. Divide by three because they are in parallel, and you will get a reading of 12.3 Ohms per section.
Example #4 (3 Elements in Series): Doll DLH11-DBX 240V 1 Phase - Each element is 6.6 Ohms. Multiply by three because they are in series, and you will get a reading of 19.8 Ohms per section.
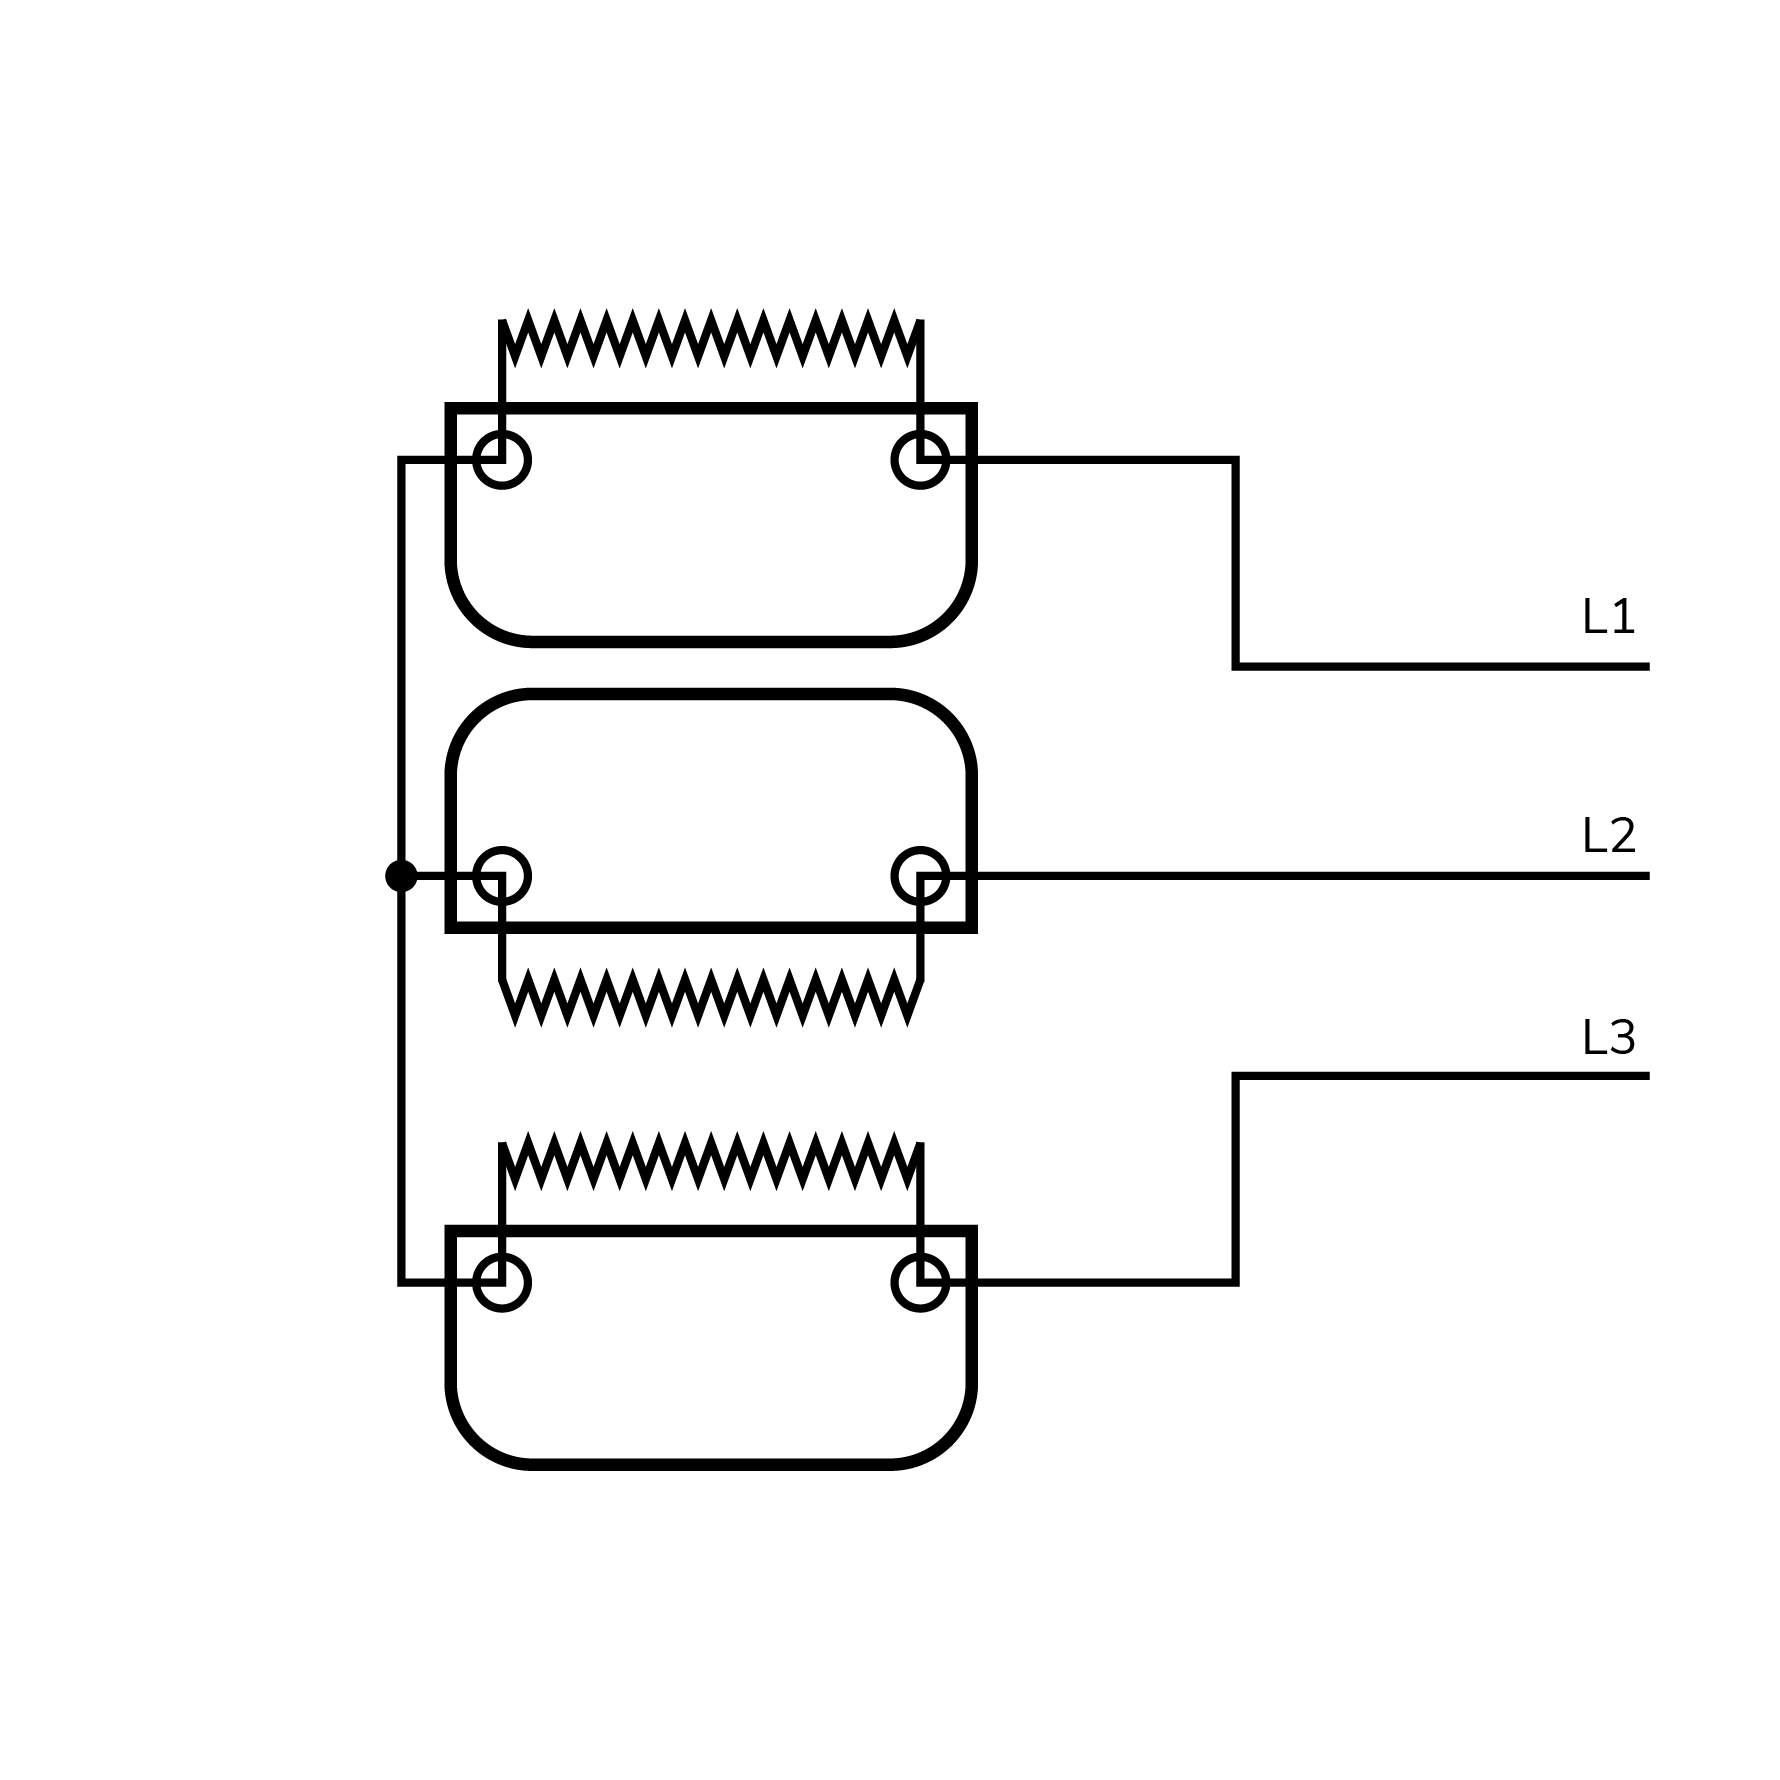
Example #5 In a 3-phase Wye circuit with three equal elements and a floating neutral, the resistance between any two lines (L1-L2, L2-L3, L3-L1) is two elements in series: 2 × cold ohms of element Ω = cold ohms per circuit.
CHECKING RESISTANCE ON AN EASY-FIRE KILN
JUPITER, DAVINCI
In these series of kilns, the control panel is separated from the kiln body, and the element terminals are connected to the controls via external jumper cords or plugs.
- Turn the power to the kiln completely OFF and unplug it if possible. If it is directly wired with Easy-Fire, then you should at least turn off all power at the disconnect switch or circuit breaker.
- Unplug the first jumper cord from the control panel.
- Set your multimeter to Ohms (Omega symbol Ω), and using your testing leads, place one lead on each of the "hot" prongs. They will be flat ones.
- Take note of the reading and proceed to the next one.
- Compare your readings to those on the wiring diagram in your instruction manual. Keep in mind that the ohms on the wiring diagram are per ELEMENT, while your reading will be per SECTION. See above for more info on understanding the readings.
CHECKING RESISTANCE ON A JUPITER OR DAVINCI KILN
Refer to this tutorial for instructions on using a multimeter.