
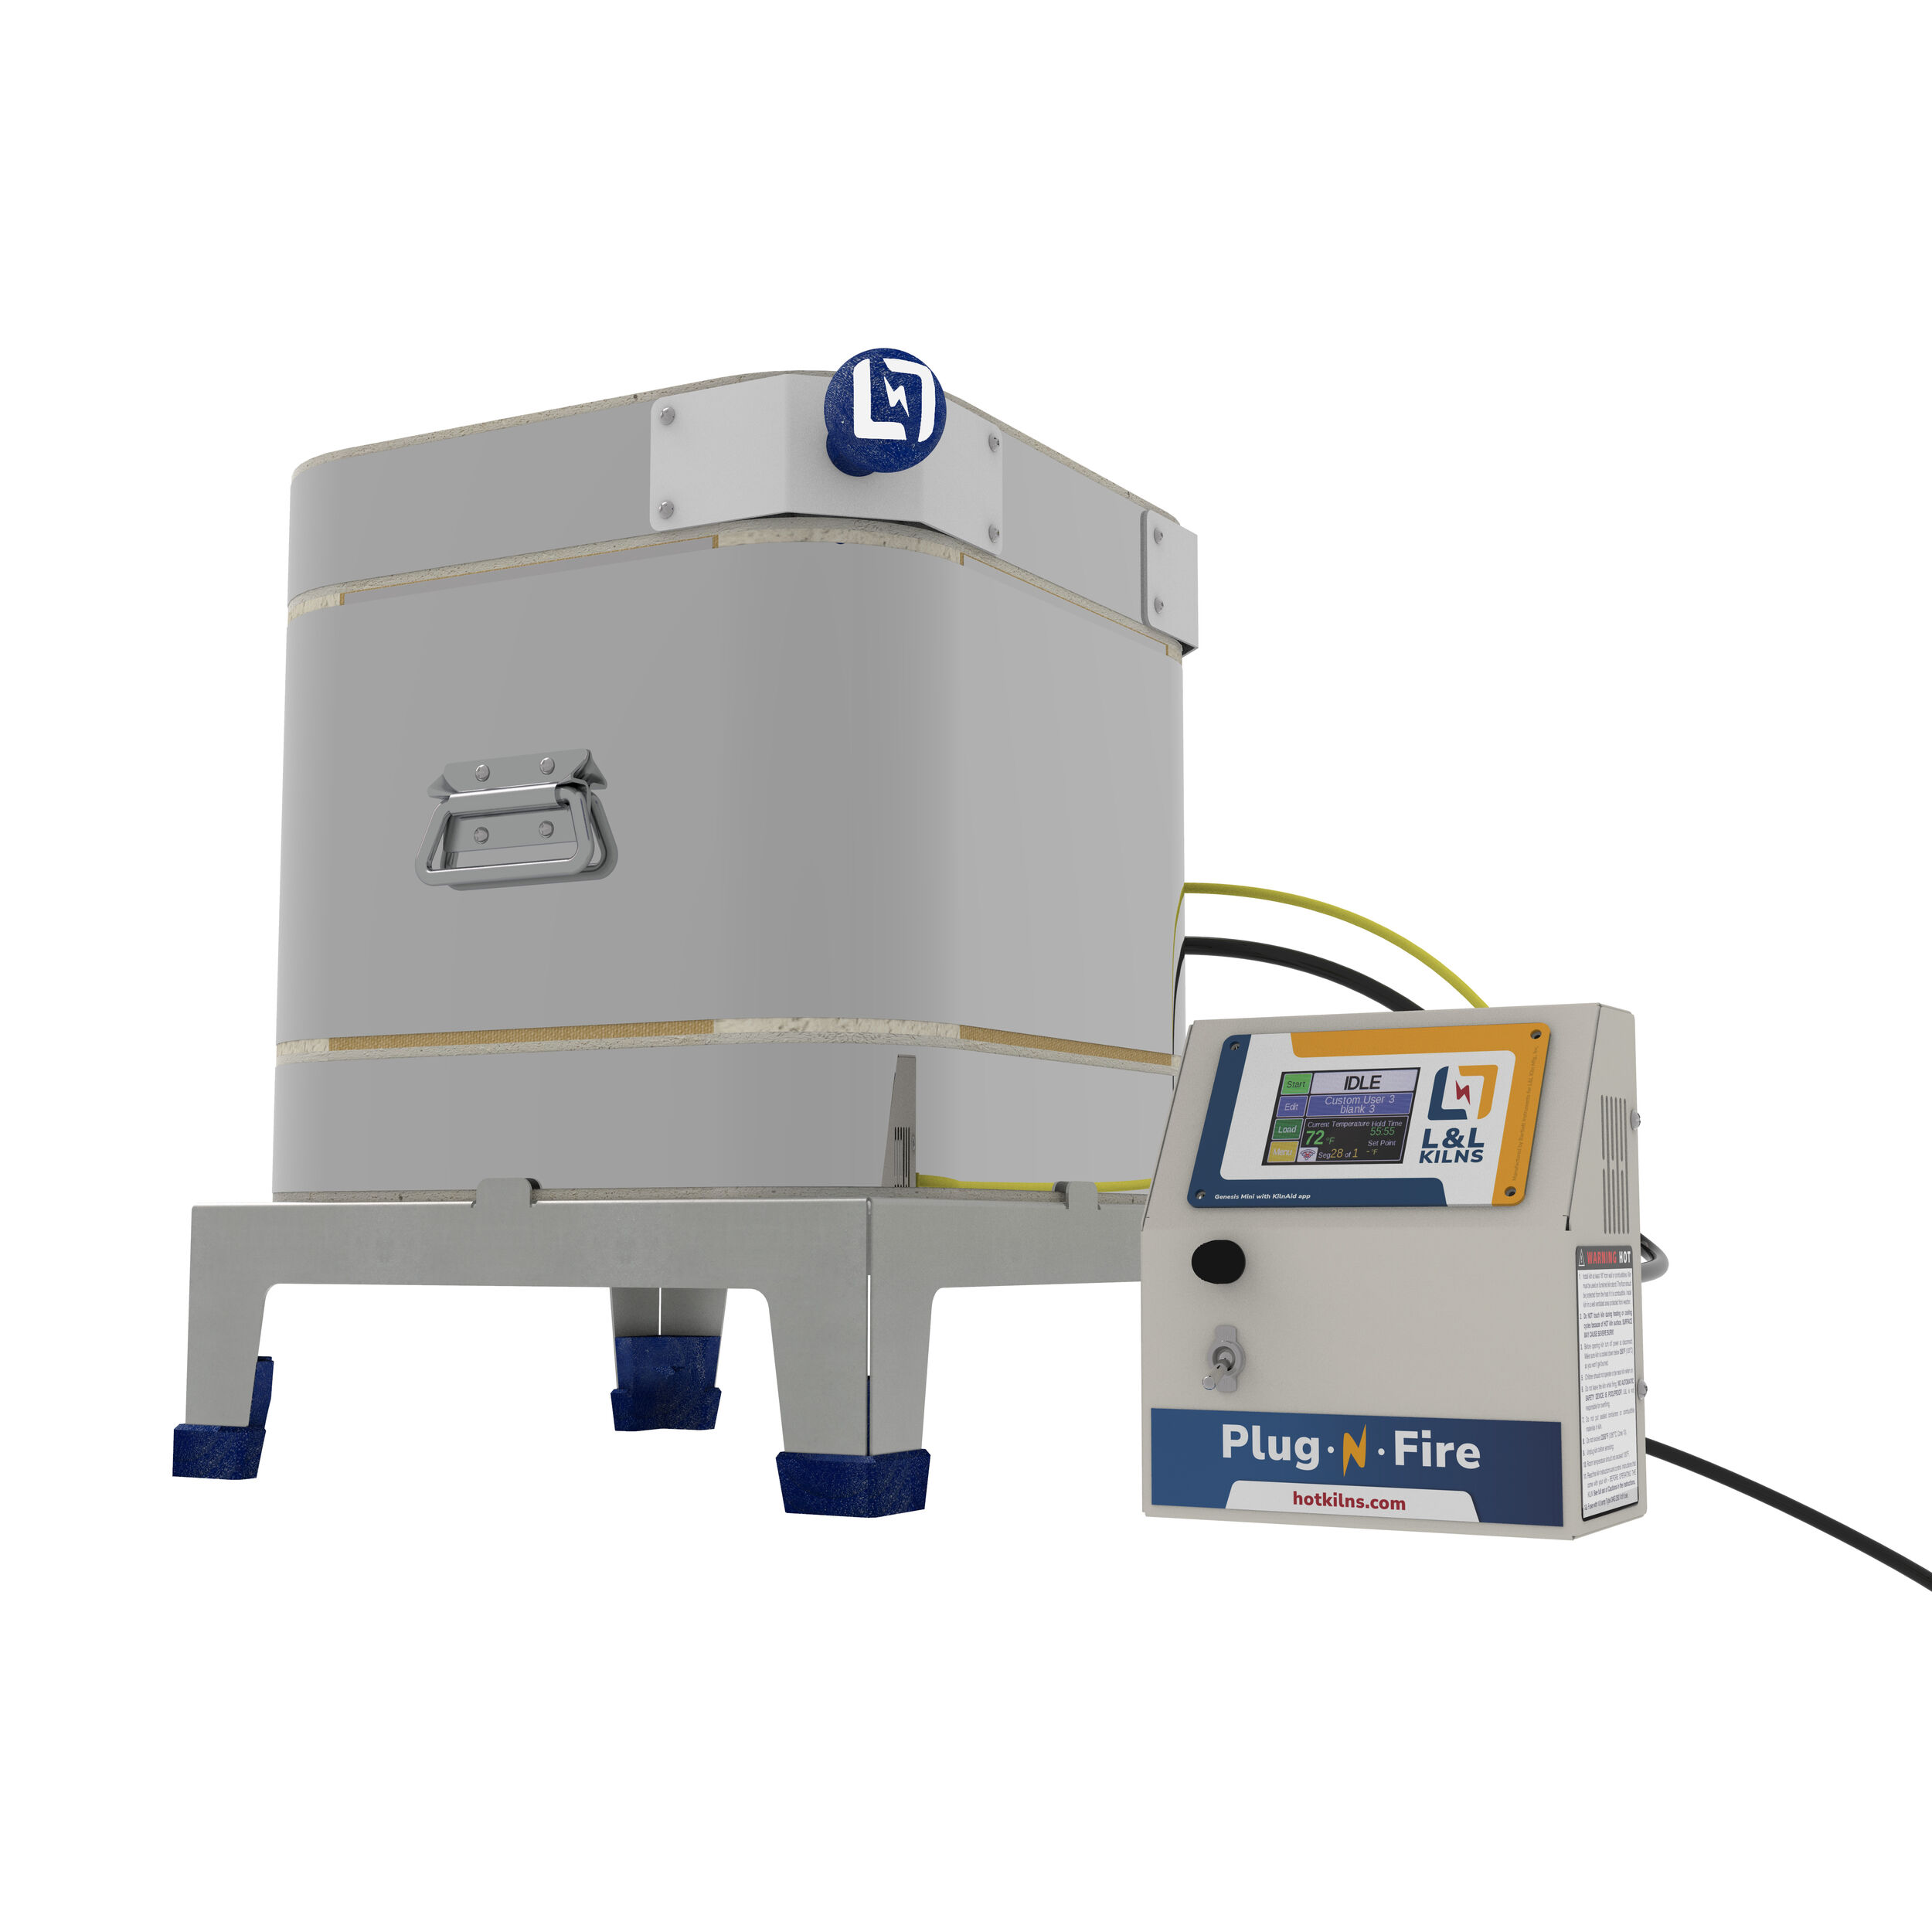


eFL Series Assembly Instructions
Rev: 3/1/2025
BEFORE YOU GET YOUR KILN
- Read these instructions and decide how you will handle the kiln when you get it - don’t wait until it arrives.
- Decide how you are going to unload the kiln. eFL Kilns are not like typical top loading sectional kilns. They are top-heavy and require special handling to unload and move them. In particular the largest model requires special handling because of its weight.
- Note that weights and center of masses are indicated on the General Dimension Drawings which are available on each kiln model page.
- If you are not comfortable moving and installing the kiln yourself - especially if you have difficult installation conditions - we can recommend hiring a professional moving company or rigger to unload the kiln from its pallet and put in place.
- Remember, because of the nature of the product, there is some unavoidable risk and you must take proper safety precautions at all times.

See https://www.youtube.com/video/3soy-X-JgOg?si=CaUB_fsOXiL1M3nU
CAUTIONS & DELIVERY ISSUES
How to unload & move your eFL kiln
- The high center of mass makes the eFL kilns a potential tipping hazard. They can weigh over 500 lbs. and are top-heavy. If the kiln leans over far enough to exceed the tipping point, it will fall over, and the weight of the falling kiln could cause severe injury or death.
- Exercise extreme caution at all times when moving, and if you do not feel qualified to do the job, hire a professional.
- If you have the caster option, never move the kiln from above the base (e.g., by pulling on the door handle).
- eFL Kilns, unlike sectional top-loading kilns, cannot be easily disassembled for easy moving.
- They cannot be removed from a truck without a lift gate or forklift.
- They cannot easily be lifted over curbs, transported on non-paved roads or walkways, tilted (because of being top-heavy), or moved up inclines without a forklift or other secure method.
- They cannot be moved up or down stairs.
- Terrain and grade must be essentially smooth, hard and flat. (Note: it may be possible to cover gravel or grass with plywood to move the kilns).
- Do not install a second-story kiln unless you have an appropriate elevator (because the kiln body cannot be disassembled and moved upstairs).
- 30” minimum door opening
Trucking Company Rules
- No dirt roads
- No dead ends
- Must have the ability for a truck to turn around
- No woods/narrow drives
- Gravel drive depends on weather (no rain or snow in forecast)
- No inside delivery
- Lift gate unavailable for certain addresses
Where can the kiln be delivered?
- Any addresses with loading docks and/or forklifts.
- Shipping to typical shipping terminals is unacceptable because ownership cannot be transferred to the buyer before opening and inspecting the kiln. If any damage happened between the terminal and the final destination no claim could be filed.
- L&L is not responsible for any damage to the kiln once it is moved from its initial delivery location.
- Any place where you can promptly inspect for shipping damage (MUST BE WITHIN 2 DAYS) and then subsequently move safely to your location. L&L cannot take responsibility for any damage after the initial inspection.
- Homes where the above trucking company rules are met.
- Difficult addresses might require you to have the kiln shipped to a professional mover and then moved into place by the mover.
Inspect Kiln for Damage
When Your Kiln Arrives
- Inspect the skids for damage. If you notice any, either refuse the shipment or unpack the kiln in the driver’s presence so you can file a damage report with the freight company.
- Call our office if there is any damage. For more information, refer to the Shipping, Receiving & Inspecting Kilns page.
There are three main causes for shipping damage:
- Dropping the kiln when loading and unloading during a terminal transfer during shipping
- Tipping over (this will be very obvious)
- Excessive Vibration. This will be hard or impossible to detect until you have opened up the package.
Who is responsible for inspecting your kiln?
- L&L takes responsibility for filing damage claims as long as customers follow our guidelines.
- FREIGHT COMPANIES ALLOW 2 DAYS TO REPORT SHIPPING DAMAGE.
- WE CANNOT HELP YOU WITH A DAMAGE CLAIM AFTER 2 DAYS.
- If the box is dented, crushed, unbanded, or off the skid, note it on the Delivery Receipt.
- Inspect the Kiln Shock Watch Label outside the crate. If it is red, note “Possible Concealed Damage” on the Bill of Lading.
- Check several cartons against the Delivery Receipt. Inspect contents while the driver is present.
- If this is impossible, take photos and mark the Delivery Receipt “SUBJECT TO INSPECTION.”
- Take photos and refuse shipment if severe damage is visible.
- After you have received the kiln, the first thing is to open the package enough to inspect the door brick (located in the back of the box) and the front of the kiln face. You do not have to unpack the kiln beyond that point if you intend to store it before installing it.
- IF YOU FIND DAMAGE: Take as many photographs of everything as soon as you can and email them to service@hotkilns.com. The time stamp on these photograph/emails is critical when filing a damage claim!
- If you can, write a description of the breakage or damage or shortage on all copies of the freight bill before you sign it. Make your notations as specific as possible to protect if concealed damage is subsequently discovered. (In some cases, the shipper may not allow you to do that.)
- See hotkilns.com/shipping for full policy.
- Damages must be reported immediately. If there is any problem at all, call L&L (856-294-0077) if during our business hours (preferably before the driver leaves).TAKE PICTURES, AND NOTE ON THE BILL OF LADING ANY DAMAGE. If you don’t, there is no recourse against the carrier responsible for the kiln's condition when it is delivered. Once you accept the kiln, it is not returnable.
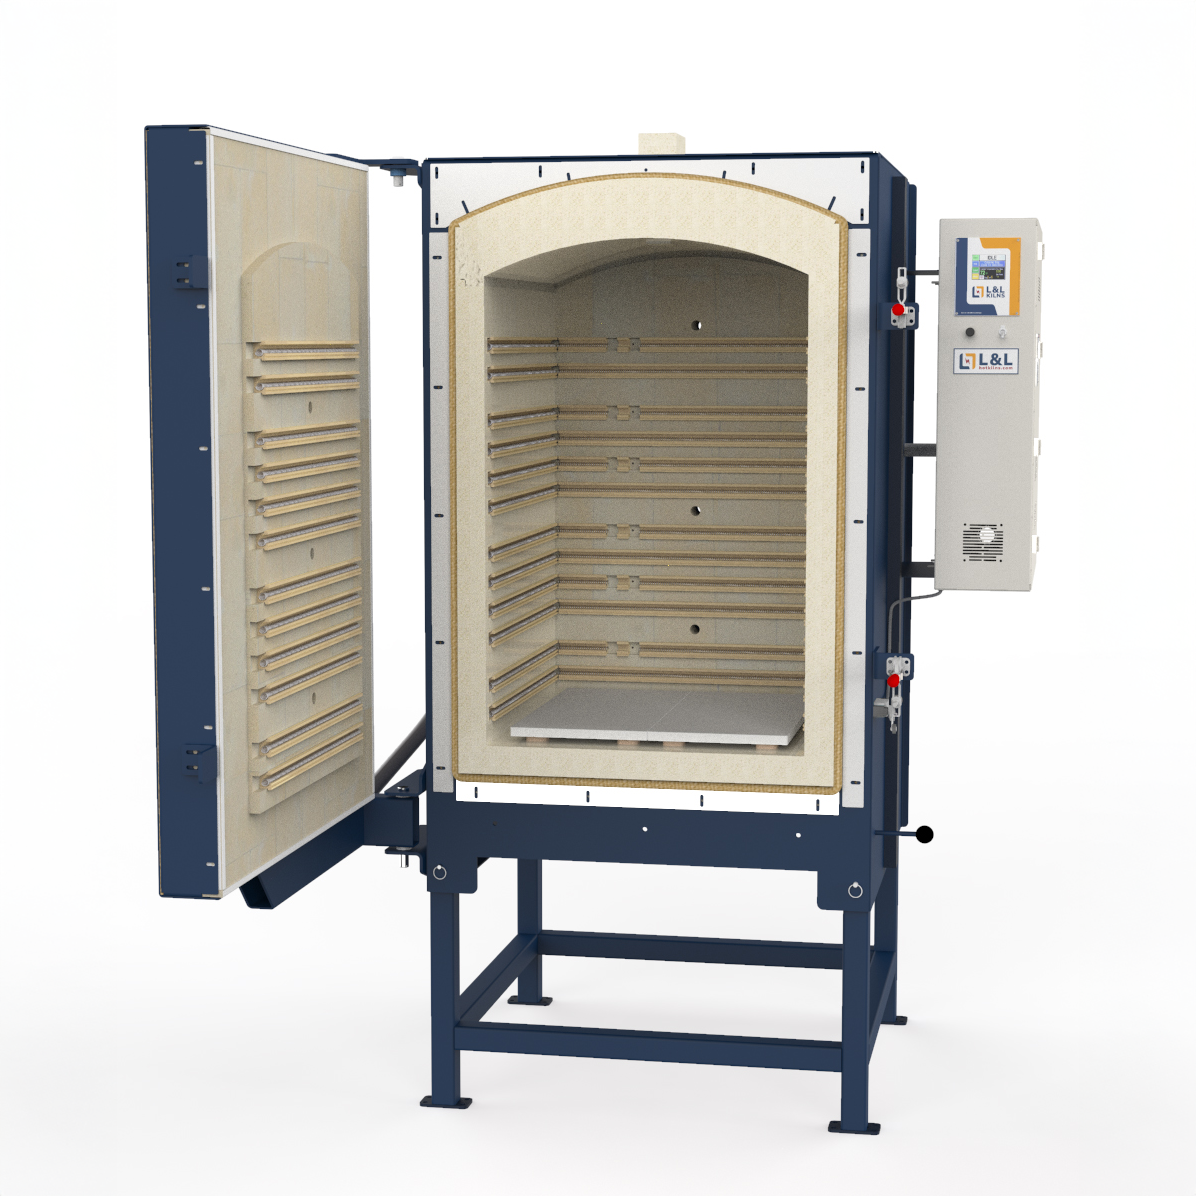
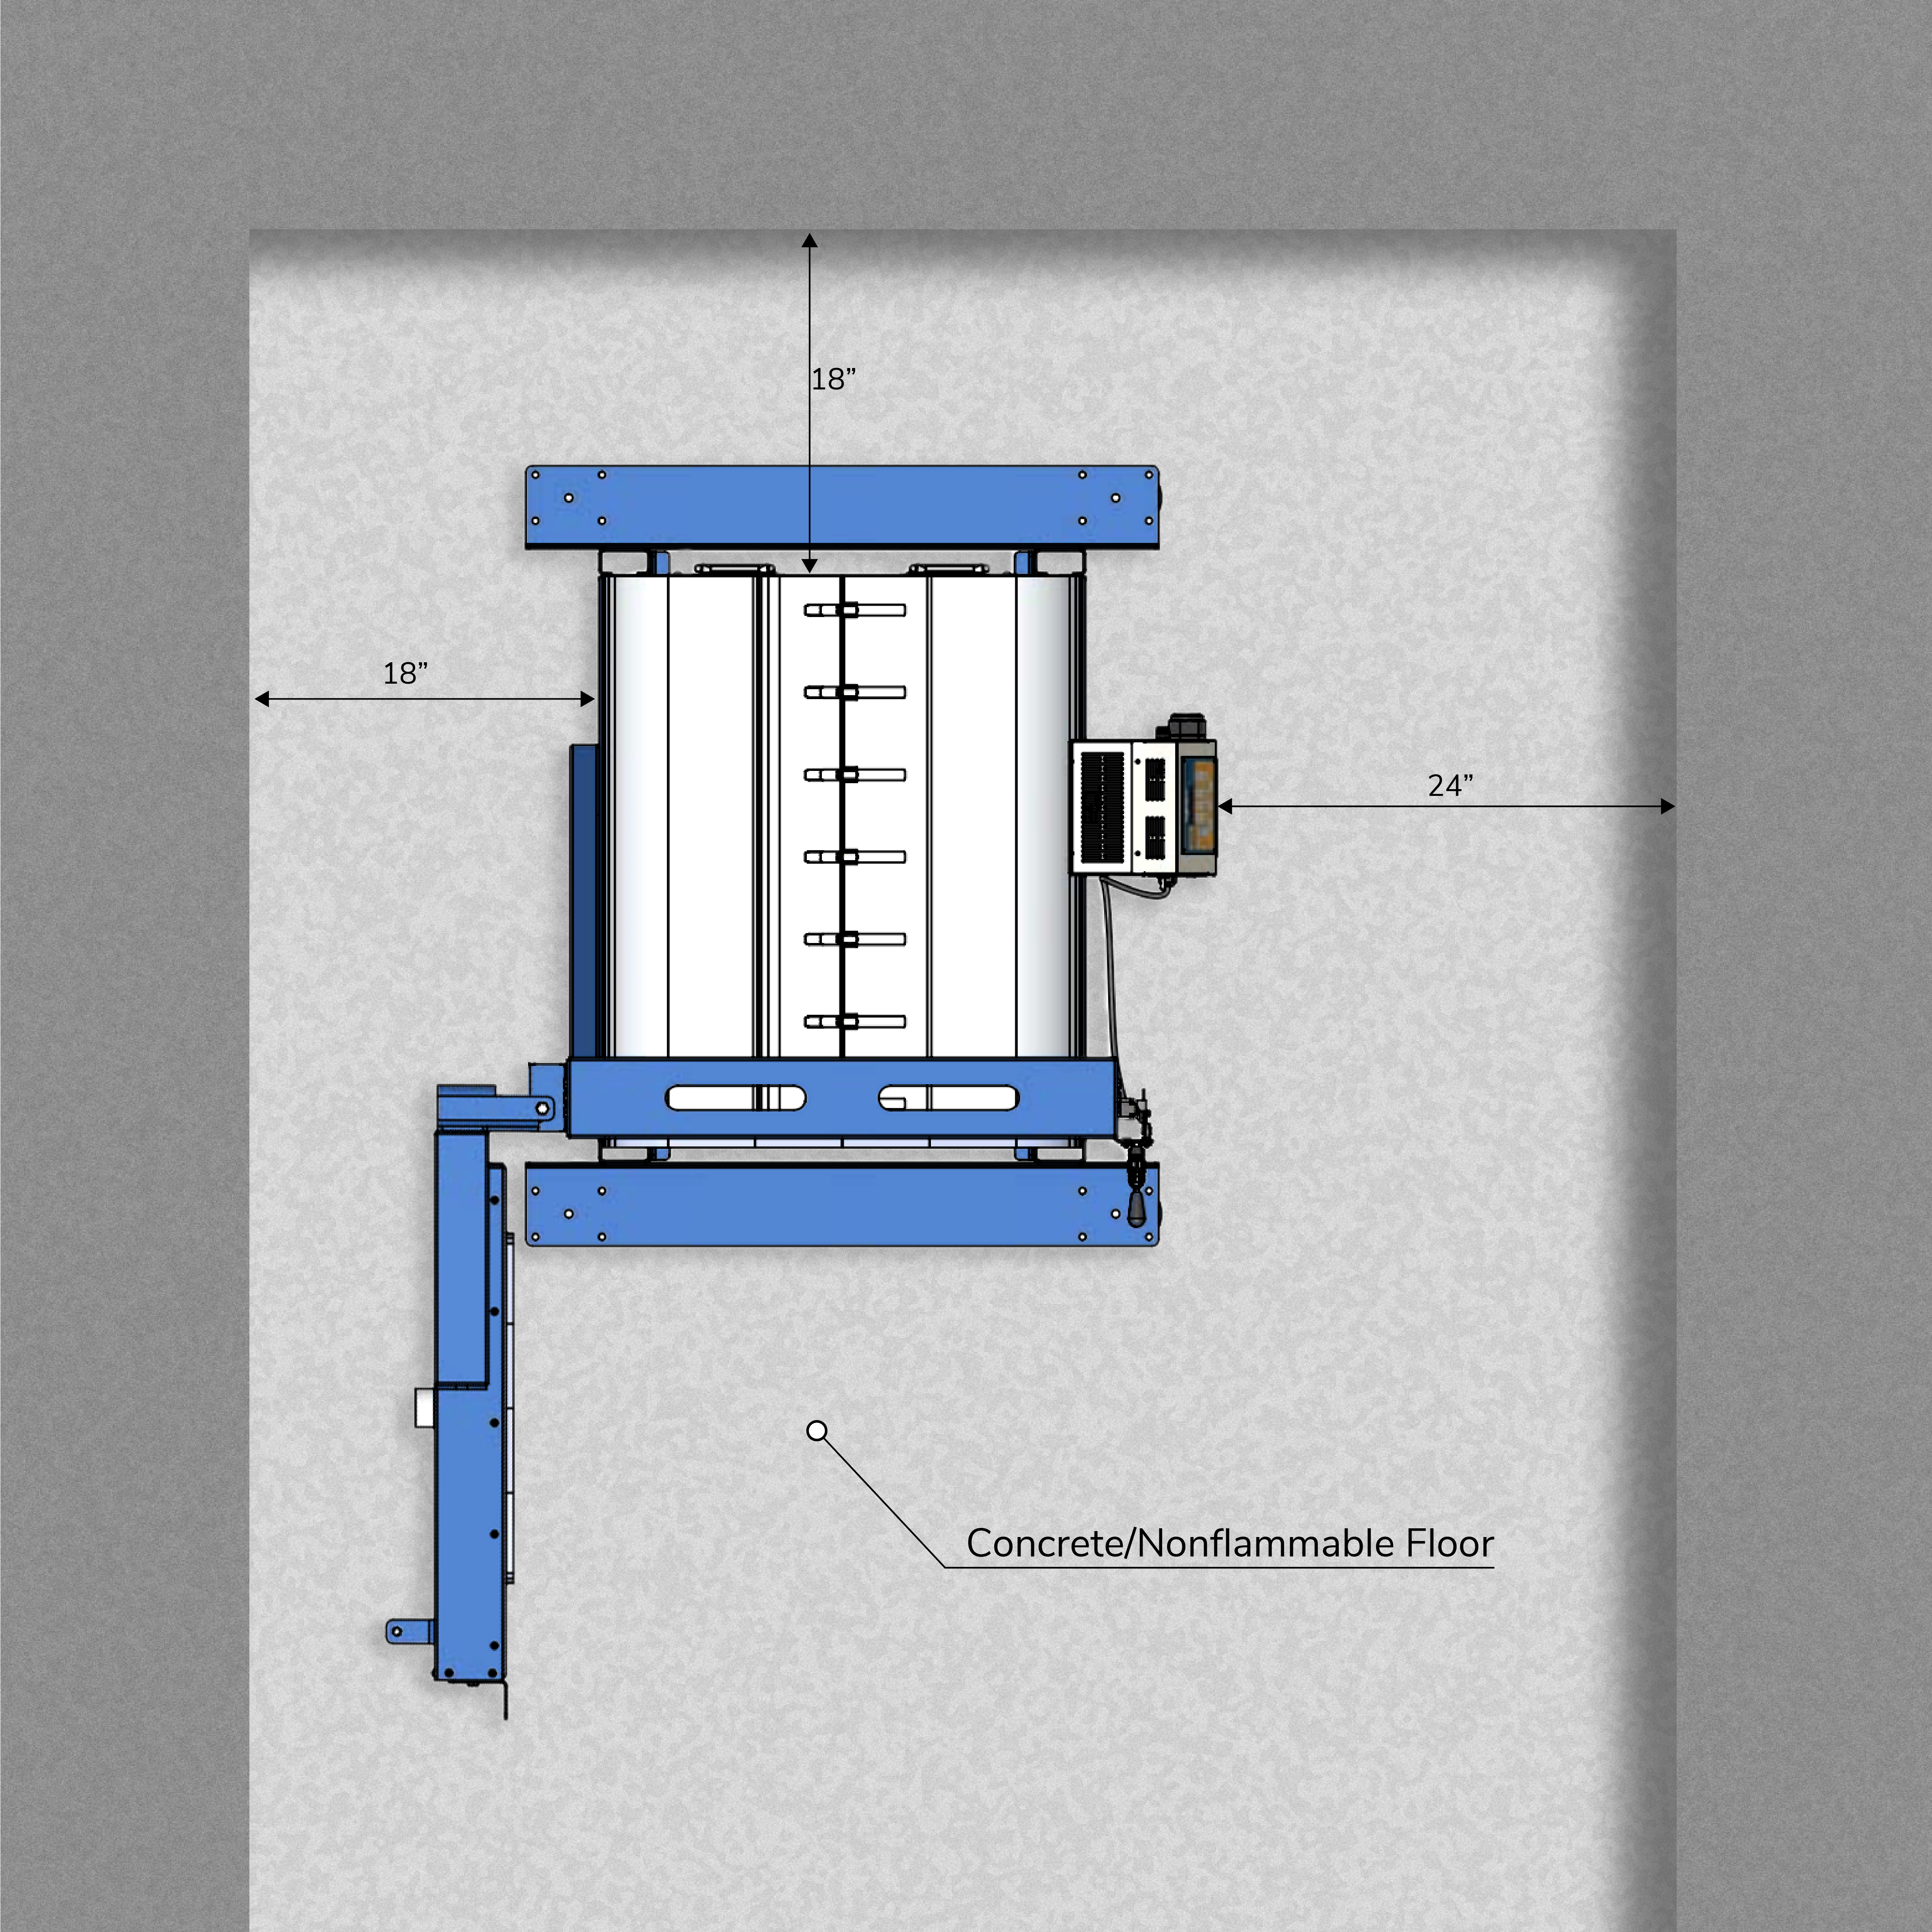
PLACEMENT, LOCATION & INSTALLATION
- The general Dimension Drawing of all kilns is on the webpage of each kiln model. These have ventilation and clearance requirements.
- Review our installation overview page for codes, clearances, ventilation, and electrical installation information before assembling your kiln.
Assembly
TOOLS TO HAVE ON HAND
The following list assumes you will be doing all of this work yourself with a team of helpers.
- Two wrenches with 1/2” opening
- One nut driver with a 5/16” opening (for tightening bands) (See video)
- 9/16” socket wrench
- Crescent wrench or box wrenches
- Phillips head screw driver (preferably powered)
- Safety Glasses and gloves
- Knife or scissors
- Standard Pallet Jack
For eFL2626 and eFL2635 kilns you will need an Engine Hoist or other means of lifting the door onto the Door Mounting Brackets. (Watch the video). This can be rented from the same types of places as a pallet jack. You can also rent a pallet jack from them and/or power tools. See this link or search for Sunbelt Engine Hoist: sunbeltrentals.com/equipment/detail/1134/0730011/engine-hoist/
Note: These engine hoists can be disassembled for moving and for moving through a door. There is a video on our unpack-efl page.
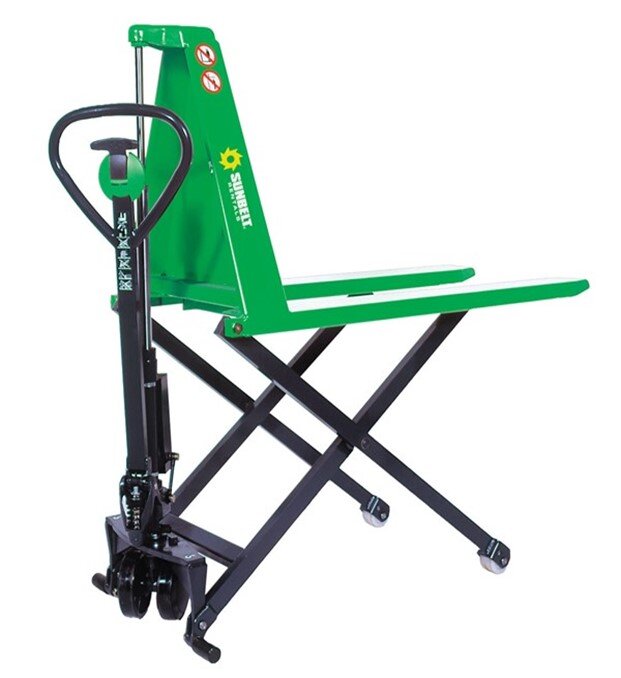
High-Lift Pallet Jack
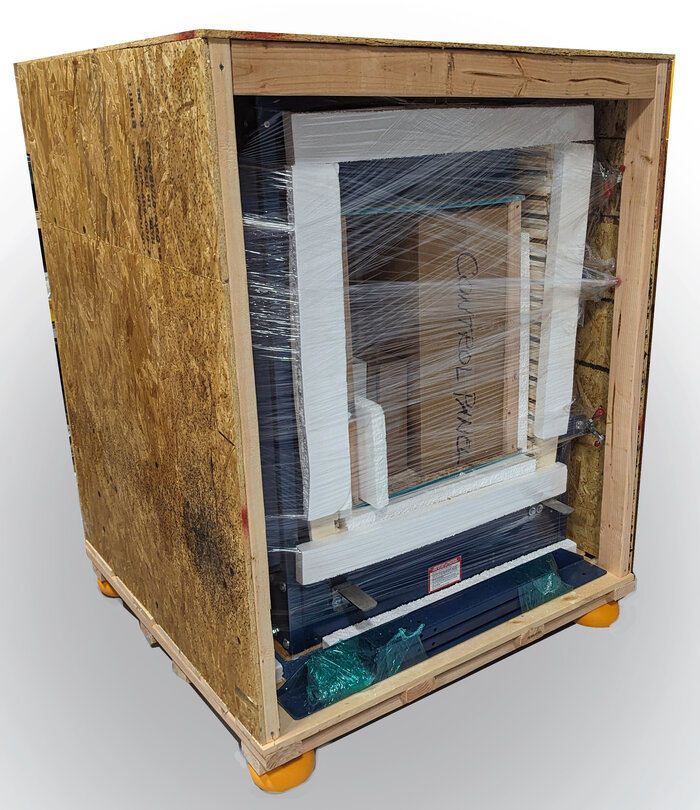
Packed kiln with one side of the care opened.
WEIGHTS
Approximate weight of kiln bodies without door, vent, hearths or any packing material:
- eFL1616: 325 lbs (147 KG)
- eFL1626: 410 lbs (186 KG)
- eFL2026: 425 lbs (193 KG)
- eFL2626: 490 lbs (222 KG)
- eFL2635: 575 lbs (261 KG)
Approximate weights of doors:
- eFL1616: 80 lbs (36 KG)
- eFL1626: 100 lbs (45 KG)
- eFL2026: 120 lbs (54 KG)
- eFL2626: 135 lbs (61 KG)
- eFL2635: 160 lbs (73 KG)
STARTING THE PROCESS
- Watch the video above.
- Remove all external packing materials but NOT the box inside the kiln and NOT the straps around the kiln case.
- Inspect for shipping damage.
- With the kiln still on the pallet, move the kiln onto a level area as close to where you are going to install the kiln. The floor must be as level as possible when you remove the pallet.
- Remove the door from the pallet by hand and set aside.
- Follow the video instructions.
Be mindful of the tipping point of the kiln at all times. You can see the center of mass on the General Dimension drawings. When the door is removed the center of mass is approximately in the center of the kiln about 3 to 12” above the hearth level. The tipping point is approximately 20 Deg. DO NOT EXCEED A GRADE OF MORE THAN 10 DEG (when the door is off). It is much worse when the door is on.
FORKLIFT METHOD
Almost any forklift will do (although smaller is better). Adjust forks to fit between the legs and lift kiln from under the kiln base (not from under the shelves) to keep the center of gravity as low to the forks as possible.
- You can lift it from the front, back or sides.
- Move the kiln into its final position and continue with the final assembly.
- You can use the forklift as a hoist to lift the door with the nylon rope or straps when you are installing the door (if you want to).
MOVING THE KILN THROUGH A 30” DOOR
- Do this BEFORE you reinstall the door of the kiln or the vent system.
- All models are approximately 29-1/2” from the face of the brick front to the back plate of the kiln.
- Move the kiln using a pallet jack or the Forklift until you get it near the door that you need to go through.
- By hand with at least two people turn the kiln so it will go through the door sideways.
- Push it through the door.
- CAUTION: Push the kiln as low as you can and NEVER above the base of the kiln (not on the brick section). This will be below the center of gravity and will make it harder (but not impossible) to tip over. Push SLOWLY. BE VERY AWARE OF TIPPING HAZARDS AT ALL TIMES.
- After this you can resume moving the kiln with whatever method you are using.
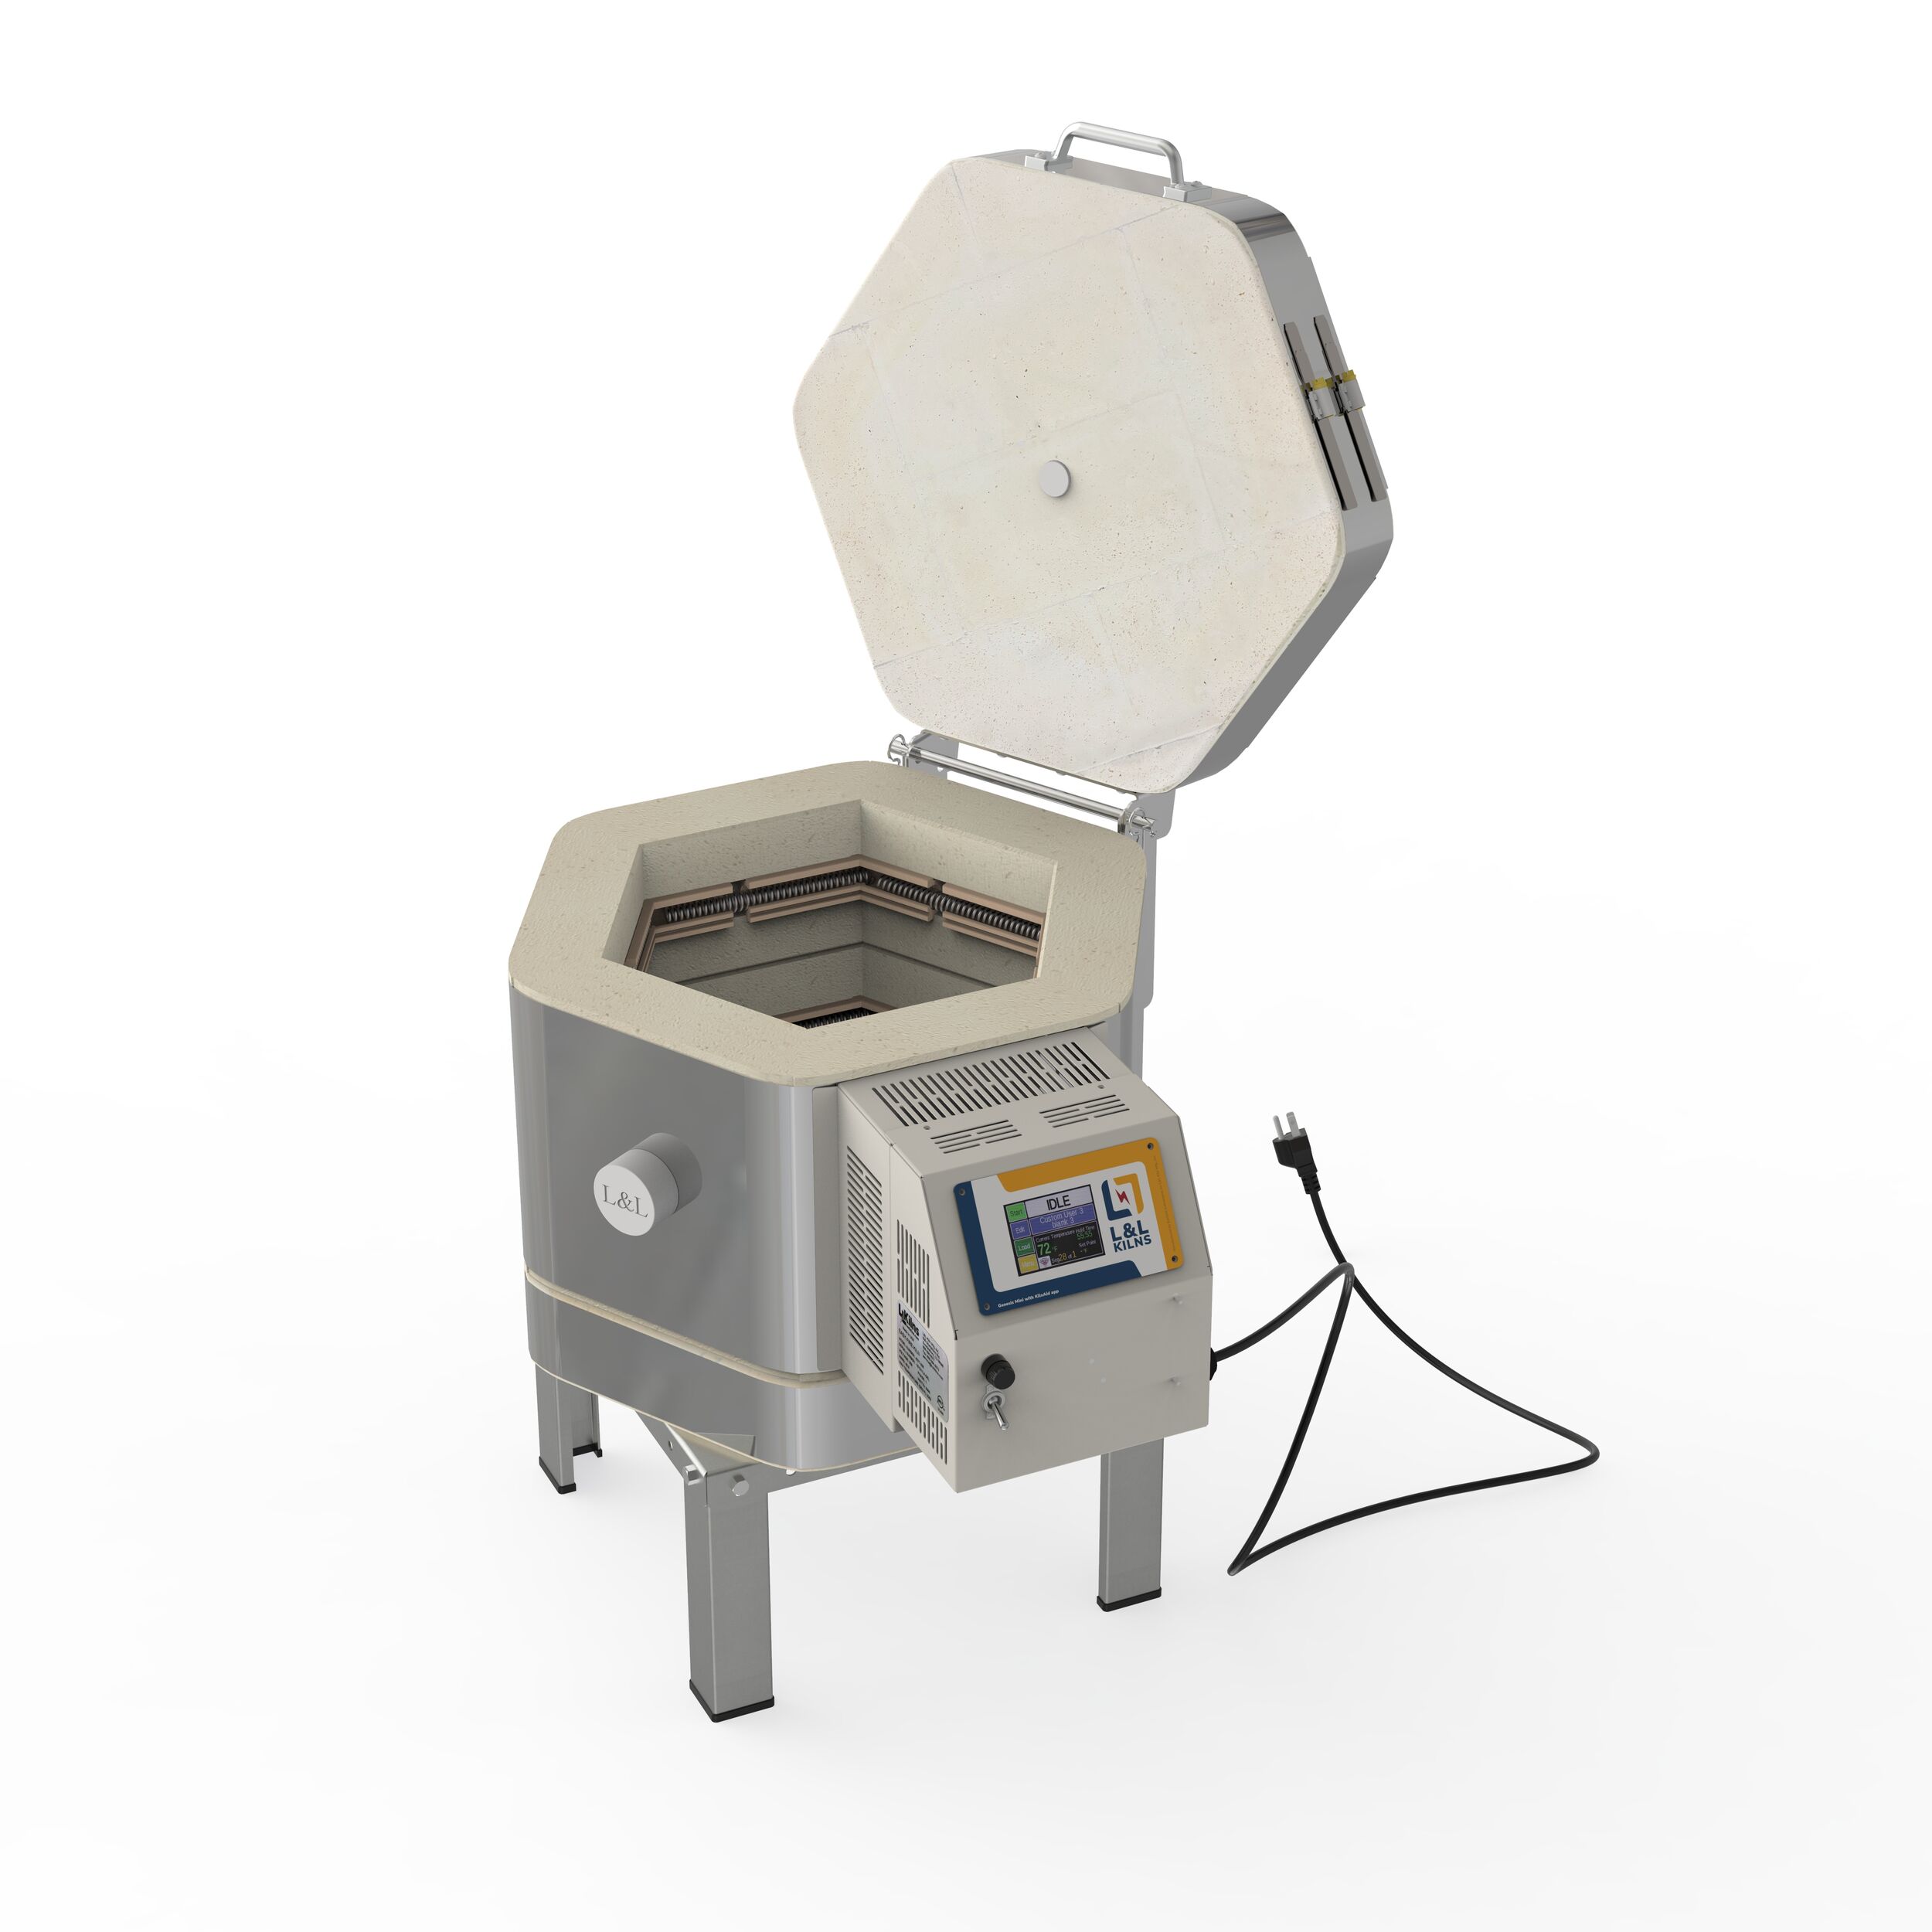
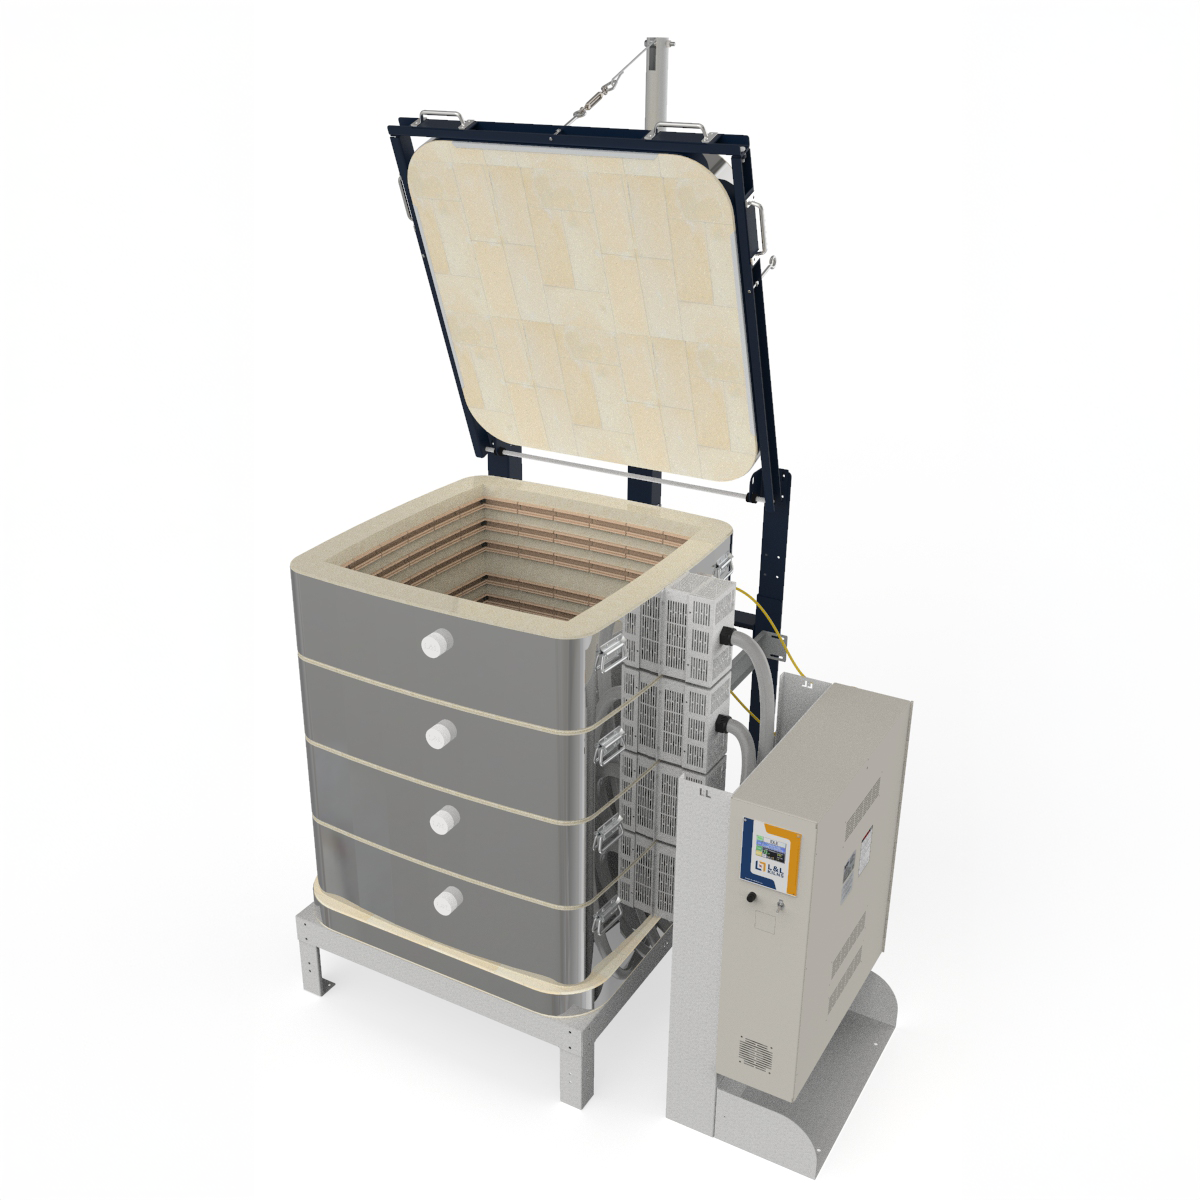
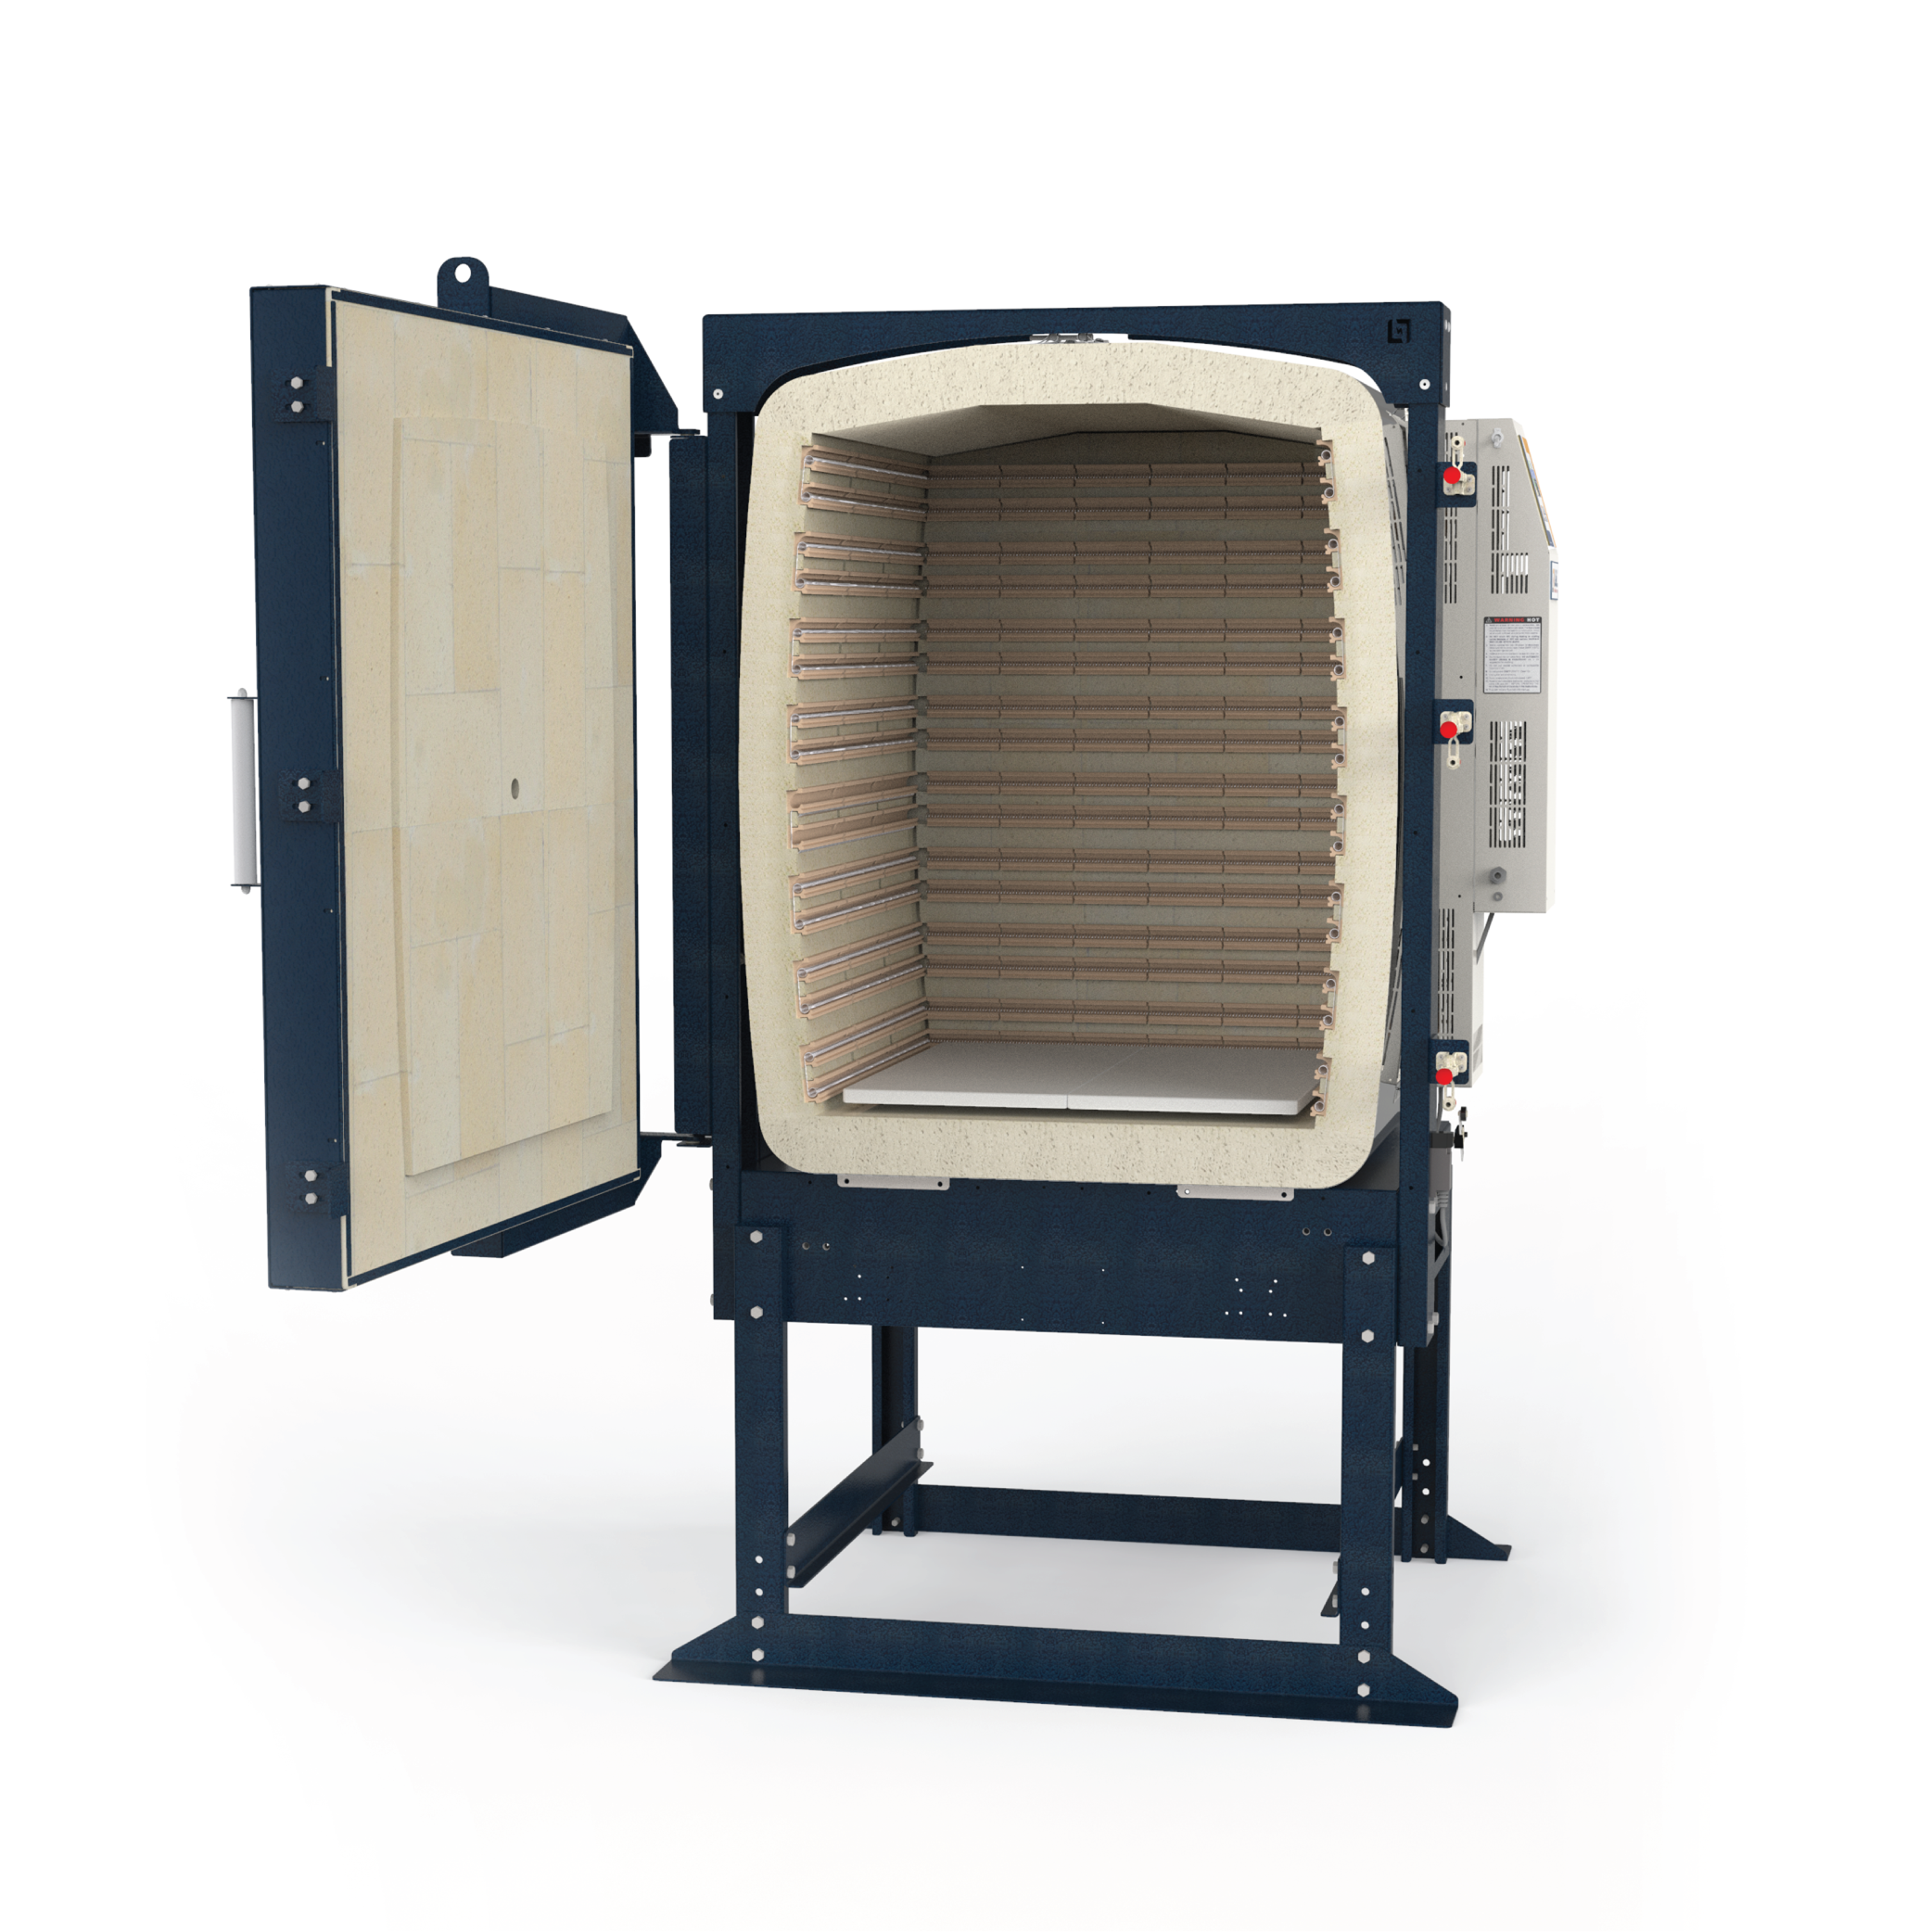
INSTALLING DOOR
This is a two person job. For the larger kilns (eFL2626 and eFL2635) use an engine hoist, forklift, or other appropriate means to lift the door up and in position.
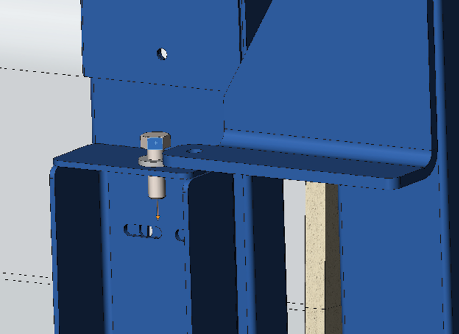
1. Attach two door supports into position as shown using the provided 3/8” bolts.
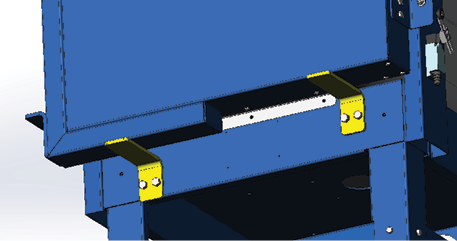
4. Insert two hinge bushings into the holes on the hinge channel, one in the top hole as shown and one in the bottom hinge hole.
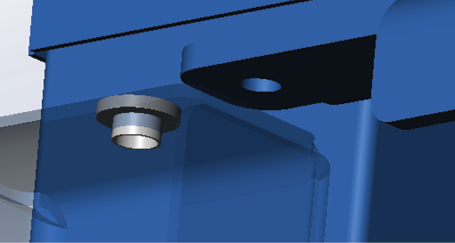
5. Prepare the 3/8” hinge bolts and nuts for installation.
6. Lift the door into place onto the door supports.
7. Slide the door back into position and insert the hinge pins (bolts), securing them with the nut. Make sure to leave the stepped bushing in place.
8. When replacing the door, check the adjustment to ensure the seal is even around the kiln's face.
9. The door hinge has been adjusted at the factory. One of the main reasons L&L ships the door unmounted from the kiln (aside from preventing shipping damage) is to maintain the hinge adjustment. If the door does not fit tightly against the front of the kiln brick, contact the factory for help on adjusting it.
IF YOU DO NOT HAVE THE CASTER OPTION
- Level kiln with shims or leveling bolts.
- We recommend using the shipping brackets to bolt the kiln to the floor.
IF YOU HAVE THE CASTER OPTION
Note: The caster option is not available on the eFL2635
- Lift kiln up with pallet jack about 1 inch.
- Follow the video instructions.
- Bolt on Casters System using the 3/8” Bolts, lock washers and nuts provided.
INSTALLING VENT
- Install the Vent Collection Box. This gets attached with included hardware.
- See the Vent Instruction for the rest of the process.
FINISHING UP
- Check the door for tightness.
- Check for a level hearth.
- Vacuum out kiln for any dust.
- Make sure all elements are tightly in place.
- Install Door Peephole Plug
- Have kiln wired by a licensed electrician following your wiring diagram.
FIRST FIRING
- Leave small ceramic washers that are in the back corners of the kiln in place - at least for the first firing. This ensures that the elements stay in place until they loose their springiness on the first firing.
- Do your first firing following the First Firing Instructions