


Easy-Load Assembly Instructions
Rev: 3/1/2025
PLACEMENT, LOCATION & INSTALLATION
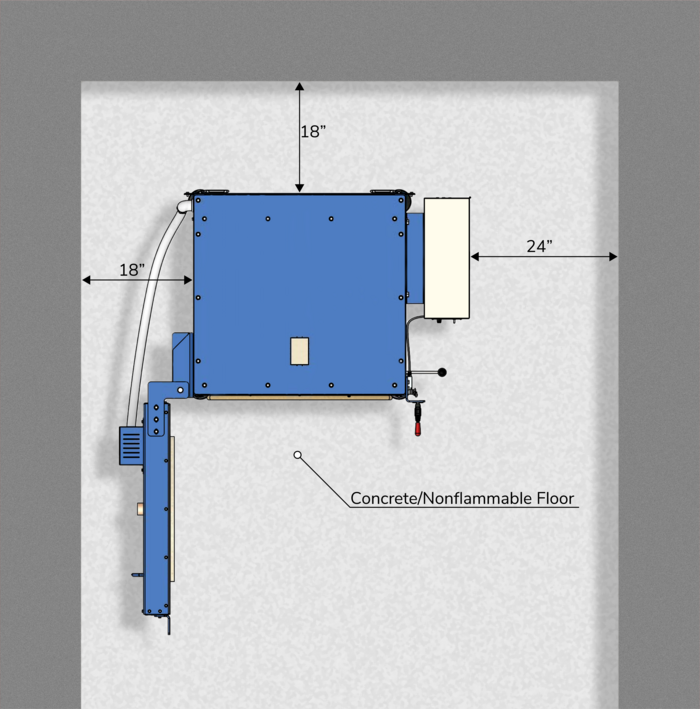
- The general Dimension Drawing of all kilns is on the webpage of each kiln model. These have ventilation and clearance requirements.
- Review our installation overview page for codes, clearances, ventilation, and electrical installation information before assembling your kiln.
Inspect Kiln for Damage
When Your Kiln Arrives
- Inspect the skids for damage. If you notice any, either refuse the shipment or unpack the kiln in the driver’s presence so you can file a damage report with the freight company.
- Call our office if there is any damage. For more information, refer to the Shipping, Receiving & Inspecting Kilns page.
SHIPPING INSPECTION
- Inspect the external crate for any apparent damage, such as broken wood.
- We build a support cage inside the kiln interior to prevent kiln bricks from shifting and cracking, although no matter what, some minor cracking of the firebrick is almost always going to be present.
- Examine the “Shockwatch” and “Tiltwatch” labels if included. If they indicate a problem, note it on the Bill of Lading.
- Remove the inside cage and scrutinize the firebrick for signs of any cracking or damage. Note that there is almost always some minor patching done in the factory because of the nature of firebrick. This is normal. Compare this with the photos if you are uncertain. Do your best to do this when the kiln is delivered before the driver leaves. If this is impossible, do it immediately afterward, even if you do not intend to move or use the kiln for a while.
- Inspect the door seal. If the kiln is damaged, it will likely show up in broken bricks around the door.
- THIS IS CRITICAL. DO NOT DISCARD ANY PACKAGING MATERIAL UNTIL YOU HAVE CAREFULLY CHECKED THE KILN FOR DAMAGE. After that, if there is damage, you will be responsible. Once you sign for the kiln, it is yours. Make your notations as specific as possible to protect yourself if concealed damage is subsequently discovered.
- Inspect the kiln as soon as possible AND DEFINITELY WITHIN 2 DAYS –EVEN IF YOU ARE GOING TO STORE THE KILN. Claims must be filed within 2 days of receipt of goods.
- We suggest taking digital pictures as soon as you receive the kiln.

See https://www.youtube.com/video/gxUHHWPAiBs?si=zspjBVZM02rHIkO2
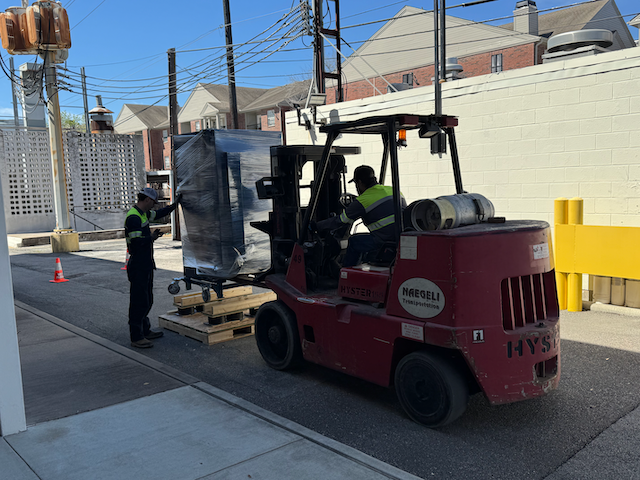
MOVING AND SETTING THE KILNS IN PLACE
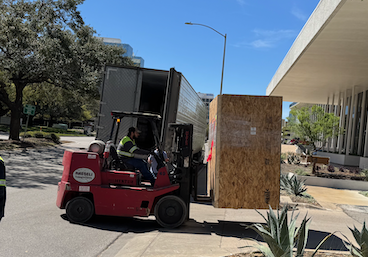
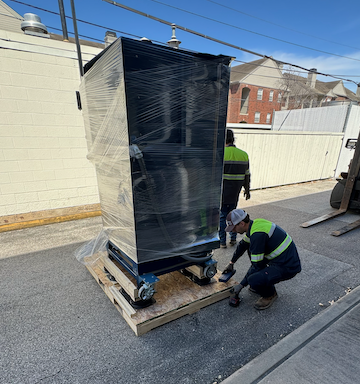
All L&L front-loading kilns come on a skid so you can move it from either the front or back with a pallet jack or forklift. If you use a forklift go slow and do not tilt the kiln more than a few degrees.
- Remove all the wood crating and boxing
- Lift the kiln off the skid with the forklift’s forks going completely through the base.
- Open the door and carefully remove the wood and foam structure that supports the arch and interior of the kiln during shipment.
- Remove the plastic clips from the element holders to keep the elements in the holders during shipment.
- Before the first firing, ensure the elements are correctly seated in the element holders. Once the kiln is heated, the elements will settle further into the element holders.
- For weights and dimensions, see the General Dimension drawing. The correct drawing can be found on each model’s webpage on our website (hotkilns.com).
MOVING THE KILN THROUGH A DOOR
- Please print out the general dimension drawing for the kiln you are ordering and examine it carefully.
- Models EL2424, EL2427, EL2436, EL2448 & EL2848 require a door that is at least 34.7” wide
- Model EL3048 requires a door that is at least 40.6” wide
- Suggestion – have a little more than this exact requirement!
L&L EASY-LOAD BASIC INSTRUCTIONS
CAUTIONS
See the CAUTIONS section. READ THESE CAUTIONS. They will help protect you and your property. Not all the cautions are obvious - even experienced operators must pay attention.
TEMPERATURE RATINGS
All Easy-Load kilns are rated for use to 2350°F (1287°C) (Cone 10) DO NOT FIRE ANY HIGHER THAN THIS. The elements, element holders and firebrick will melt above 2350°F.
PREPARATION & ASSEMBLY
No assembly is required for the Easy-Load kiln.
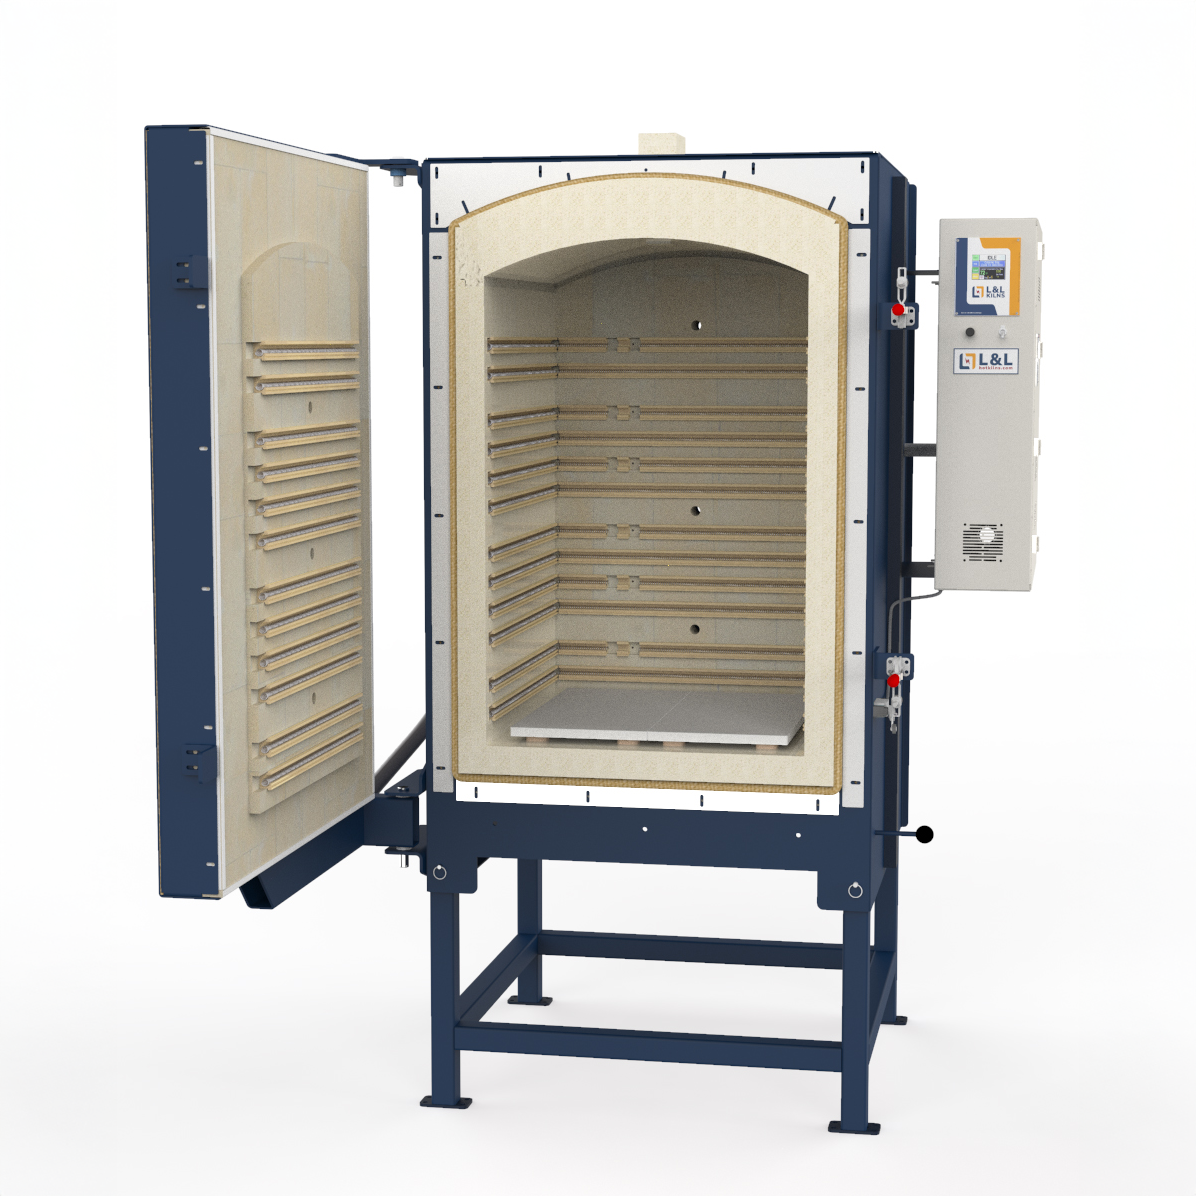
REMOVING THE DOOR
You may need to remove the door to get the kiln through an opening. If so, remove the element connection wires from the element terminals on the door. Then, support the door with 2x4s or a table so it doesn’t fall down. CAUTION: The door is very heavy and could cause injury to you or damage to the door if it falls. Remove the hinges and lower the door to the ground. This will take at least two people.
When you replace the door, be sure to readjust it so that the seal is even all around the face of the kiln.
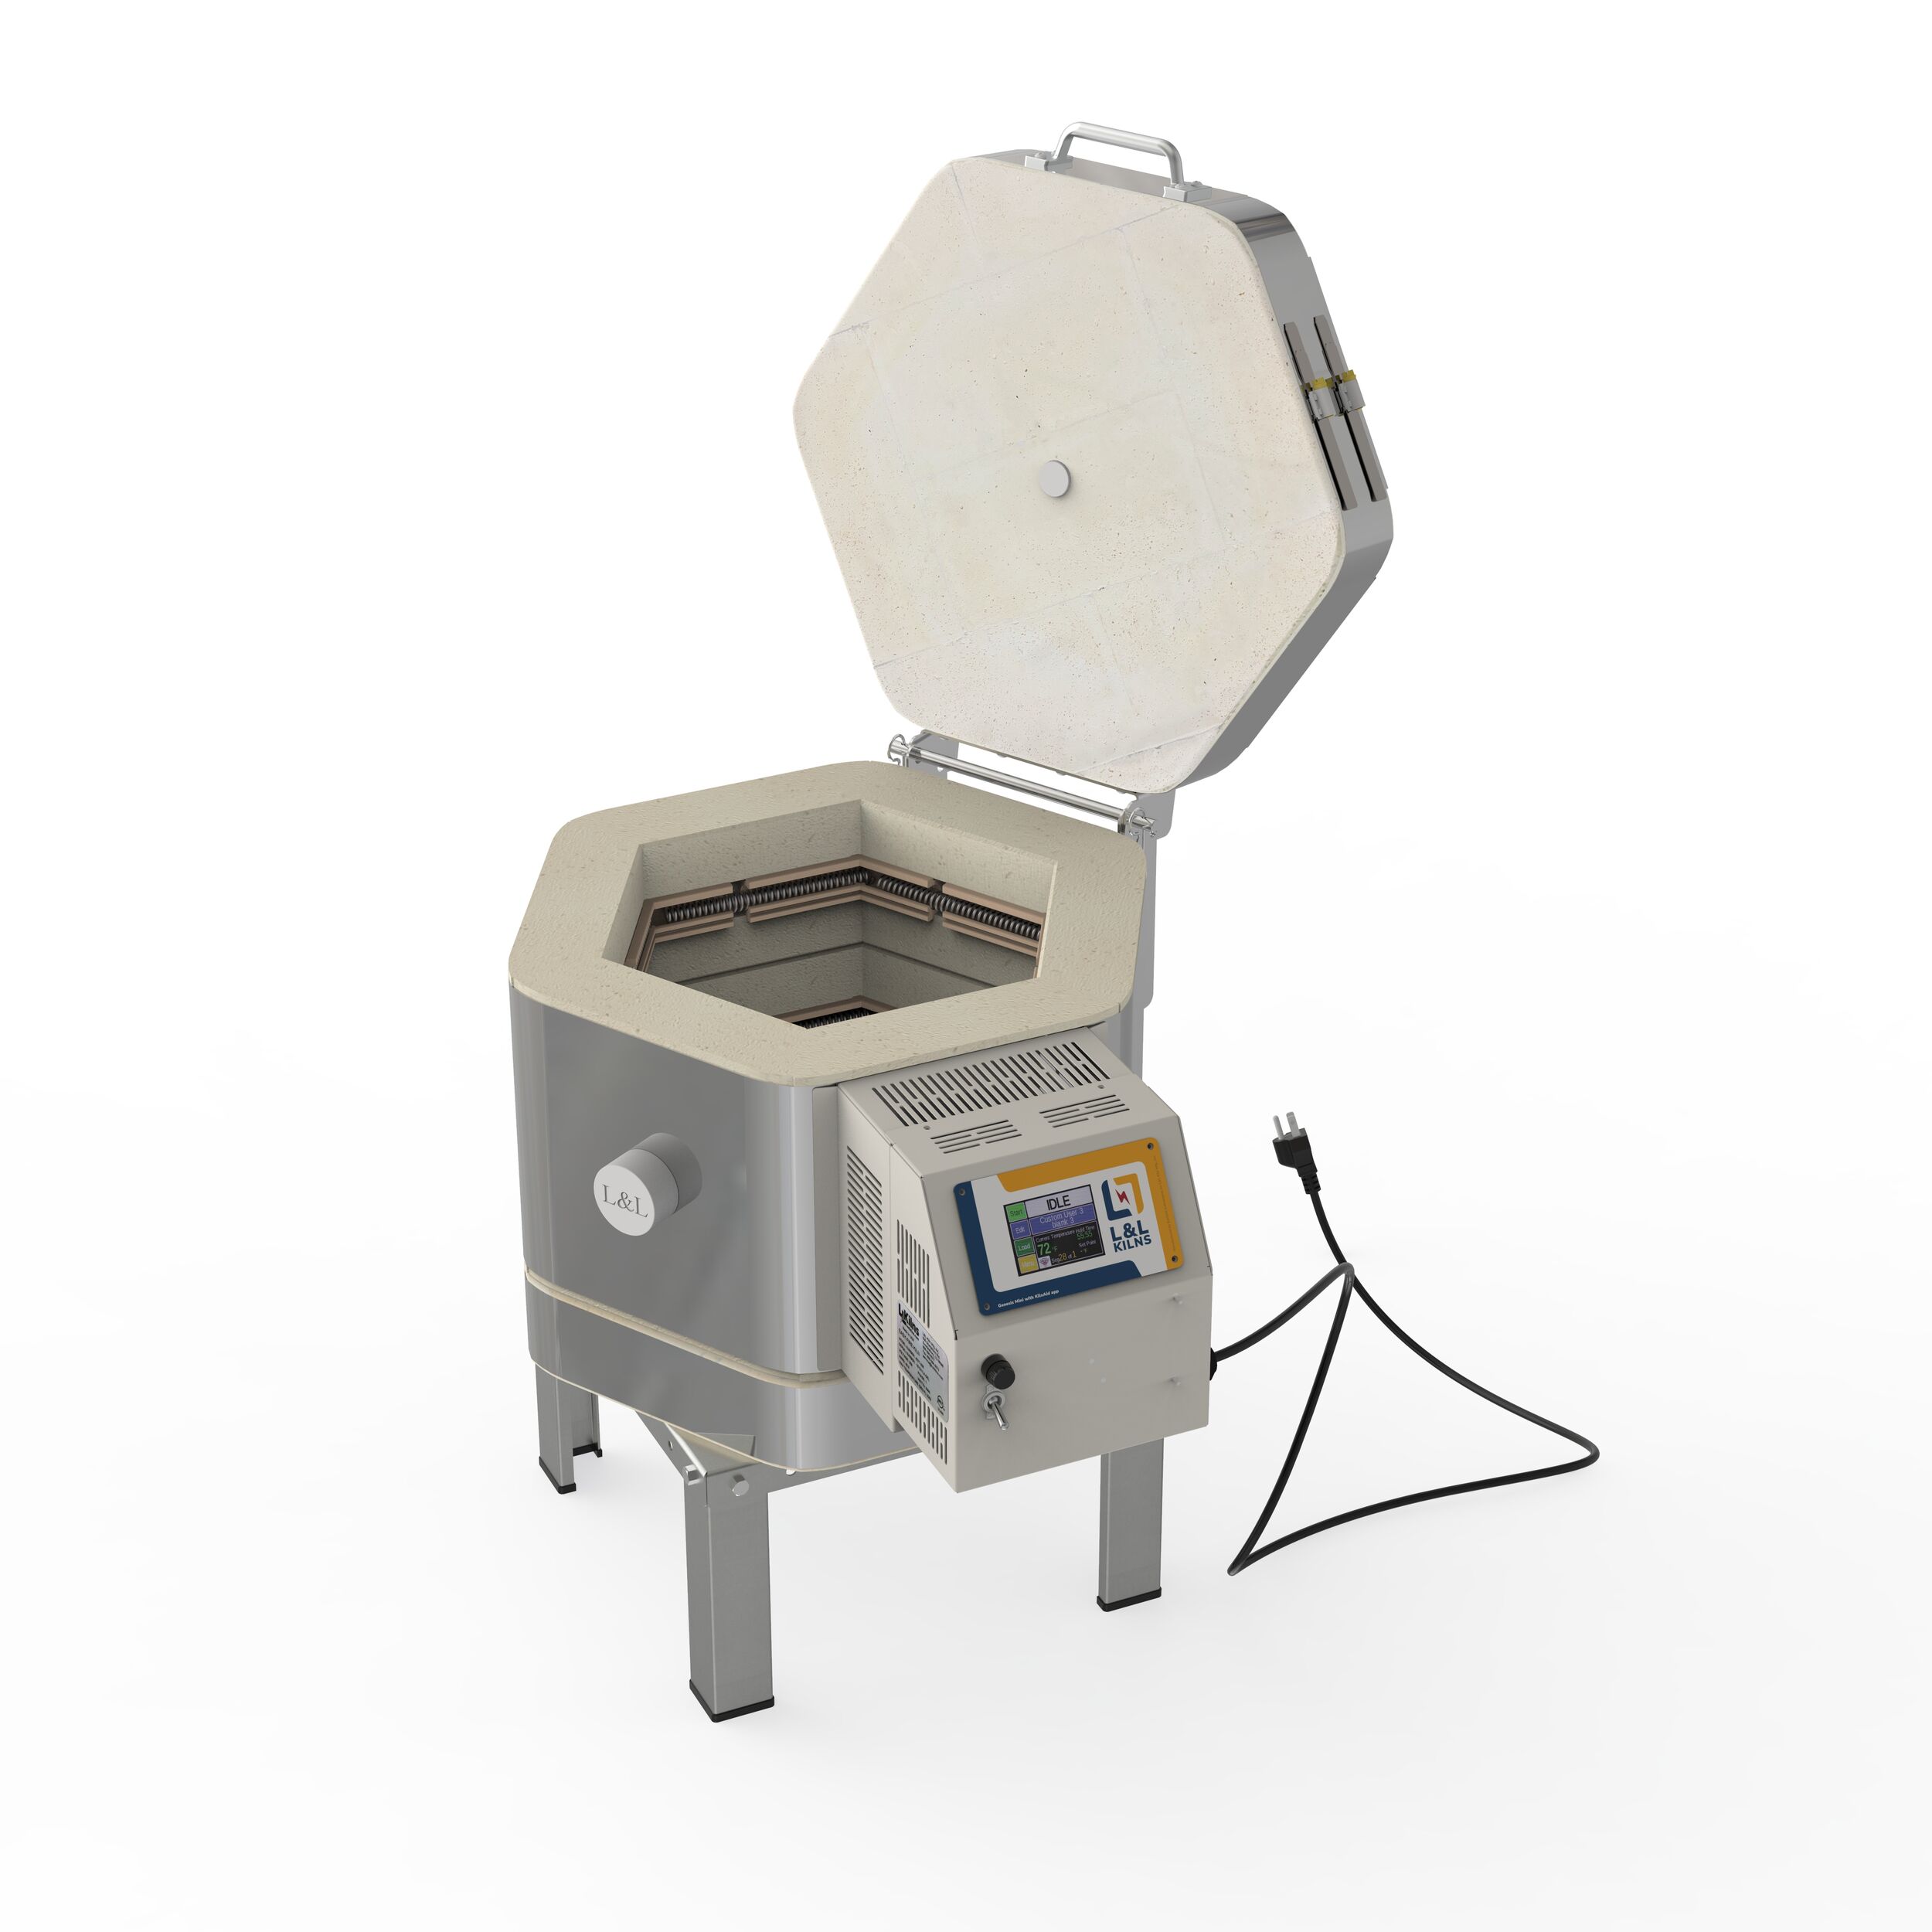
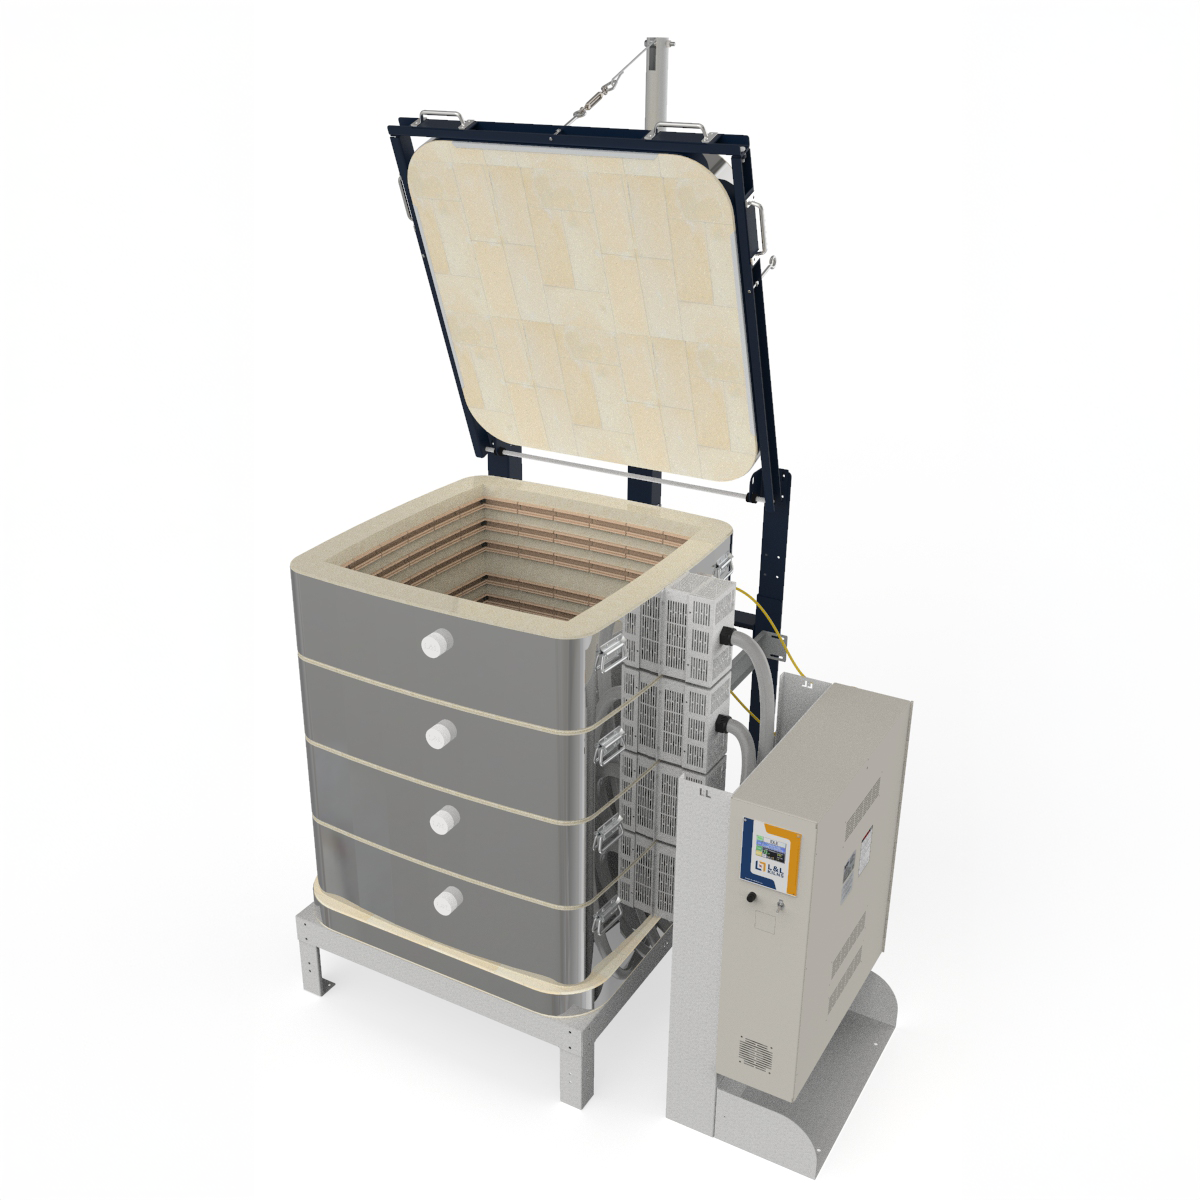
UNDERSTANDING THE DESIGN
BASIC CONCEPT OF THE KILN
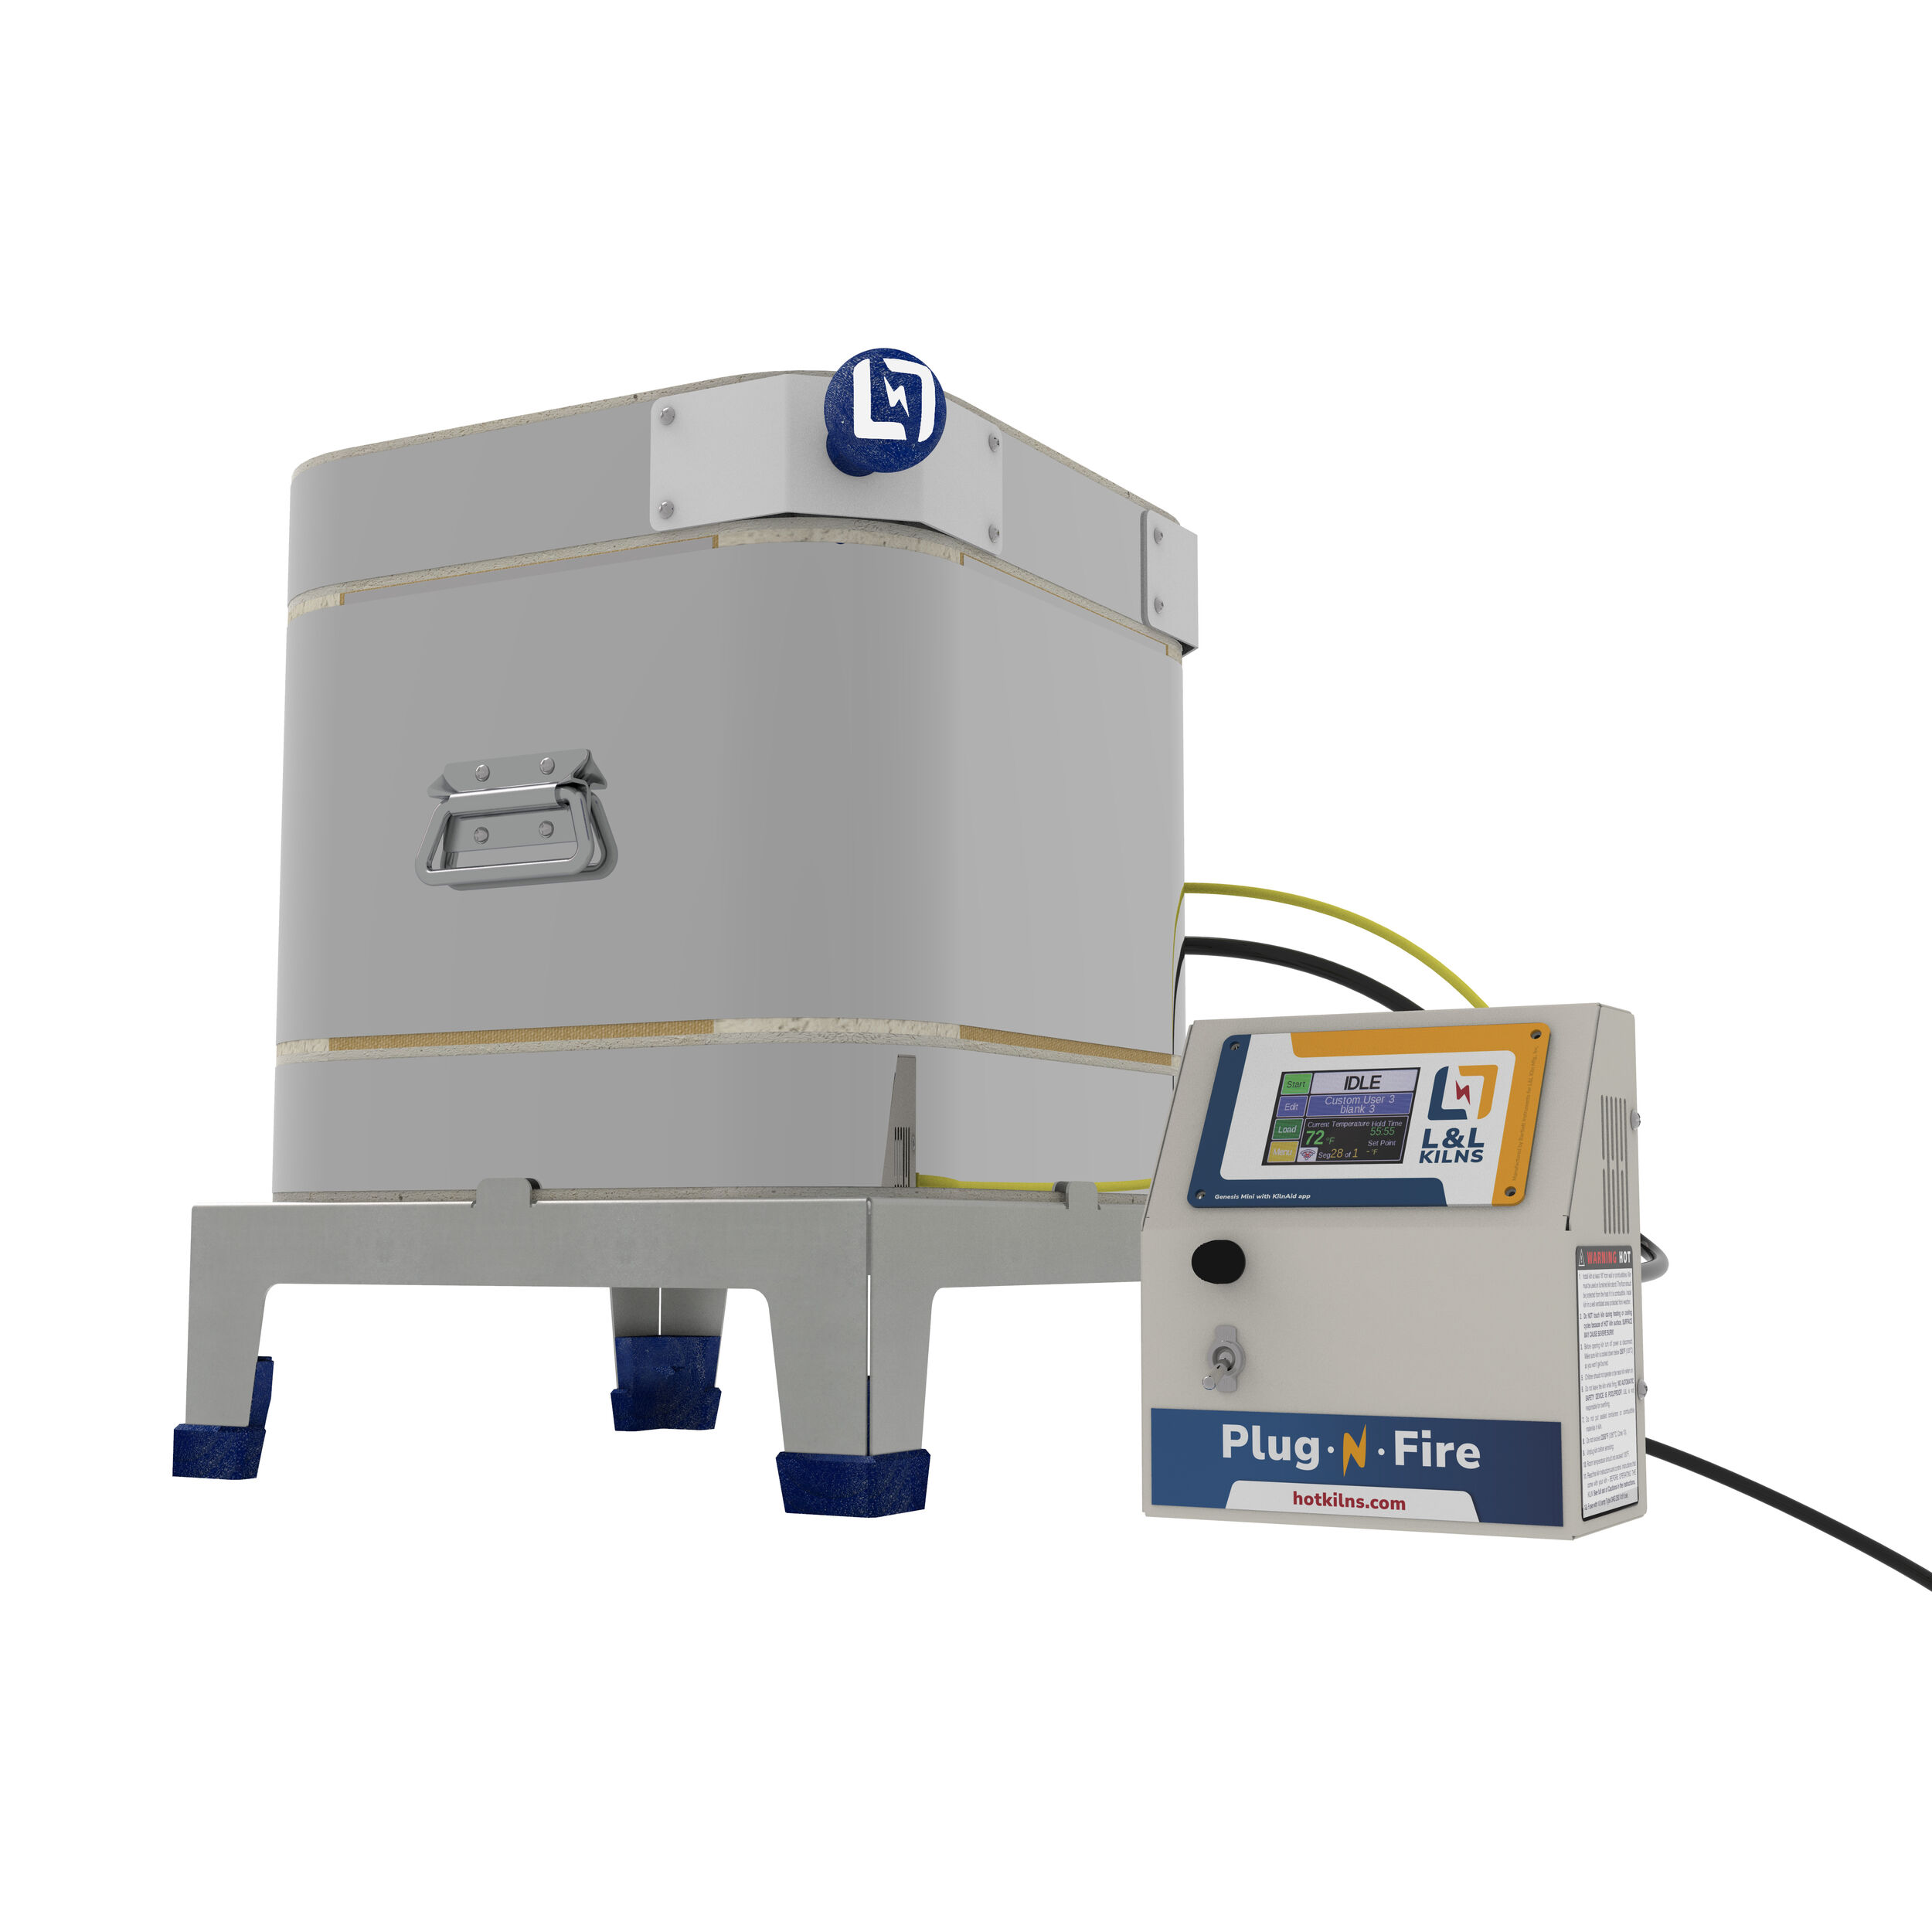
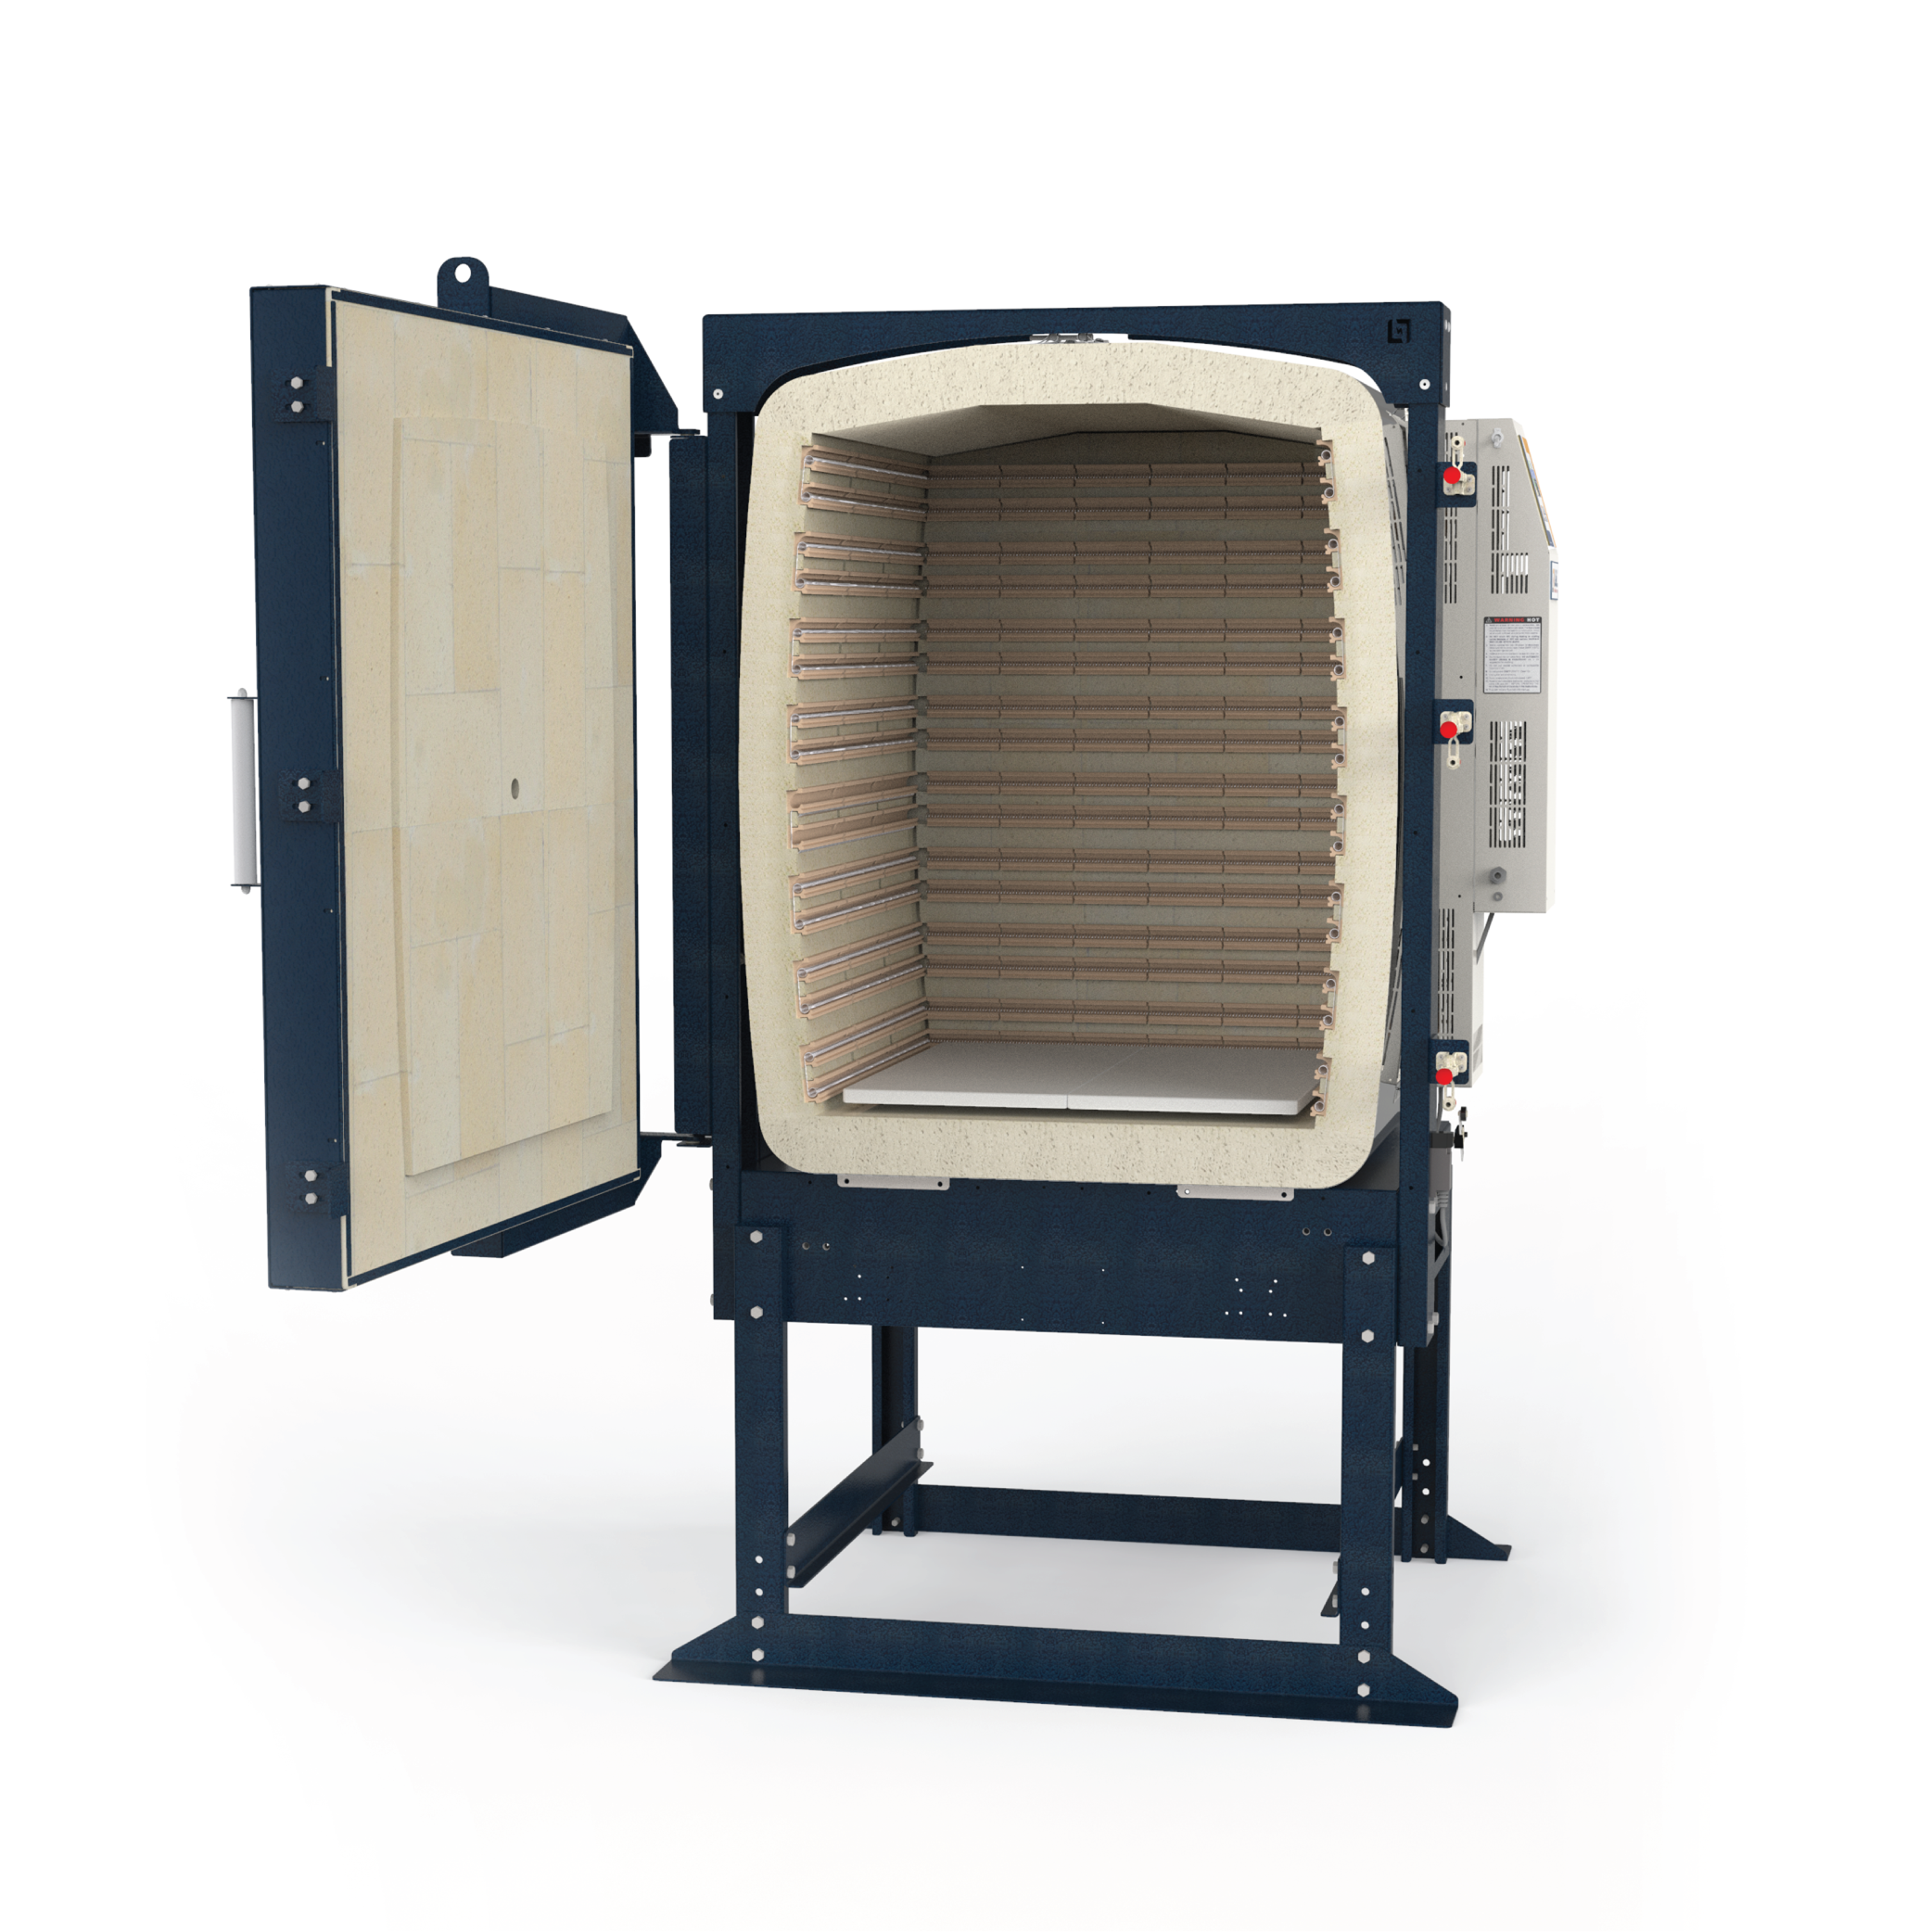
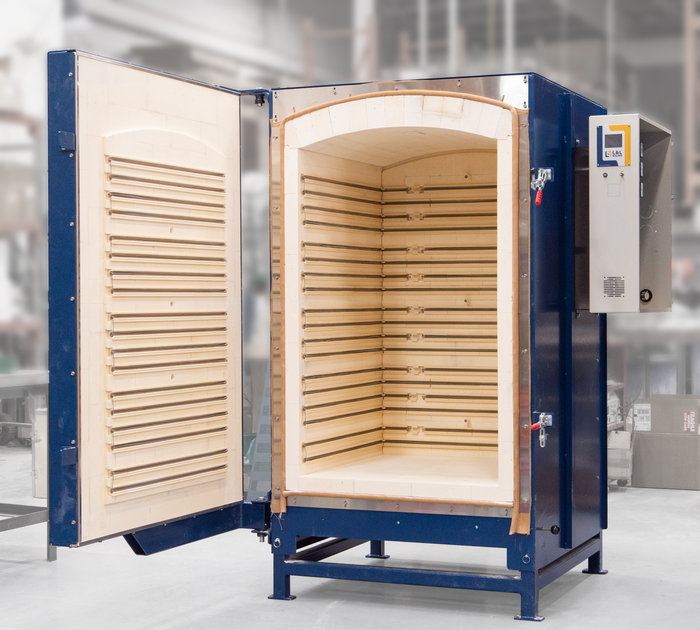
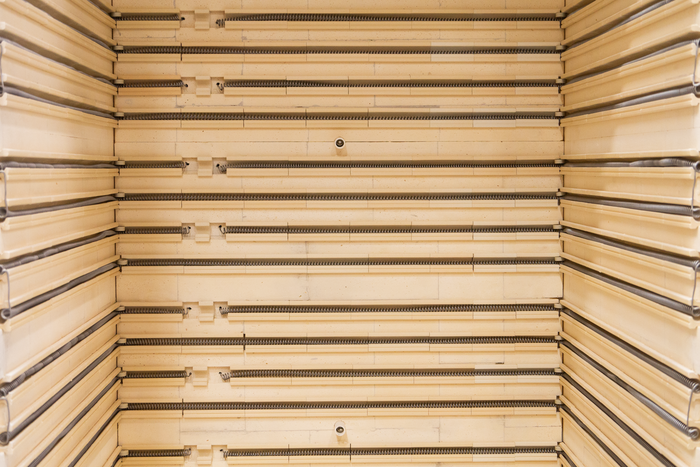
An EL Series Easy-Load electric kiln is an insulated front-loading kiln designed specifically for firing ceramics. Coiled elements made of a special high-temperature alloy (iron-aluminum-chrome) are mounted on the sides, back, and door for even heating. Bottom elements are optional.

SEPARATE CONTROL BOX
The control panel is mounted on the right side with standoffs to keep it separate from the kiln's heat for more reliable operation. The switches and other sensitive components last longer. On some models, the control panel may be floor-mounted.
ADJUSTABLE DOOR
The door has thrust bearings to make it easy to open. It is adjustable to maintain a proper seal with the front of the kiln over the years of operation.
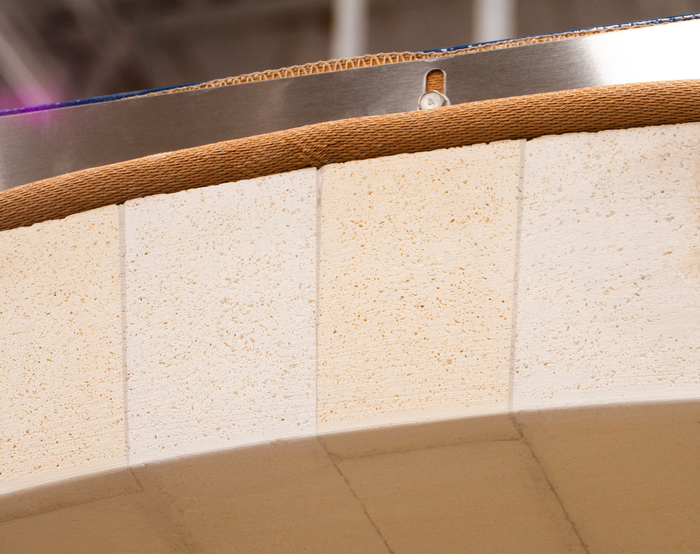
5” OF MULTI-LAYERED INSULATION
The insulation is lightweight K23 firebrick, 3” thick. It is highly insulating and resists temperatures up to about 2450°F.. This is backed up with 2” of non-asbestos backup insulation, which is also highly insulating. The arch is a K25 4.5” thick arch brick.
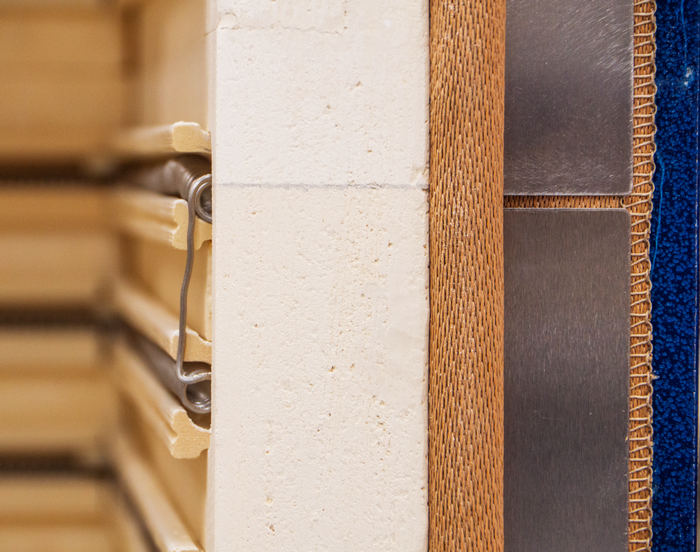
After the heating elements are turned off, the insulation slowly loses its heat, and the kiln and ware cool down. L&L uses a special coating on the firebrick to help prevent brick dusting.
OPTIONAL POWERED BOTTOM
Some Easy-Load models have optional powered bottoms available. These are useful if you need to fire faster, have a heavy load, or are going to very high fire (they will improve overall element life because the elements won’t have to work as hard to get there). The powered bottoms also offer more control over the temperature accuracy at the bottom of the kiln. There should be a 1” to 1-1/2” air space between the bottom and the first hearth shelf (in other words, set the first hearth shelf on 1” or 1-1/2” ceramic spacers). Keep spacers at least ½” away from the edge of the element grooves on the bottom. Use Option C in the hidden menu of the control.
CRACKS IN THE BRICKS
It is pretty standard to get hairline cracks in firebricks. These cracks are caused by the firebrick's expansion and contraction as it heats and cools. It generally does not make sense to cement these cracks.
PARTS TO KEEP ON HAND
If you are operating in a production environment, you should stock certain spare parts to prevent downtime. While we do our best to ship parts quickly and to keep all parts in stock, we cannot be responsible for your downtime. We recommend the following parts be kept on hand:
- Complete set of elements
- Complete set of fuses
- One power contactor
- Set of spare thermocouples
- Several element holders
- Brick Repair kit
Adjusting the door of an Easy-Load Kiln

See https://www.youtube.com/video/U0GtWAeTGvM