


See https://www.youtube.com/video/w7dsHK-3l4w
This video tutorial demonstrates how to properly stretch and install replacement quad elements for our eQuad kilns.

See https://www.youtube.com/video/aEfGj_eA8v0
This video shows how easy it is to change elements in an L&L kiln. The hard ceramic element holders protect the fragile firebrick while you are pulling element out and putting new elements in. See this link for more information on changing elements, wiring, and diagrams.

See https://www.youtube.com/video/6cfRNR2Tggw?ecver=2

See https://www.youtube.com/video/ZvBiD2BPJ9w
This video shows you how to remove an L&L easy-fire, eQuad-Pro or School-Master panel to send to factory for service.
For the previous panel design with a thermocouple terminal strip, watch from the beginning.
For the new panel design without a thermocouple terminal strip, skip to 2:13

See https://www.youtube.com/video/FDmUn-rbH_M
In this video we will demonstrate how to upgrade your kiln from Type K thermocouples to Type S.
- Brick plugs
- Brick cement
- Type S Thermocouples (short for most kilns)
- Type S Thermocouples (long for Easy-Load)
- Type S Lead Wire (by the foot)
- All Type S Lead Wire (Assemblies)
- Spade Terminals for thermocouples
-

See https://www.youtube.com/video/b9MzA4mL0Oo?ecver=2
This video shows how to check a control fuse on an L&L automatic kiln.
See this for more information.
Parts- See this page for control fuse ordering information.
- See this page for all fuses and fuse holders.

See https://www.youtube.com/video/Z8WCjC1IPwk?ecver=2
How to check the operation of a control transformer on an L&L automatic kiln. Applies to all automatic kilns that are not 480 volts. The control transformer reduces the incoming line voltage from 240, 208 or 220 volts to 24 volts for the control and 12 volts for the relays. See this page for more detail.
Parts
See https://www.youtube.com/video/rPGoMbVSUu8
The most important debugging tool in any toolbox is a trusty multimeter. A multimeter can measure continuity, resistance, voltage and sometimes even current, capacitance, temperature, etc.

See https://www.youtube.com/video/5BXvm3Xy3j0
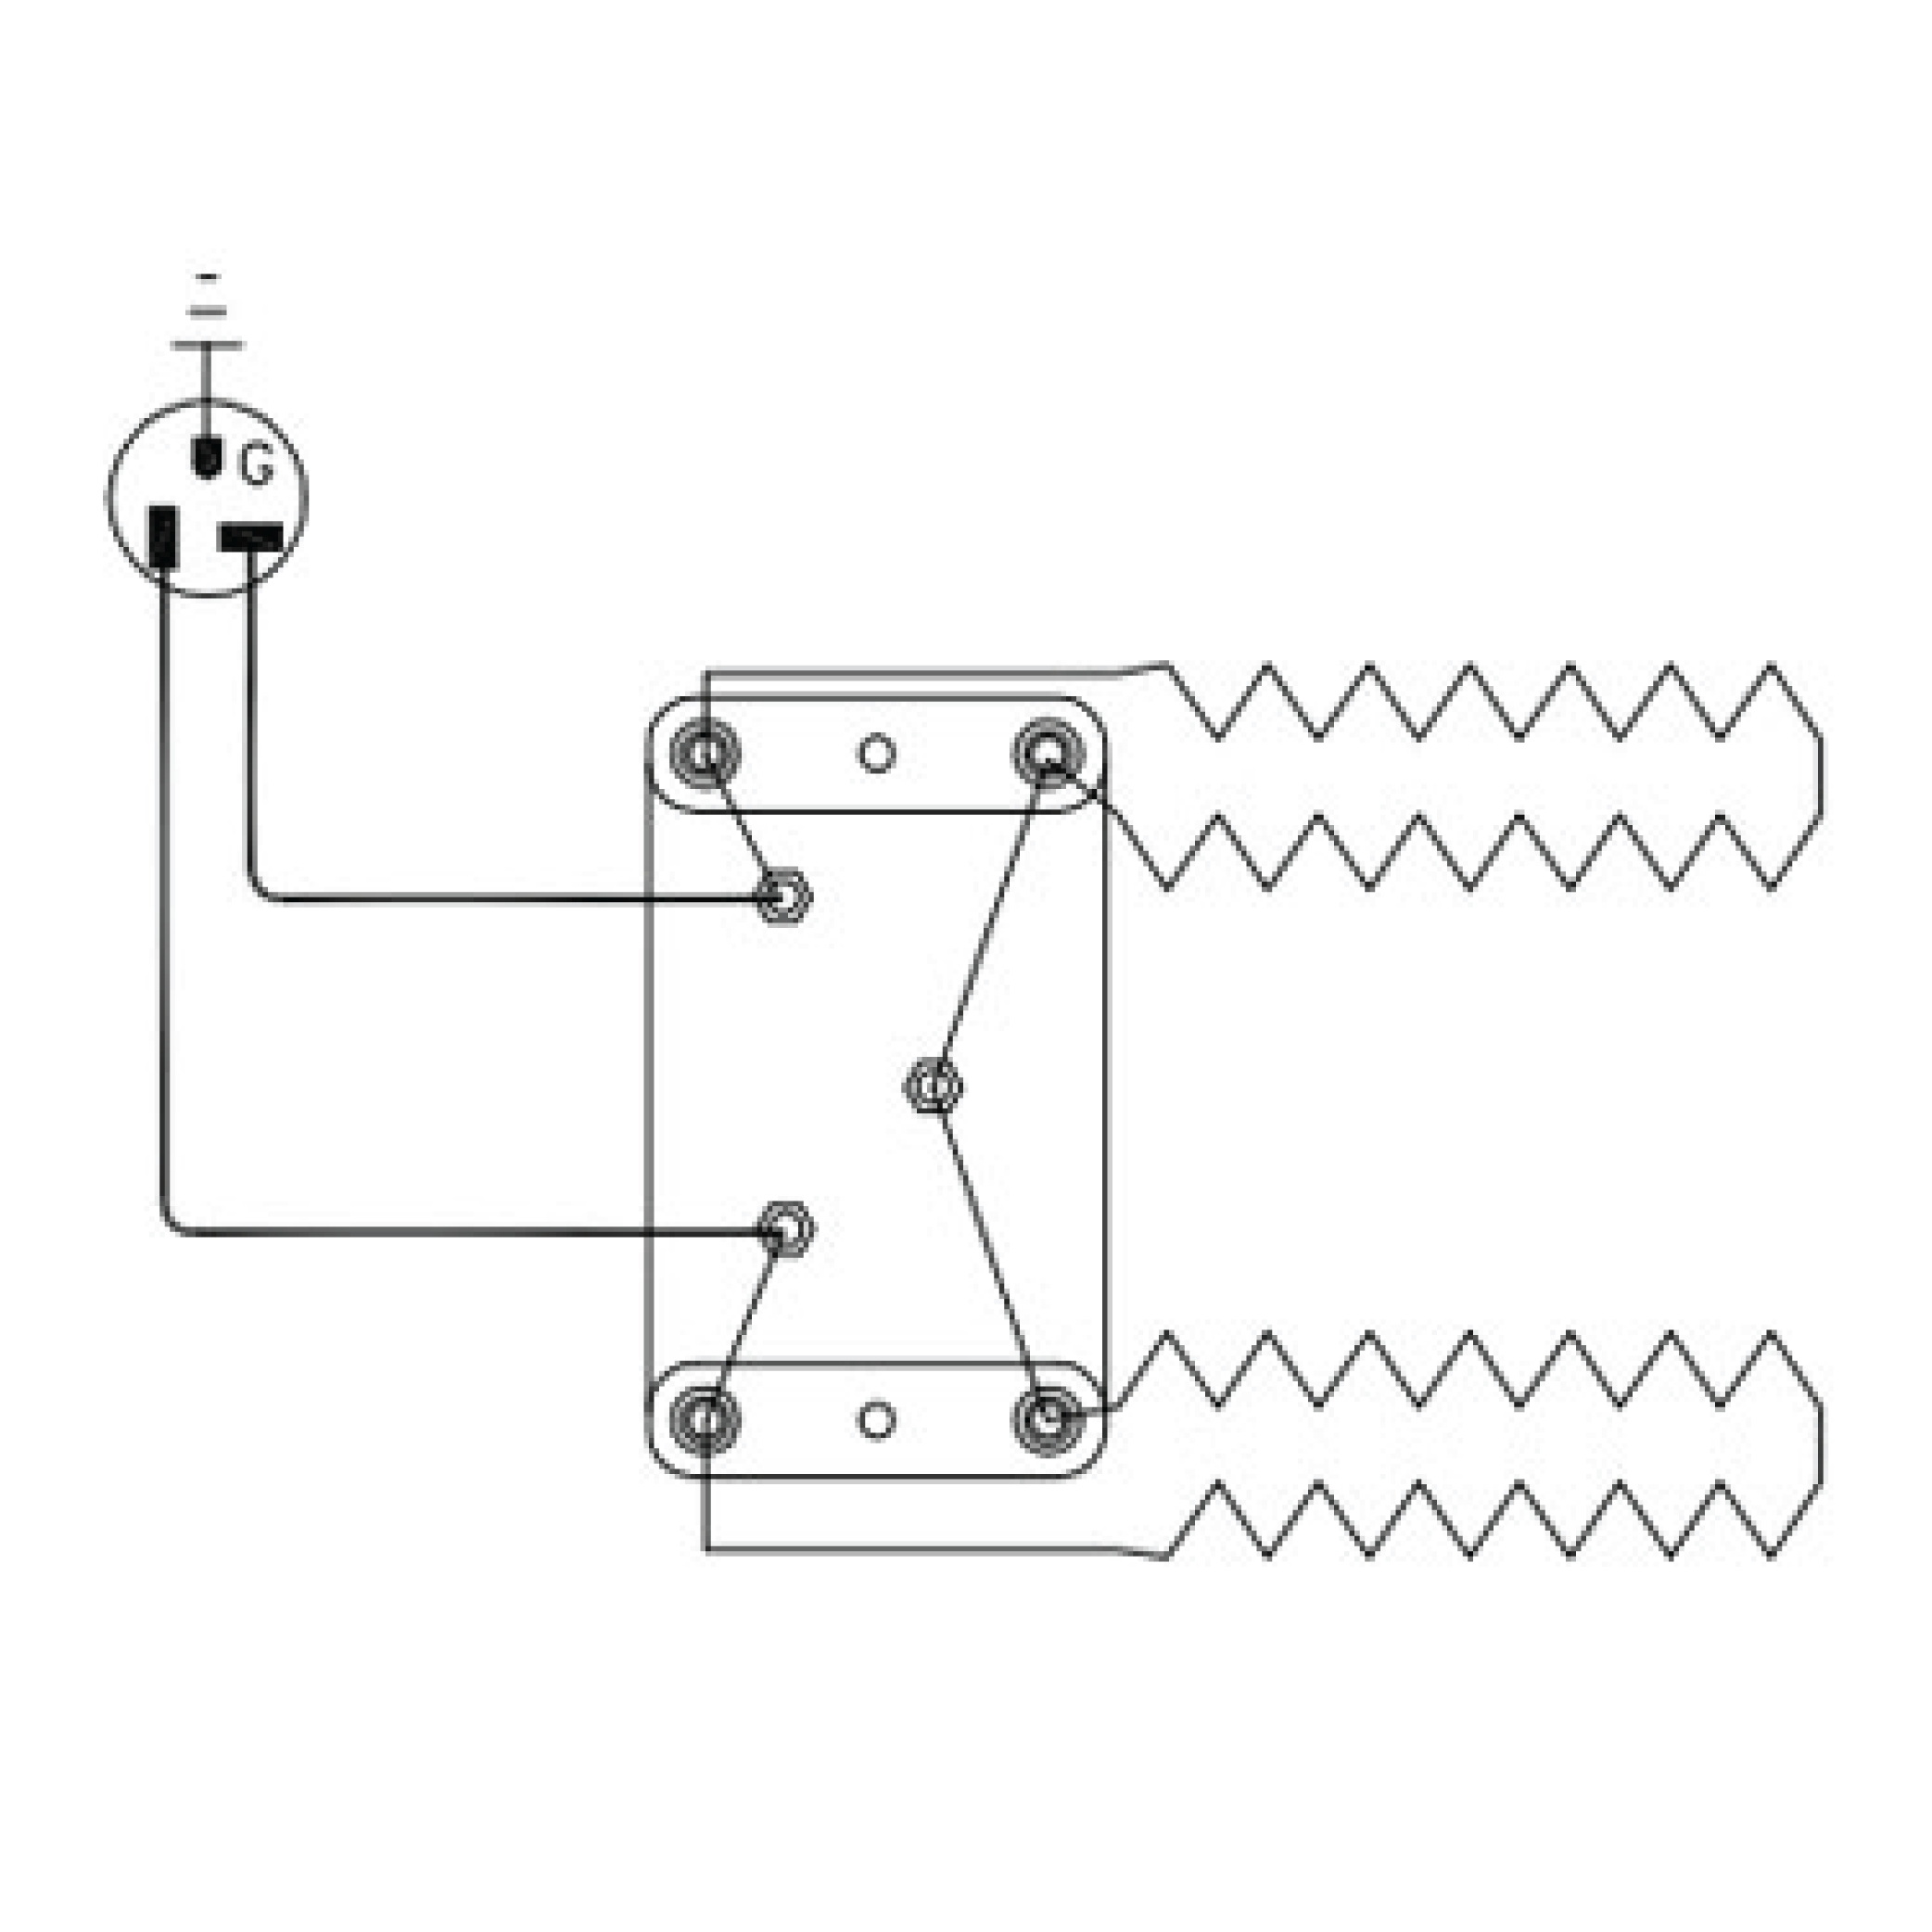
This video shows how to check voltage on an L&L automatic kiln.

See https://www.youtube.com/video/e_zv2Em2kPI?ecver=2

See https://www.youtube.com/video/m700BW3flYY
In this video we demonstrate how to replace Type K thermocouples. These thermocouples degrade over time, and we recommend replacing them whenever you replace your elements.

See https://www.youtube.com/video/LtaRwQ7jim0?ecver=2
This video is useful for changing a type S platinum thermocouple on any L&L kiln