


See https://www.youtube.com/video/dZF74dVz7hM
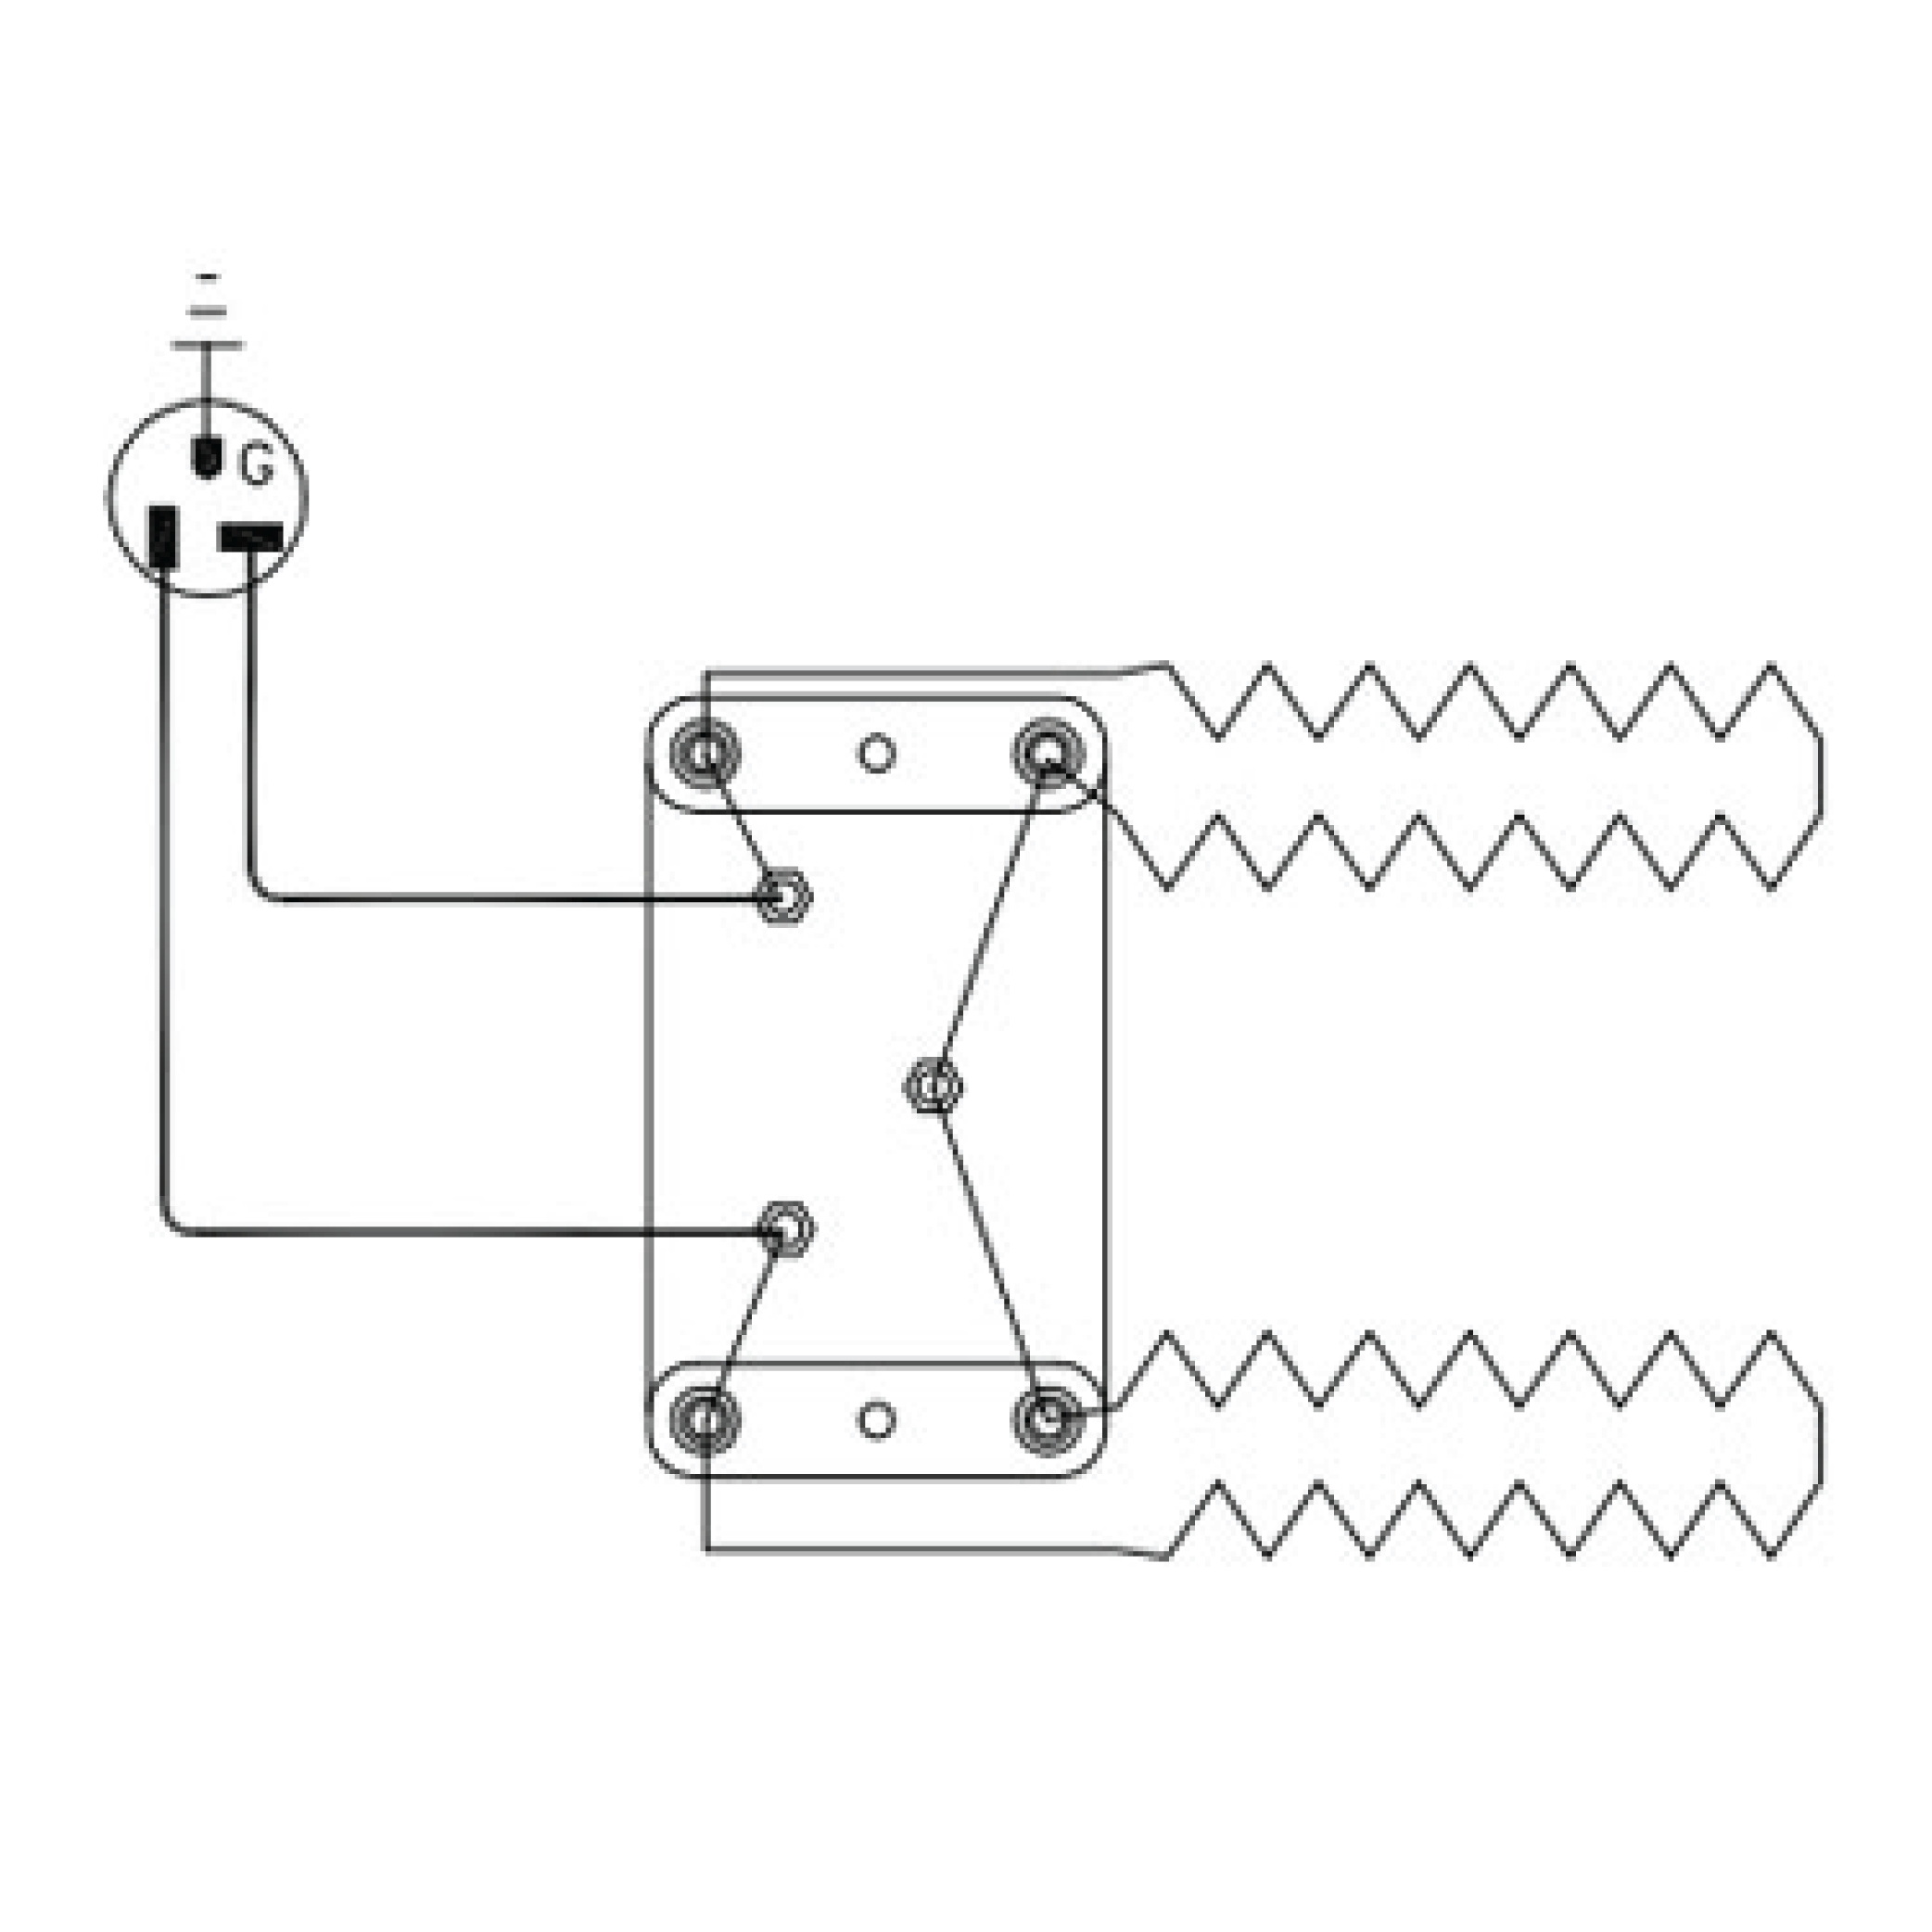
Quad Element System results in longer element life through lower watt density and heavy gauge elements.

See https://www.youtube.com/video/ATh9sn7gCf4?ecver=2
All L&L Kilns feature these solid ceramic peephole plugs. They are much stronger and heavier-duty than the typical hollow slip-cast peephole plugs you find on many competitors' kilns. Although they can break it is much less likely with these plugs.. See this for more information.

See https://www.youtube.com/video/86TJikm3vjU
In this video we will demonstrate how to upgrade your kiln from the older Dynatrol to the new Genesis control. This process is easy as both controls use the same connectors. See more details.

See https://www.youtube.com/video/kRJqg_9_Pb8
Overview of an L&L kiln Genesis Control's home screen.

See https://www.youtube.com/video/Kkz-n3McjC0
In this video we will explore how to setup WiFi on an L&L kiln Genesis Control.

See https://www.youtube.com/video/cP2rFlLUyUs
In this video we will show you how to download and install firmware on your L&L kiln Genesis Control.

See https://www.youtube.com/video/91BnfralR7U
Learn how to setup the Bartlett Kiln Aid app to remotely monitor your L&L Genesis Control.

See https://www.youtube.com/video/TMpWNf1tGjY
In this video we will break down our recommended program for your kiln's first firing using an L&L kiln Genesis Control.

See https://www.youtube.com/video/kk5IHSuj7oc
In this video we will explain how to toggle Novice Mode on an L&L kiln Genesis Control.

See https://www.youtube.com/video/K7WPwfBYzFM
In this video we will teach you about programming in novice mode on an L&L kiln Genesis Control.

See https://www.youtube.com/video/ofV-CKI-1Pw
In this video we will explore the ceramic programming options on an L&L kiln Genesis Control.

See https://www.youtube.com/video/AQKHkLIpjdY
In this video we will explore custom programming on an L&L kiln Genesis Control.