

Rolling Stand Instructions
Overview
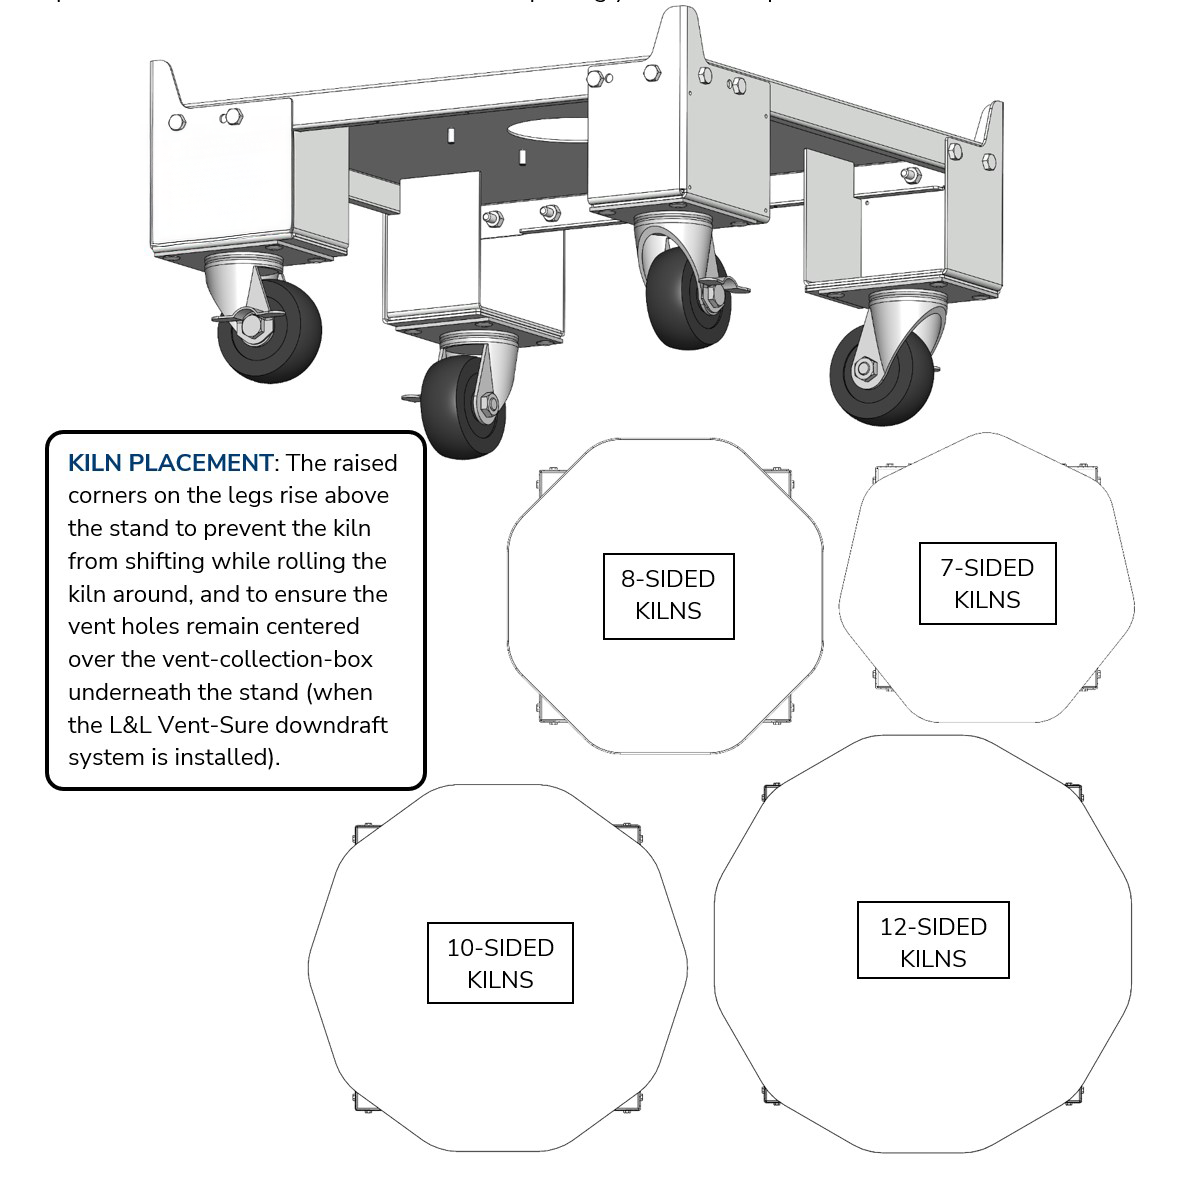
- The redesigned L&L Rolling Stand comes as a kit that can bolt onto the regular stand of L&L polygonal kilns.
- If your stand has 4 bolt holes in each corner, and the corners extend outside the exterior of the kiln, then your stand is likely compatible with the new rolling stand kit.
Parts
- Bolts: (16) ¼” flange-hex-head bolts
- Nuts: (16) ¼” flange-hex nuts
- Leg Assemblies: (4) leg-caster assemblies
Assembly
- Align legs with corner holes.
- Insert 4 bolts per leg, with nuts on the inside.
- Tighten bolts using a wrench.
- Before placing the kiln on top, lock casters by pressing the levers on the wheels.
Caution
- Do not remove casters; stand top must be at least 8” from the ground.
- Rolling Stand is not for moving while kiln is loaded.
- Avoid rolling on inclines or rough ground.