

Manual Kiln Operation with Kiln Sitters
Rev: 2/1/2025
A Starting Point
CAUTION: USE THIS ONLY AS A STARTING POINT IN LEARNING THIS PROCESS
IMPORTANT NOTE: Many kinds of loads are fired in kilns with infinite variations. There is bisque firing, glaze firing, variations in clay bodies, variations in the wetness of the clay, and, of course, many other kinds of firing like glass, crystalline glazes, various industrial processes, etc. This guide is meant ONLY as a starting point. Rely on your experience and that of other people who know to complement and expand on this starting point. Unfortunately, we can not be your ultimate resource for firing information. If you have further questions, please get in touch with your local distributor, Orton Firing Institute, or local pottery guilds or organizations. (See our External Links page for some great resources)
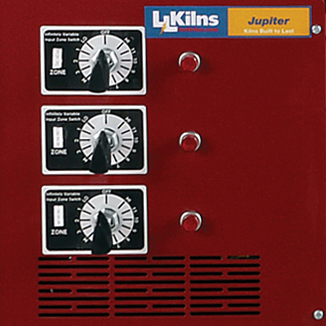
Zone Switches on L&L kilns come in two varieties; four position switches which have settings for Low, Med, High, and Off, but nothing in between, and Infinite Switches which have Off, then 1, 2, 3 through 11 ending at High - an infinite number of choices between Off and High. The four position switches were used on our old K Model and H & C Model kilns (typically before 1975). All manual J Series, Jupiter, and DaVinci Series kilns use the Infinite Zone switches.
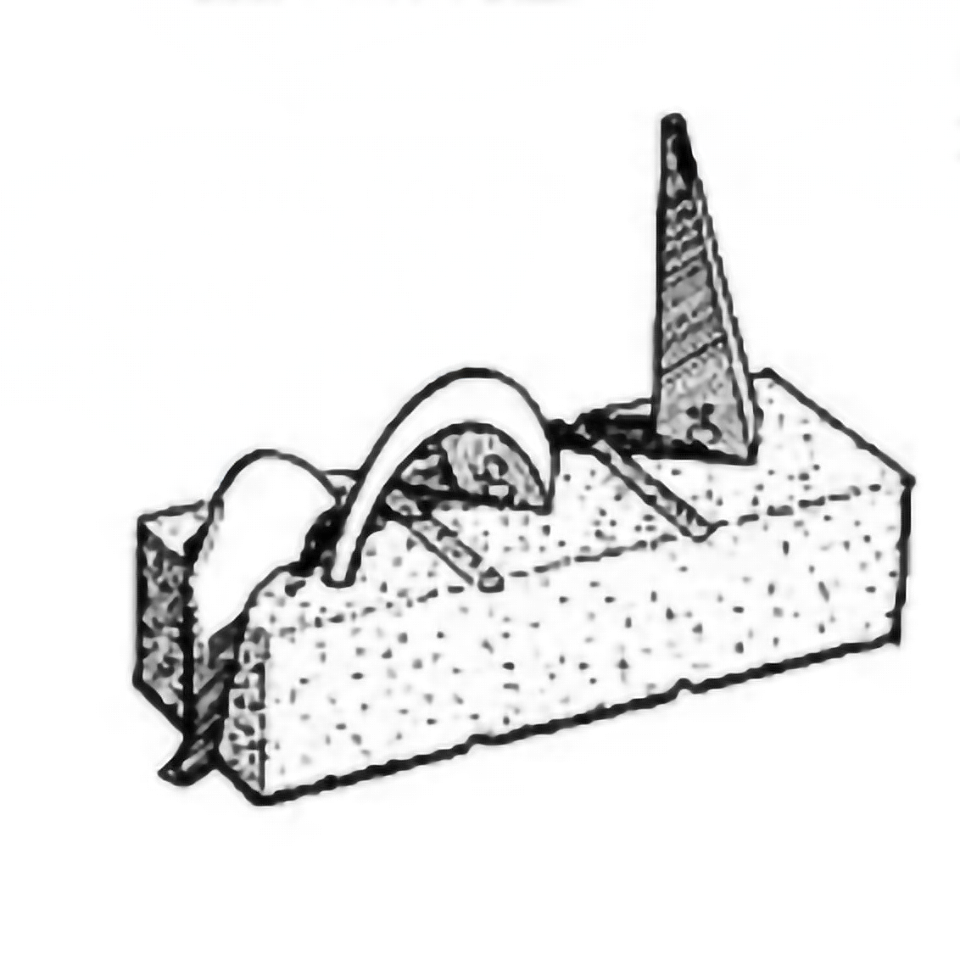
It is always wise to fire the kiln using self-supporting cones that melt at the temperatures your clays mature at, or a pyrometer, or some other way to tell the temperature in the kiln. As you load the kiln, place these cones so they can be seen easily through the peepholes.
SUGGESTION #1
- Set the kiln sitter up with one cone # hotter than your self-supporting cones.
- If you have an automatic vent like the Vent-Sure, use it. If not, prop the lid open about 4 or 5 inches with something non-flammable and leave all the peephole plugs out. Venting the water vapor and other fumes (such as carbon monoxide) generated at the beginning of the firing cycle is essential. Glazes can also give off toxic fumes later in the firing cycle.
- Turn on the Kiln Sitter's Timer. The first time, turn it up very high and keep track of how long the firing takes. The next time, set it for about an hour longer than your first firing took.
- Press the Kiln Sitter's white or silver button so it stays in. Turn all the switches to Low or 1. Leave it for three hours if you think the clay is dry. Leave it for 8 to 20+ hours if the clay seems wet. On L&L Kilns switches, pilot lights are next to them. On Low, they may be on something like 7 seconds, and off 23 seconds in a 30-second cycle. The closer you turn the switches to High, the longer they stay on, and the shorter they stay off in that 30-second cycle. ('30 seconds' is not what it will be, but probably something close). When you get to High, they will be on all the time.
- Assuming the clay was dry, you left it on for three hours. Now, close the lid. Turn the top two switches to 5. Turn the bottom switch to 6.
- As soon as you see Red Heat (any visible color) in the kiln, plug the bottom two peepholes. Leave the top one open during the entire firing (if you don’t have an automatic vent). If you do have a vent, leave it on and plug the peephole.
- As soon as you see quite a bit of Red Heat (about 1400°F if you have a pyrometer), turn the bottom two switches to High, and the top switch to 9. Check the cones you can see through each peephole often.
- As you start to see movement in the cones, as their surfaces start to look runny, look closely to see that all three kiln sections are doing the same thing, at the same temperature from top to bottom. You can fine-tune the switches now to add or subtract a bit of heat from the top or bottom to get to this point. As the cones all slump, turn all your switches off. Also, if possible, turn the electrical breaker off as well.
- Wait for it to completely cool before opening it.
SUGGESTION #2 (for a bisque firing):
- I put a ^08 into the sitter, and prop the lid open with a 2-3" piece of soft brick. (using a hard post gouges the lid)
- 0.00: Turn the bottom elements on LOW and leave the peepholes in (this prevents a chimney effect from cooling the front of the kiln). Leave the bottom on LOW for 1 hour.
- 1:00 Put the middle elements on LOW. Now the bottom and middle are both on LOW. leave the kiln like this for one hour
- At 2:00, hold a small mirror near the front of the open lid. If condensation appears, let the kiln go for another hour, if it does not, drop the lid.
- 3:00 turn the top element to LOW
- 4:00 turn all switches 1/3 of the way on (8:00 if you liken it to a clockface)
- 5:00 turn all the switches to 1/2 on (6:00 on a clockface)
- 6:00 turn all switches to 3/4 on (3:00 on a clockface)
- 7:00 turn all switches to HIGH. Dull red heat should begin to appear within the hour. When it does, set the timer on the Dawson to 2 hours. The kiln should shut off within that two-hour period, most likely before the timer runs out.
- This firing schedule has worked for the type of work I make on the wheel, my clay bodies, the density that I load my kiln, and the dryness of the ware that I feel comfortable loading into the kiln. This is just an example of a typical firing schedule for me and may need adjusting at different places depending on your own conditions.