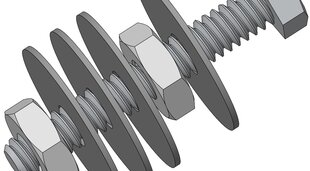
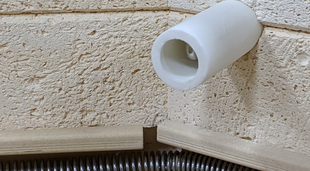
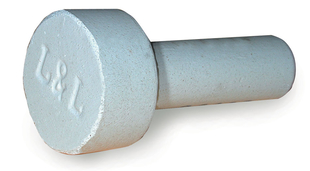
Cylindrical Ceramic Spacer - Unit is a 3/4" Diameter Cylinder x 1/4" High with a 1/4" Diameter hole in the center.
NOTE: These are also used to hold thick elements in place by using it as a wedge between the element and the ceramic holder. See this Knowledgebase page.
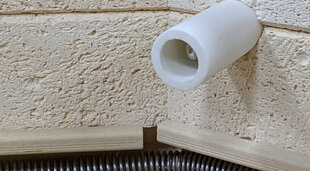
This is used to prevent element ends from touching each other (on older kilns). A 21/64" diameter hole is drilled into the brick 1-1/4" deep and the assembly is inserted into the hole. The overall length is 2" and the thick end is about 3/4" long. DISCONTINUED 3/19/26, use ceramic washers threaded over the element ends instead.
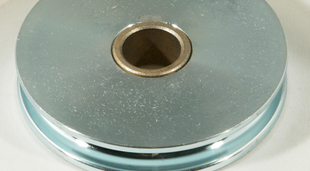
DaVinci Bell-Lift System Pulley - Unit is the pulley wheel that the cable used to hoist the Kiln Bell runs along
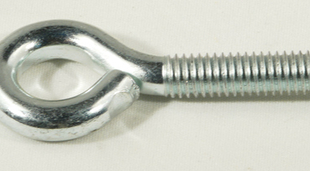
DaVinci Counterbalance System Eyebolt - Unit is used on the sides of all DaVinci Lids as an anchor to which the Safety Chains are attached
In a 3-ring binder. For kilns with the Genesis control (DynaTrol instructions can be downloaded).
You need to specify which control you have and your model number and serial number so we can provide the proper wiring diagram and control instructions.
You can download the free PDF here. This has both the DynaTrol and Genesis instructions. You can control service@hotkilns.com to get your wiring diagram. You will need your exact model number and wiring diagram.
In a 3-ring binder. For kilns with the Genesis control (DynaTrol instructions can be downloaded).
You can download a free PDF here. This has both the DynaTrol and Genesis instructions. Most diagrams are included but, if yours is not there, you can contact service@hotkilns.com to get your wiring diagram (you will need your exact model number and serial number).
In a 3-ring binder. For kilns with the Genesis control (DynaTrol instructions can be downloaded).
You can download a free PDF here. Most diagrams are included but, if yours is not there, you can contact service@hotkilns.com to get your wiring diagram (you will need your exact model number and serial number).
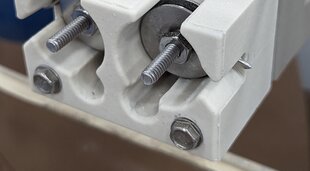
Ceramic Handle for 2nd Generation Easy-Lift Hinges - The unit is 1" in Diameter, 7-15/16" in Length, and Includes Mounting Hardware
Acorn Nuts: M-A-ACRN/00 - (two included)
Threaded Rod: M-A-TROD/00 - (one included)
In a 3-ring binder. For kilns with the Genesis control (DynaTrol instructions can be downloaded).
You need to specify which control you have and your model number and serial number so we can provide the proper wiring diagram and control instructions.
You can download the free PDF here. This has both the DynaTrol and Genesis instructions. You can control service@hotkilns.com to get your wiring diagram. You will need your exact model number and wiring diagram.
In a 3-ring binder. For kilns with the Genesis control (DynaTrol instructions can be downloaded).
You can download a free PDF here. This has both the DynaTrol and Genesis instructions. Most diagrams are included but, if yours is not there, you can contact service@hotkilns.com to get your wiring diagram (you will need your exact model number and serial number).
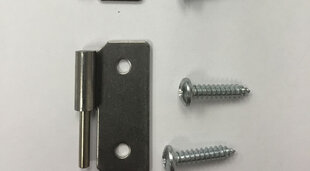
These are the metal hinges that get attached to the kiln case and mate with the hinge parts that are welded to the element cover boxes. There are two hinge parts and four mounting screws.
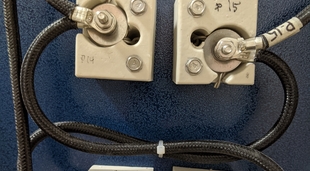
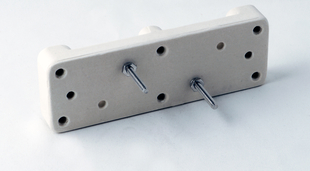
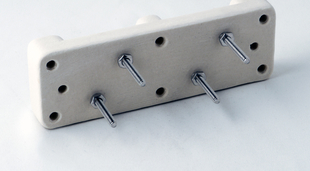
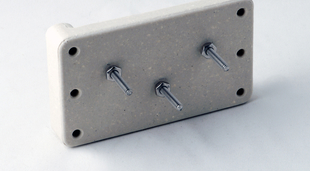
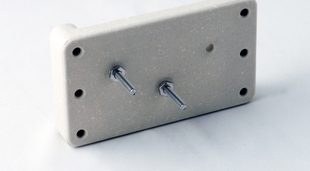
Element Insulator Bushing - Unit is used in conjunction with the Old Style (Red) Element Terminal Boards to keep the Element insulated from the Sheet Metal Casing Internal Reference: C-BSH-C1620X-B1, C-BSH-C1620X-A1
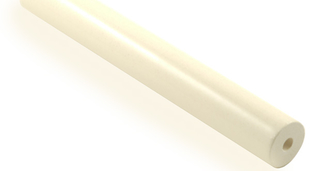
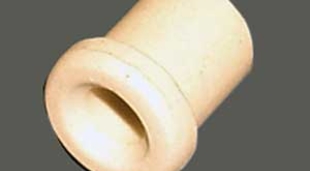
Corderiete Ceramic Tube: Element Insulator Tube - 4" long 5/16" OD x 3/1"6 ID. Used in some front-loading kilns for insulated the element ends as they protrude throught he insulation.
In a 3-ring binder. For kilns with the Genesis control (DynaTrol instructions can be downloaded).
You can download a free PDF here. This has both the DynaTrol and Genesis instructions. Most diagrams are included but, if yours is not there, you can contact service@hotkilns.com to get your wiring diagram (you will need your exact model number and serial number).
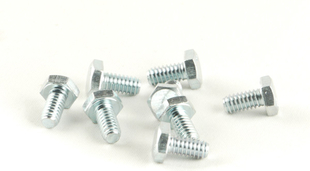
Hardware for Attaching Stand Legs with PEM Nuts - Includes eight 1/4" Long #20 (1/4-20) Bolts.
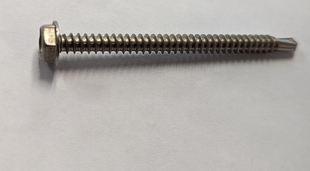
Hex Head #10 2-1/2 Self-Tapping Screw for mounting EL Terminal Blocks, Stainless 400 Series
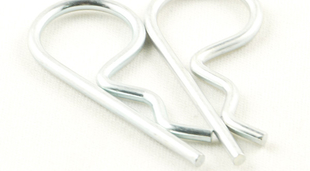
Cotter Pins for All Hinge Bars - Unit includes a set of two Pins
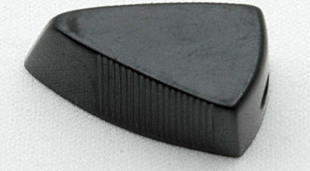
Knob for the INF Infinite Zone Switch
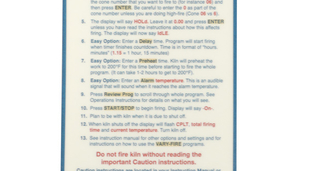
Dynatrol Instruction Label - This label goes underneath the DynaTrol Control Board and provides step-by-step instructions for its use
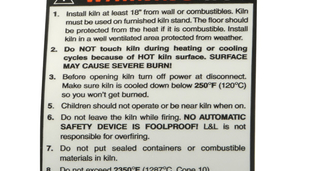
Hot Instruction Label - This label goes on the side of the Control Panel and provides instructions for how to position the kiln to avoid any heat related accidents or problems
In a 3-ring binder. For kilns with the Genesis control (DynaTrol instructions can be downloaded).
You need to specify which control you have and your model number and serial number so we can provide the proper wiring diagram and control instructions.
You can download the free PDF here. This has both the DynaTrol and Genesis instructions. You can control service@hotkilns.com to get your wiring diagram. You will need your exact model number and wiring diagram.
Mullite Thermocouple Protection Tube - Unit is 5" Long x 1" Diameter with a stepped head for use with All Standard Length Type-K 8 Ga. Thermocouples. NOTE: This is the newer type open end tube which was put in service with new kilns starting in September 2020.
Mullite Thermocouple Protection Tube - Unit is 7" Long x 1" Diameter with a stepped head for use with all Longer Length Type-K 8 Ga. Thermocouples. NOTE: This is the newer type open end tube which was put into service for new kilns starting in November 2020.
Ceramic Peep Hole Plug - Unit is a 1" Diameter x 5" Long Top Hat Style Plug (Stepped Head has a 2" Diameter and serves as a heat lock)
Ceramic Peep Hole Plug - Unit is a approximately 7/8" Diameter (.86") x 3.75" Long Top Hat Style Plug (Stepped Head has a 1.5" Diameter and serves as a heat lock)
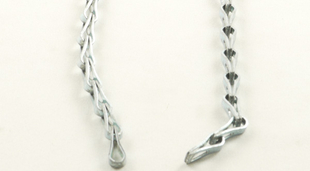
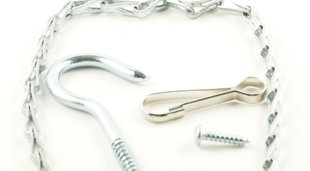
#8 Safety Chain - Unit is sold by the foot
Complete Safety Chain Assembly - Assembly includes the Safety Chain, Snap Clip, Screw Hook, and any Hardware
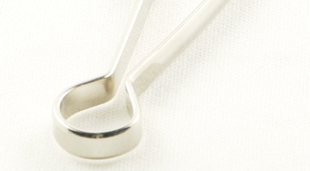
Snap Clip for the Safety Chain System - Unit should be attached to the end of the Safety Chain to hook onto the Screw Hook
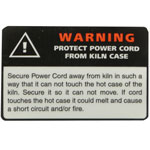
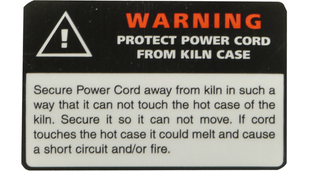
Cord Caution Label - This label goes by the Power Cord and warns about keeping it away from the kiln case
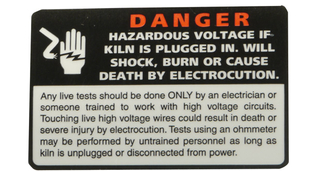
Electrical Hazard Label - This label goes inside the Control Box and warns about electrical shock, etc.
Hinge Caution Label - This label goes on the side of the Hinge and warns about the use of the Locking Push Pin Assembly
#10-24 Zinc-Plated Hex Nut - Unit is used for mounting the Vent Bypass Box, Contactor Plate in the Control Panel, and for the Element Terminal Bolts
|