

Firing with Pyrometric Cones
REV: 2/1/2025
Download the Orton Cone Chart Here

See https://www.youtube.com/video/-8E-YkZ45EA?si=gkLQ4NyvP8Va3DVg
What are Pyrometric Cones?
Pyrometric cones, also known as witness cones or simply cones, are small, ceramic, cone-shaped tools used to measure heatwork (the combined effect of temperature and time) during a kiln firing. Each cone is made from a ceramic mixture that melts and bends after a specific amount of heatwork.
Developed in the late 1800s by Edward Orton Jr., pyrometric cones provide ceramicists with a reliable method to ensure their ware was fired correctly to achieve the desired properties. Each ceramic product is assigned a specific cone number, indicating the proper firing temperature and conditions (e.g., Cone 06 for glazes, Cone 04 for bodies).
Although electronic temperature controllers have simplified the firing process, pyrometric cones remain essential. They accurately measure the cumulative effect of time and temperature on ceramic ware, ensuring consistent and reliable results. Heat-work is something that electronic controls cannot measure - the controls can only measure temperature and rate of firing. From those measurements, the control approximately calculates heat-work. This is why each kiln needs to be calibrated using pyrometric cones.
Firing Ceramics is like baking a turkey
An interesting analogy for firing ceramics is cooking a turkey in an electric oven. You can set the oven temperature to 350°F, place the turkey in the oven, and estimate how long it will take to reach an internal temperature of 180°F. However, to ensure the turkey reaches the desired internal temperature, you use a meat thermometer, which indicates when the desired temperature is achieved. Changing the oven temperature will affect the time needed to reach this internal temperature.
Similarly, in ceramics, pyrometric cones act like the meat thermometer. They measure the combined effect of temperature and time during the firing process, ensuring the ceramics are fired correctly to achieve the desired properties. Just as the thermometer ensures your turkey is perfectly cooked, the cones ensure your ceramics are properly matured.
Heat Work and Electronic Controls
Bartlett electronic temperature controllers' cone-fire programs are based on the actual firing behavior of Orton cones, thanks to information provided by the Orton Ceramic Foundation. These controllers automatically adjust the final firing temperature based on the kiln's heating rate, ensuring the correct amount of heat work specified by the selected cone number. Using the cone-fire programs built into your controller is the most efficient and reliable way to fire your kiln.
One caveat: The Orton ramp rates were developed years ago when kilns mostly used 2-1/2" of insulation. Many kilns, including most L&L kilns, now use 3" or more insulation. This affects heating and cooling ramps, and that affects heat work. Again, this is another reason you need to calibrate your specific kiln and not assume the control is perfectly tuned from the factory.
Electronic controllers alone do not guarantee that your ware has been fired correctly. The controller measures the temperature inside the kiln using a thermocouple, typically mounted in the kiln's side wall and extending 1 to 1½ inches into the kiln. While the thermocouple accurately measures temperature at a specific point and time, heat work is a function of both temperature and time, as indicated by the bending of pyrometric cones.
Why is it important to know if you have attained the correct cone firing?
Look at the label on your glaze jar. It likely specifies the glaze as a "Cone X" glaze. This means the glaze should be fired to achieve the heat work equivalent to the specified cone number for proper maturation. The glaze manufacturer has formulated the glaze to mature at a specific cone number and has conducted extensive testing to determine its characteristics when properly fired. This includes glaze fit to the body, color development, chemical resistance, and food safety.
Under-firing or over-firing can prevent the glaze from achieving the desired appearance and properties, leading to unsatisfactory results. Therefore, ensuring the correct cone firing is crucial for attaining the expected qualities of the glaze.
Since the thermocouple and the controller do not measure heat-work, how do you know if the glaze matures after every firing?
The thermocouple measures the temperature near the kiln's wall, where the heating elements are located. However, it cannot measure the temperature at the ware's location, making it difficult to ensure uniform heatwork throughout the kiln.
Remember the turkey analogy? One could extend the kiln's firing cycle to ensure all areas receive the desired heat-work. However, this practice would be inefficient, potentially requiring additional kilns to meet firing needs and resulting in excessive energy consumption. It's an overkill approach without practical merit.
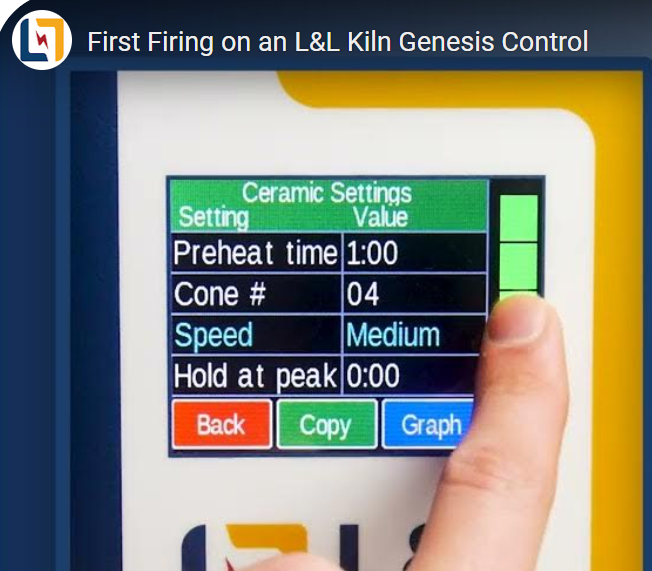
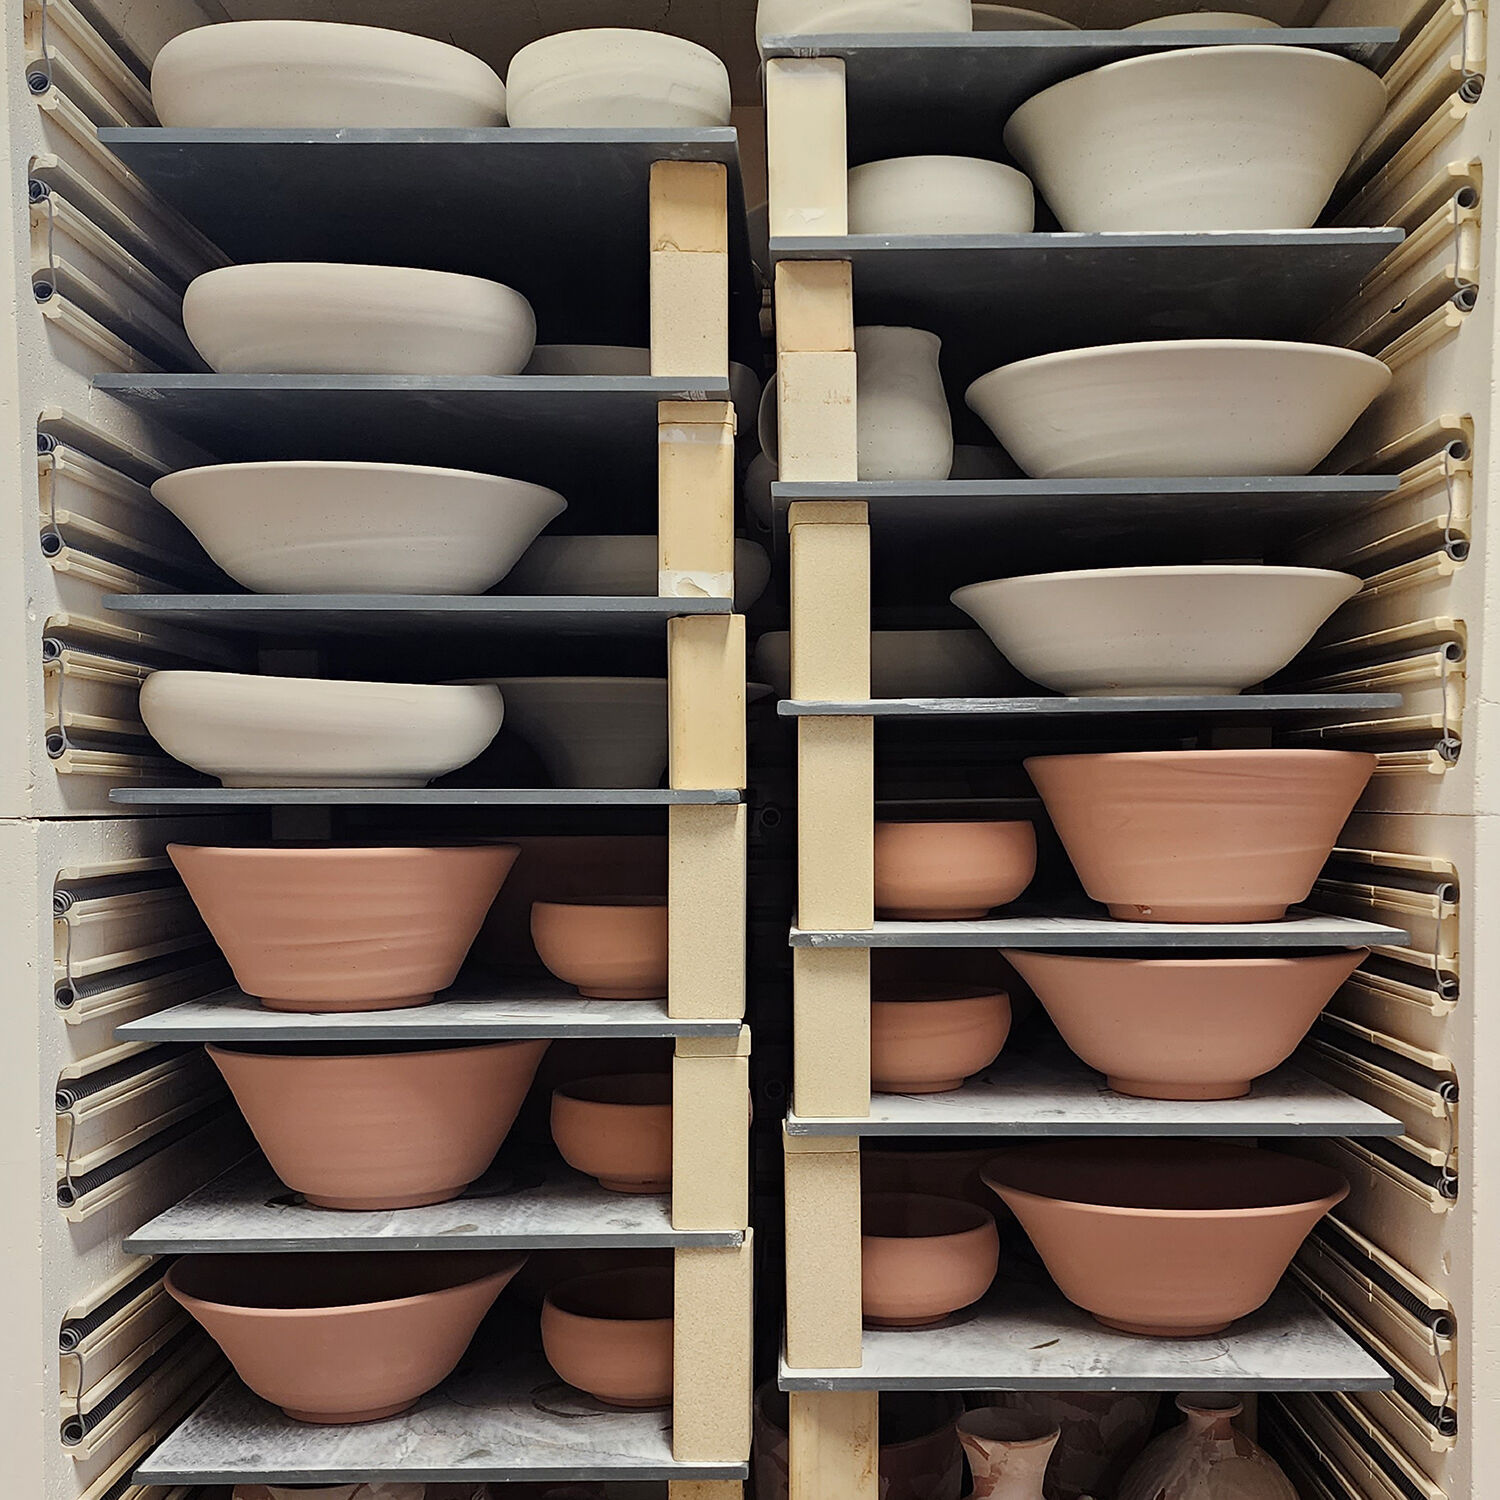
The programmable controller and pyrometric cones allow for developing firing profiles tailored to your specific needs. Most shop operators aim to fully utilize their kiln during each firing, so let's consider a fully loaded kiln of glazed ware to be fired to cone 06. The load in the kiln directly impacts the firing profile needed for successful results. Select the cone-fire program recommended by the glaze manufacturer, in this case, cone 06.
Remember that selecting a cone-fire program alone does not guarantee uniform heat distribution throughout your ware. The controller compensates if the kiln is heating slower than expected, but it only measures temperature at the tip of the thermocouple and not at the ware’s location.
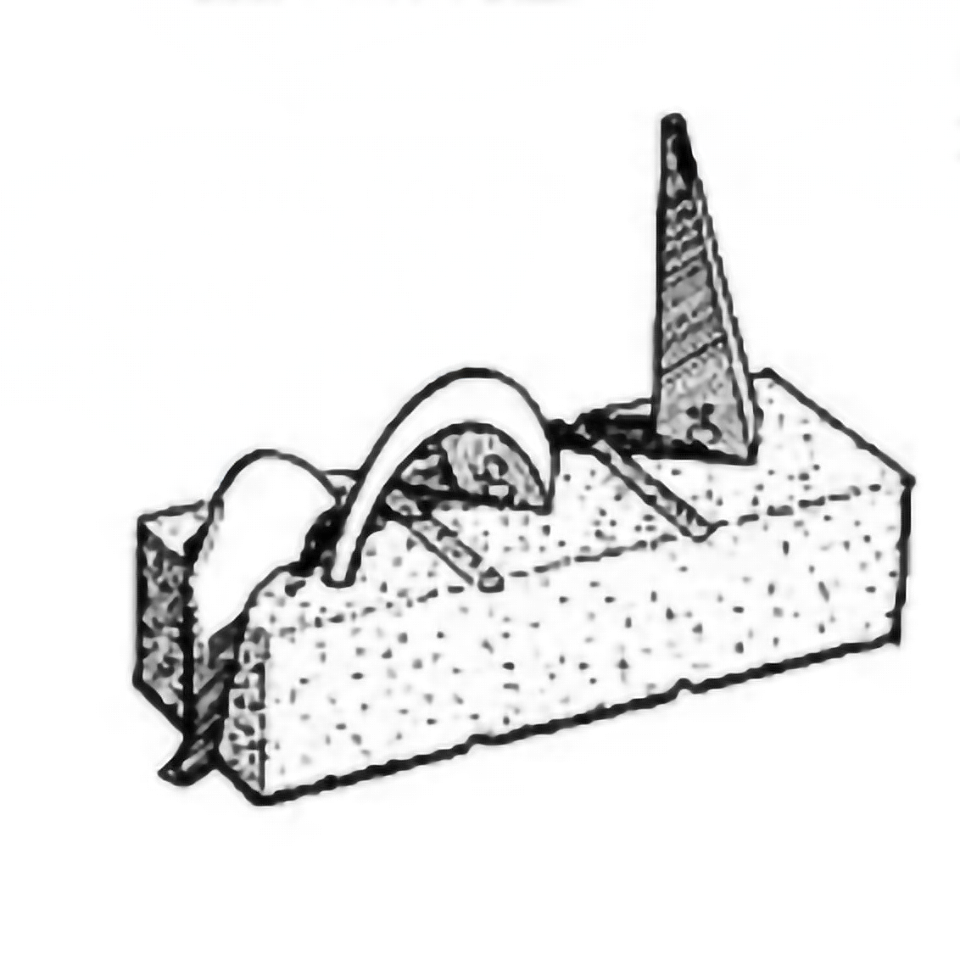
Place two series of three self-supporting cones (07, 06, 05) on each shelf: one set at the perimeter and one in the center. Fire the kiln. Once cool, remove and note the cones' locations. If the 06 cone is properly bent (its tip level with the top of its foot) in all locations, you have successfully fired to cone 06.
Figure 1: Cone 07 is over-fired and cone 06 indicates a successful cone 06 firing.
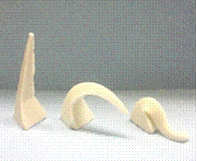
Cone 05 Cone 06 Cone 07
If some cones indicate that you did not reach cone 06 (the tip of cone 06 is not bent enough), you must adjust your firing cycle on the controller. Since cone 07 measures a lesser amount of heat-work, placing it alongside cone 06 can help you gauge how close you were to reaching cone 06. For example, if cone 07 is bent to the same level as the top of its foot, you are only one cone away from the desired heatwork.
Correcting Poor Heat Distribution:
- Adjust Firing Speed: If you selected a fast or medium firing speed in your cone-fire program, try using a slow firing speed. This allows more time for heat to equalize throughout the kiln chamber.
- Add Hold Time (Soak): Add additional hold time at the final cone temperature. Depending on how heavily the kiln is loaded, slowing the heating speed and adding hold time may be necessary in combination.
Your kiln or controller manufacturer can provide valuable suggestions to improve your firing program. They will likely first ask, “What do your witness cones show?”. Once you change the firing cycle, repeat the procedure above to check for improvements.
Figure 2: Cone 06 has not reached the proper bending angle, indicating an under-fired condition.
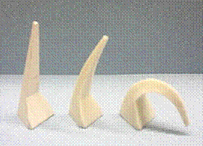
Cone 05 Cone 06 Cone 07
Since minor under-firing may not be obvious to the eye, using cones in every firing will alert you to potential issues with heatwork distribution. When cones confirm a successful firing, you can rest easy knowing you’ve taken a proactive approach to ensure high-quality customer results. Retaining the cones proves that the ware was fired according to the glaze manufacturer’s specifications.
For more information on using pyrometric cones and ceramic firing, visit the Edward Orton Jr. Ceramic Foundation website at Ortonceramic.com. (Text written by the Edward Orton Jr. Ceramic Foundation, edited and reformatted by L&L Kiln Mfg. Inc.)