


PLUG-N-FIRE TROUBLSHOOTING
PLUG N FIRE KILN WON'T HEAT OR IS READING ERROR-1
-
Check Electrical Supply
-
The Plug-N-Fire kiln requires 12.5 amps and is designed to operate on a 15-amp circuit. However, if the circuit is shared with other appliances, the kiln may not receive the full 12.5 amps needed for proper operation. (Moreover, this may overload your circuit, trip your circuit breaker, or even cause a fire.)
-
To rule out insufficient power as the cause, make sure nothing else is plugged into the circuit.
-
Try plugging the kiln into a 20-amp outlet if available. This can provide more capacity for the kiln to draw the necessary current without being affected by other devices on the circuit or wire size.
-
-
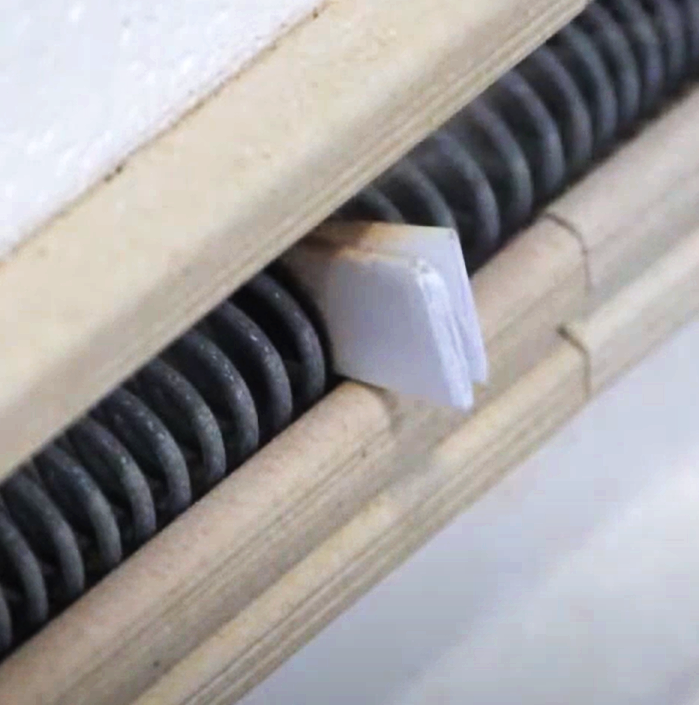
Ensure the hinge switch is positioned properly.
-
When moving the Plug-n-Fire (if you are holding it by the element box), the hinge switch may slightly move upwards. Make sure the switch is still disengaged when the lid is closed. You can lightly tap the element box downward to increase the gap between the cam and the switch.
-
Note: The hinge bar should be able to move easily in the holes in the hinge – if not, that indicates that the gap between the cam and the switch might be too tight.
-
-
Programming
-
Verify that the kiln is programmed correctly and is set to fire. Check if a Delay Time or Preheat Time is included in your program.
-
-
Bad Power Relays
-
Listen for a soft clicking noise from the contactors when the kiln is turned on and should be heating up. This indicates that the relays are switching on and off.
-
If you don’t hear the relays clicking, The relays may not be firing, or the control board might not be signaling them to fire.
-
If you hear the relays but the kiln is not heating, the problem may lie in the power circuit after the relays (most likely, the door switch is not engaging properly).
-
-
-
Aged Elements (see element troubleshooting page)
DISPLAY WON'T POWER ON
-
On/off switch
-
Ensure the on/off switch is in the "on" position. Toggle it off and back on to confirm.
-
-
Fuse
-
Twist open the fuse holder on the side of the controller. Check if the metal element inside the fuse is melted. Replace if necessary (½ amp fuse, L&L P/N L-G-FS05/00)
-
-
Plugs
-
Ensure the plug is fully seated in the outlet. Reseat if needed.
-
While unplugged, inspect the cord for any signs of damage, such as burns, melted areas, or pinches.
-
Examine the plug’s prongs for oxidation, discoloration, or burns.
-
-
Circuit breaker/Power Source
-
Ensure the circuit breaker is on. Toggle it off and back on if necessary.
-
-
Short circuits – DO ALL OF THE FOLLOWING WITH THE KILN UNPLUGGED
-
Check for signs of short circuits, such as burnt wires or frayed ends at wire connectors that may be touching.
-
Inspect for worn wires that could have shorted against the metal casing. Check the wire insulation for damage.
-
Look for dirt or debris inside the kiln. Some types of dirt, like carbon compounds, can be conductive. Vacuum out any visible dirt.
-
-
Control Board
-
If the transformer is functioning and the voltage reaches the control board, but the display remains off, the control board may need replacement.
-
DISPLAY READS FAIL.
-
Initial Thermocouple Test
-
Unplug the thermocouple from the kiln (leaving the control on).
-
Jump between the two terminals on the thermocouple jack to complete the thermocouple circuit to the control. (You can do this by holding a paper clip across the thermocouple jack prongs).
-
The display should now read the room temperature for that thermocouple.
-
-
Evaluate the Results
-
If the display reads room temperature, the thermocouple is faulty and needs to be replaced.
-
If the display does not read room temperature, there may be a problem with the thermocouple wire in the control thermocouple harness, or the control itself may be faulty.
-
DISPLAY READS 2400 OR CPLT ON START-UP DESPITE KILN NOT BEING THAT HOT. THIS INDICATES A THERMOCOUPLE FAILURE.
-
Check the Thermocouple End
-
Inspect the end of the thermocouple carefully. A crack may form when the kiln is hot but appears normal when cold.
-
If the thermocouple end looks severely corroded and you’re getting error codes, it’s best to replace the thermocouple.
-
-
Check the Thermocouple Circuit
-
Ensure all thermocouple lead wires are securely connected and that the thermocouple jack is firmly inserted into the female jack on the kiln.
-
Check where the thermocouple lead wires enter the thermocouples. If the wires are loose, tighten the screws to ensure a firm connection.
-
Look for signs of corrosion on the connections. If corrosion is present, pull off each connection and reseat it to scrape away the buildup.
-
Inspect melted wires inside the element cover box.
-
Verify the connections to the control board. Reconnect the thermocouples if needed to improve contact.
-
-
Replace the Thermocouple
-
If the thermocouple is faulty, replace it with a new one.
-
Avoid attempting temporary fixes like twisting the wire ends together. This may cause failures during important firings and result in inaccurate temperature readings.
-
KILN FIRES TOO HOT OR COLD
-
Factory programs vs custom programs
-
The factory programs use Orton software to adjust the final temperature based on firing speed, which affects the total heat work and the final cone achieved. These algorithms do not consider all the factors, so you may need to adjust using a Cone Offset or Thermocouple Offset.
-
Custom programs do not have this feature—you must manually input the final set point temperature when using these programs.
-
-
Hold Times
-
Be cautious with hold times. Even a 10-minute hold can significantly increase the total heat-work and affect the final cone.
-
Slow cooling also adds heat-work.
-
You can use hold times to compensate for underfired pieces but test small increments.
-
-
Thermocouple Drift
-
Over time, thermocouples can drift in accuracy. You may need to adjust the Thermocouple Offset or Cone Offset settings as the kiln ages to maintain accurate firings.
-
KILN STALLS
-
Thermocouple Wire Failure
-
If thermocouple wires touch the hot kiln case, they may melt, causing the kiln to stall, display random error codes, or prematurely signal COMPLETE. The kiln may also refuse to increase in temperature and continue running indefinitely.
-
If restarted, the kiln may work temporarily, but the millivolt signal from the thermocouple wire could be grounding or shorting due to melted insulation. This results in the temperature being misread at the point of failure rather than inside the kiln.
-
The thermocouple lead harness must be replaced if this occurs.
-
-
-
Thermocouples close to the end of their useful life can cause some of these same problems.
-
Sometimes excessive ambient temperatures (over 125°F) around the control can cause stalling too.
-
Corroded connection points can also cause stalling.
SERVICE FOR YOUR KILN
-
Where to get service
-
See service document
-
-
Where to buy parts
-
You can order parts for your L&L Kiln through your local distributor or from the factory. Standard Parts are typically shipped the day or two after an order is placed.
-
-
REPLACEMENT ELEMENTS
-
Replacement Elements made by L&L Kiln Mfg., Inc. are designed for each individual model for long life and superior performance. Good element design is a complex balance of watt density, design voltage, stretch ratio, wire gauge, element length and material. It takes many hours and years of experience to design a good element for each model. Do not expect an outside supplier with no interest in your kiln performance or long experience with L&L kilns to spend the necessary time to do this right. In the end you will not save money. (see element troubleshooting page)
-