

DaVinci Kiln Assembly Instructions
INSPECTION
When Your Kiln Arrives
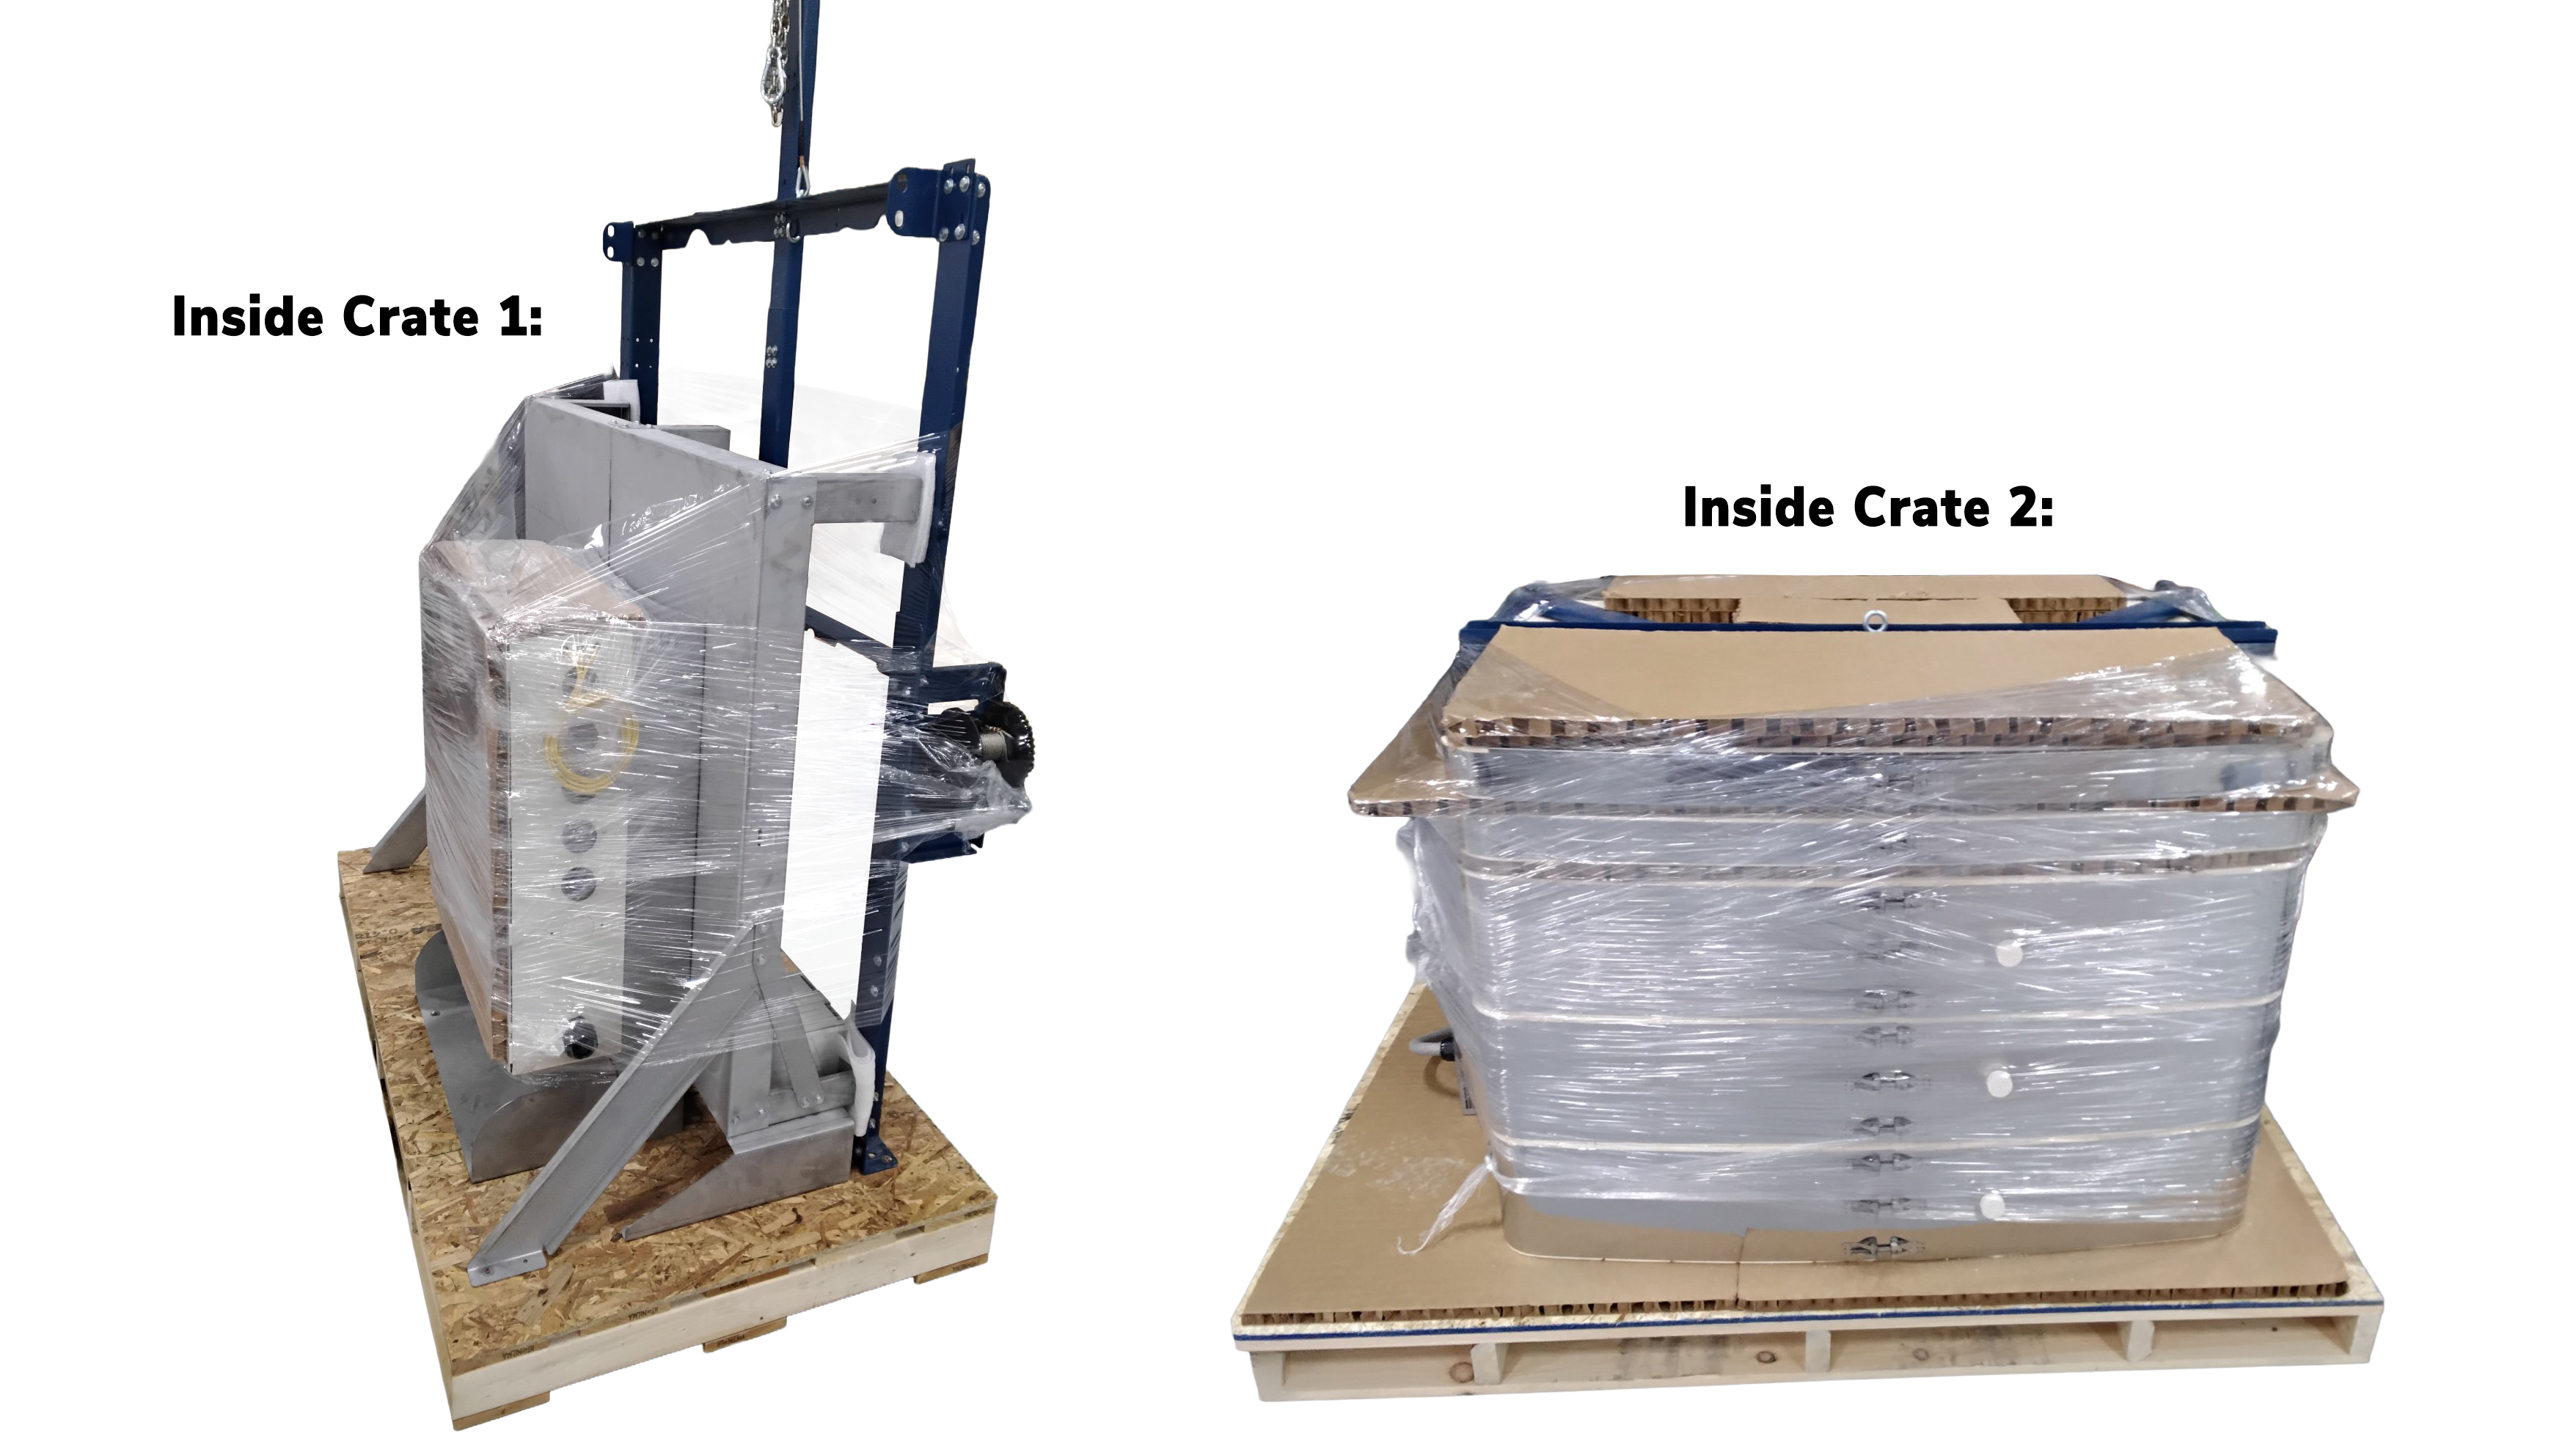
- Your kiln will arrive on two or three crated skids, depending on the model and accessories ordered.
- Inspect the skids for damage. If you notice any, either refuse the shipment or unpack the kiln in the driver’s presence so you can file a damage report with the freight company.
- Call our office if there is any damage. For more information, refer to the Shipping, Receiving & Inspecting Kilns page.
Unpack the Crates
- Carefully remove the crating boards from each skid.
- One crate contains the kiln stand, winch assembly, control panel, and additional accessories.
- The other crate(s) contain the kiln sections (stacked in reverse order for proper setup), the kiln top (lid), the kiln bottom (floor)
ASSEMBLY
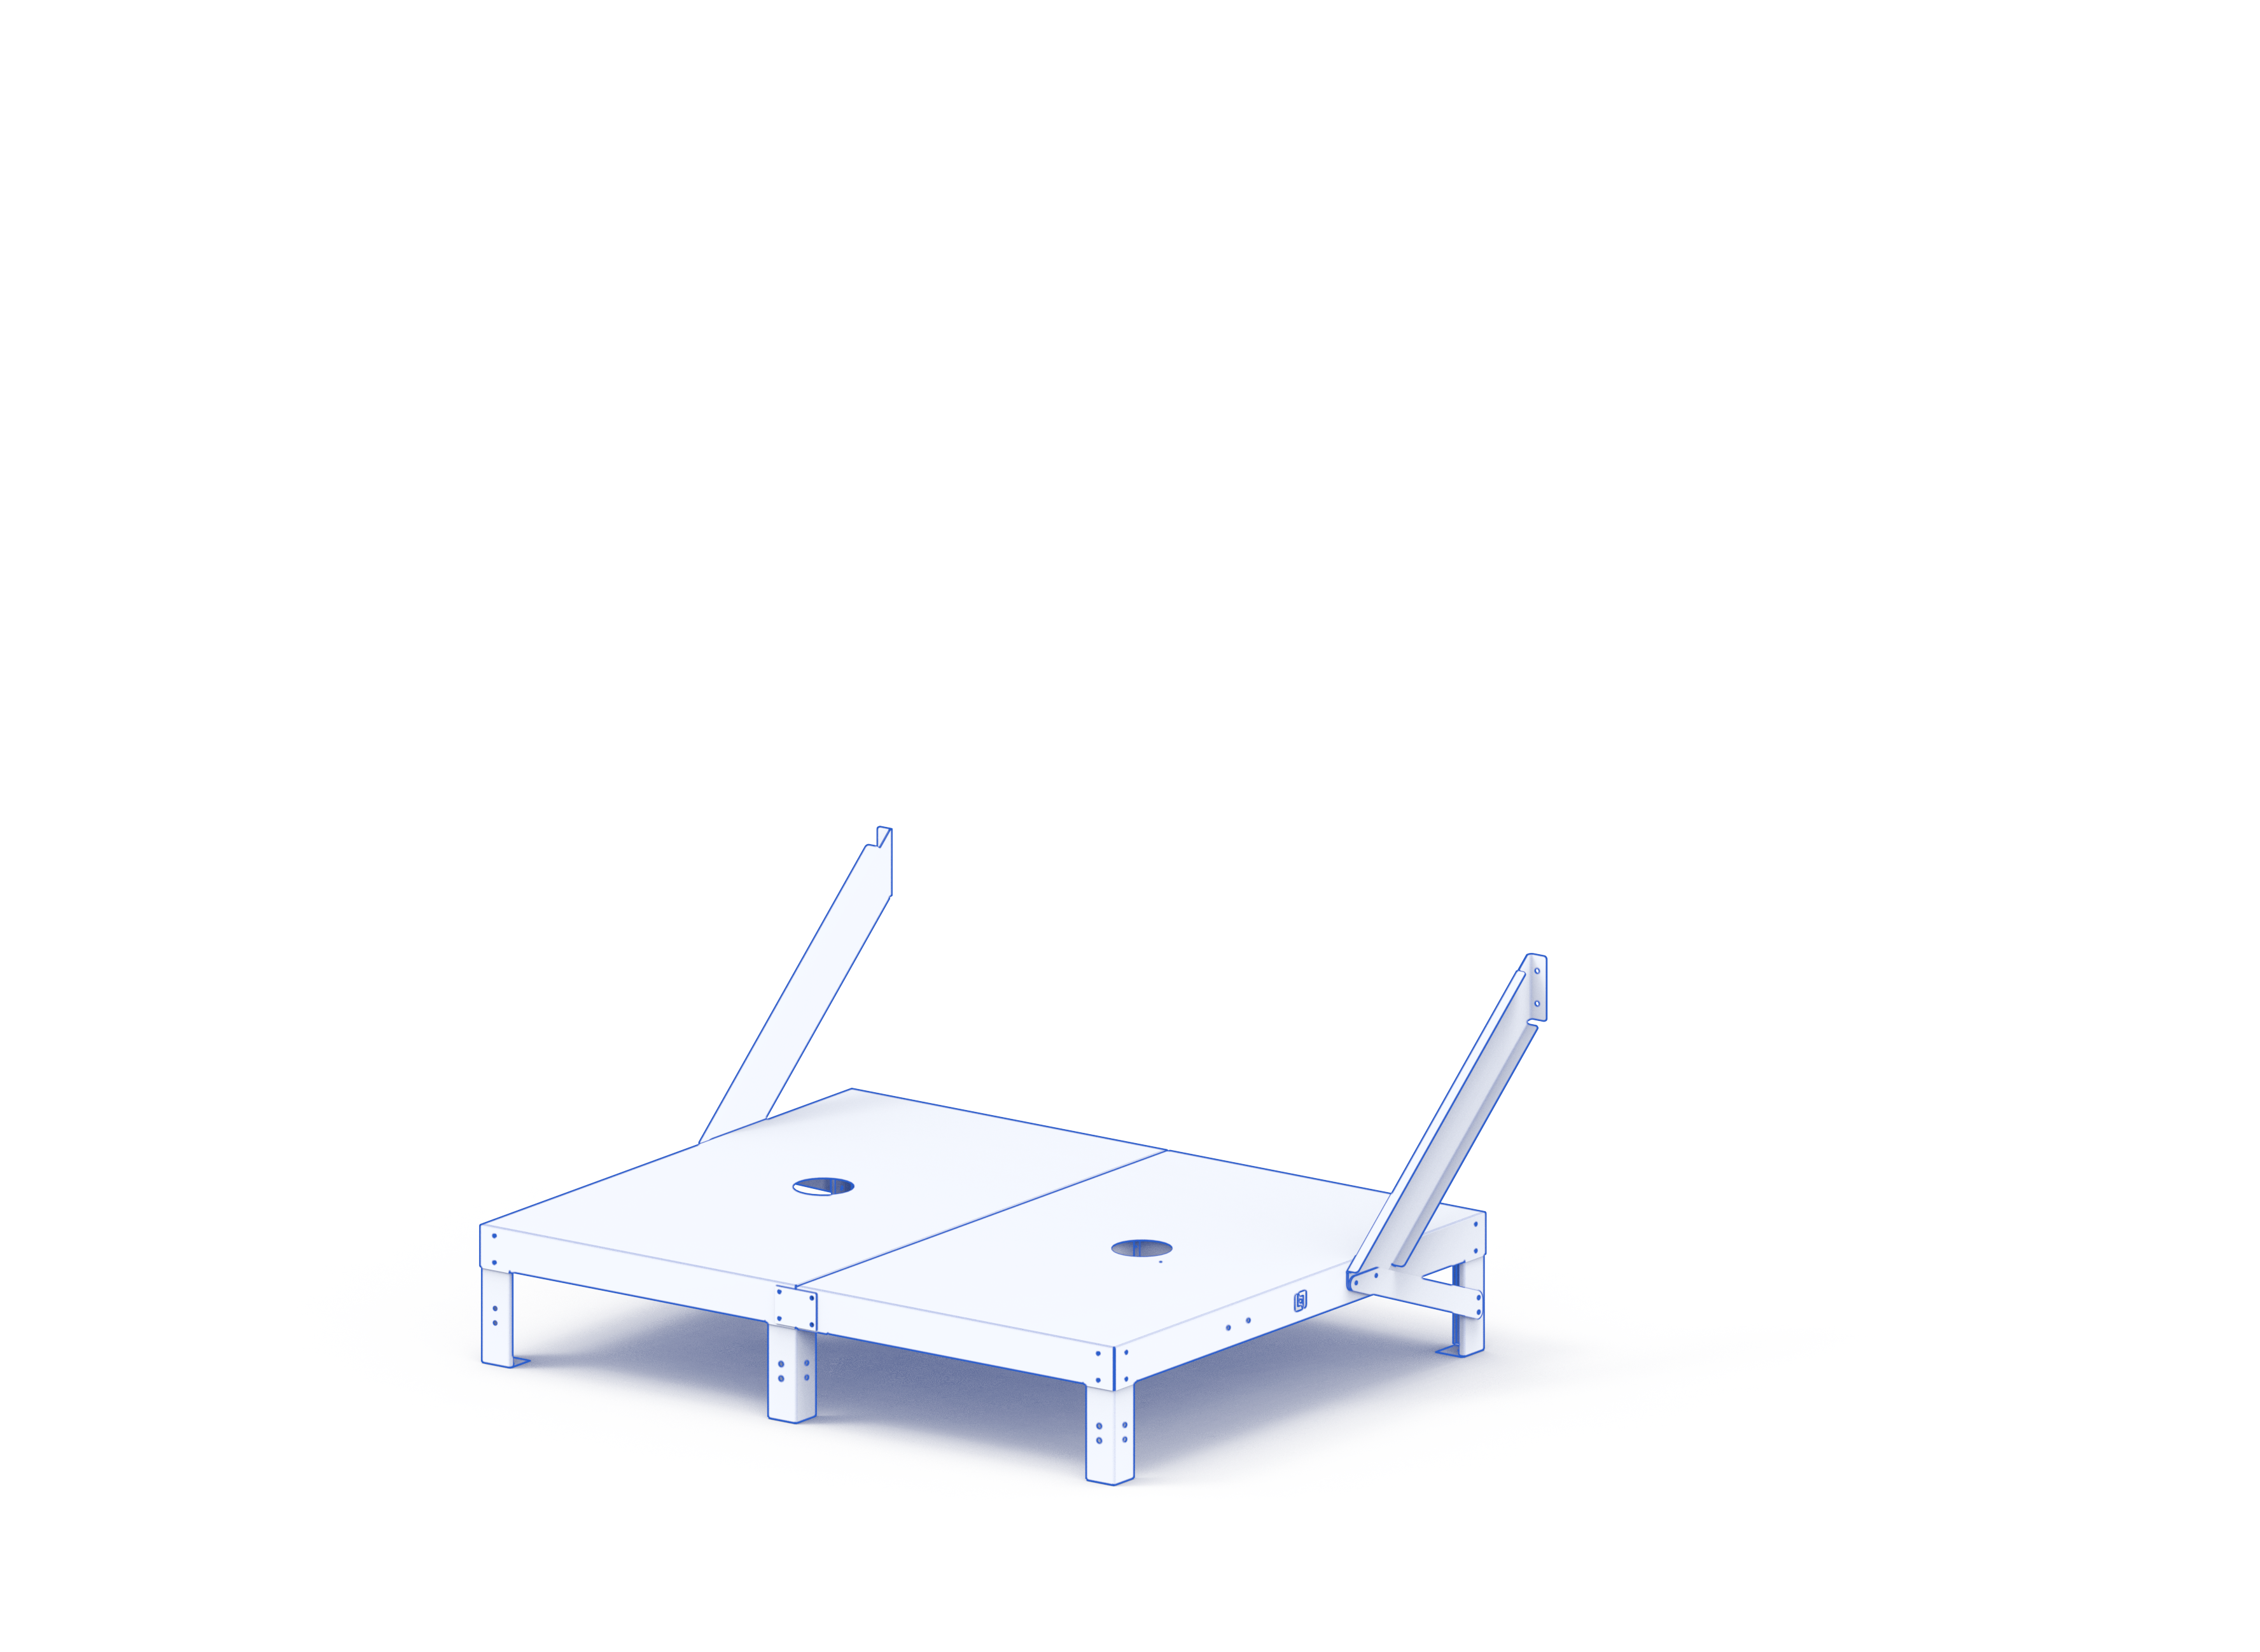
Set Up the Stand
- Place the kiln stand on the floor in your desired location and ensure that it is level.
- Refer to the Preparation & Installation page for detailed information on local codes, ventilation requirements, and clearances.
- If a vent is supplied and must be attached to the bottom, do so now.
Attach Winch Assembly
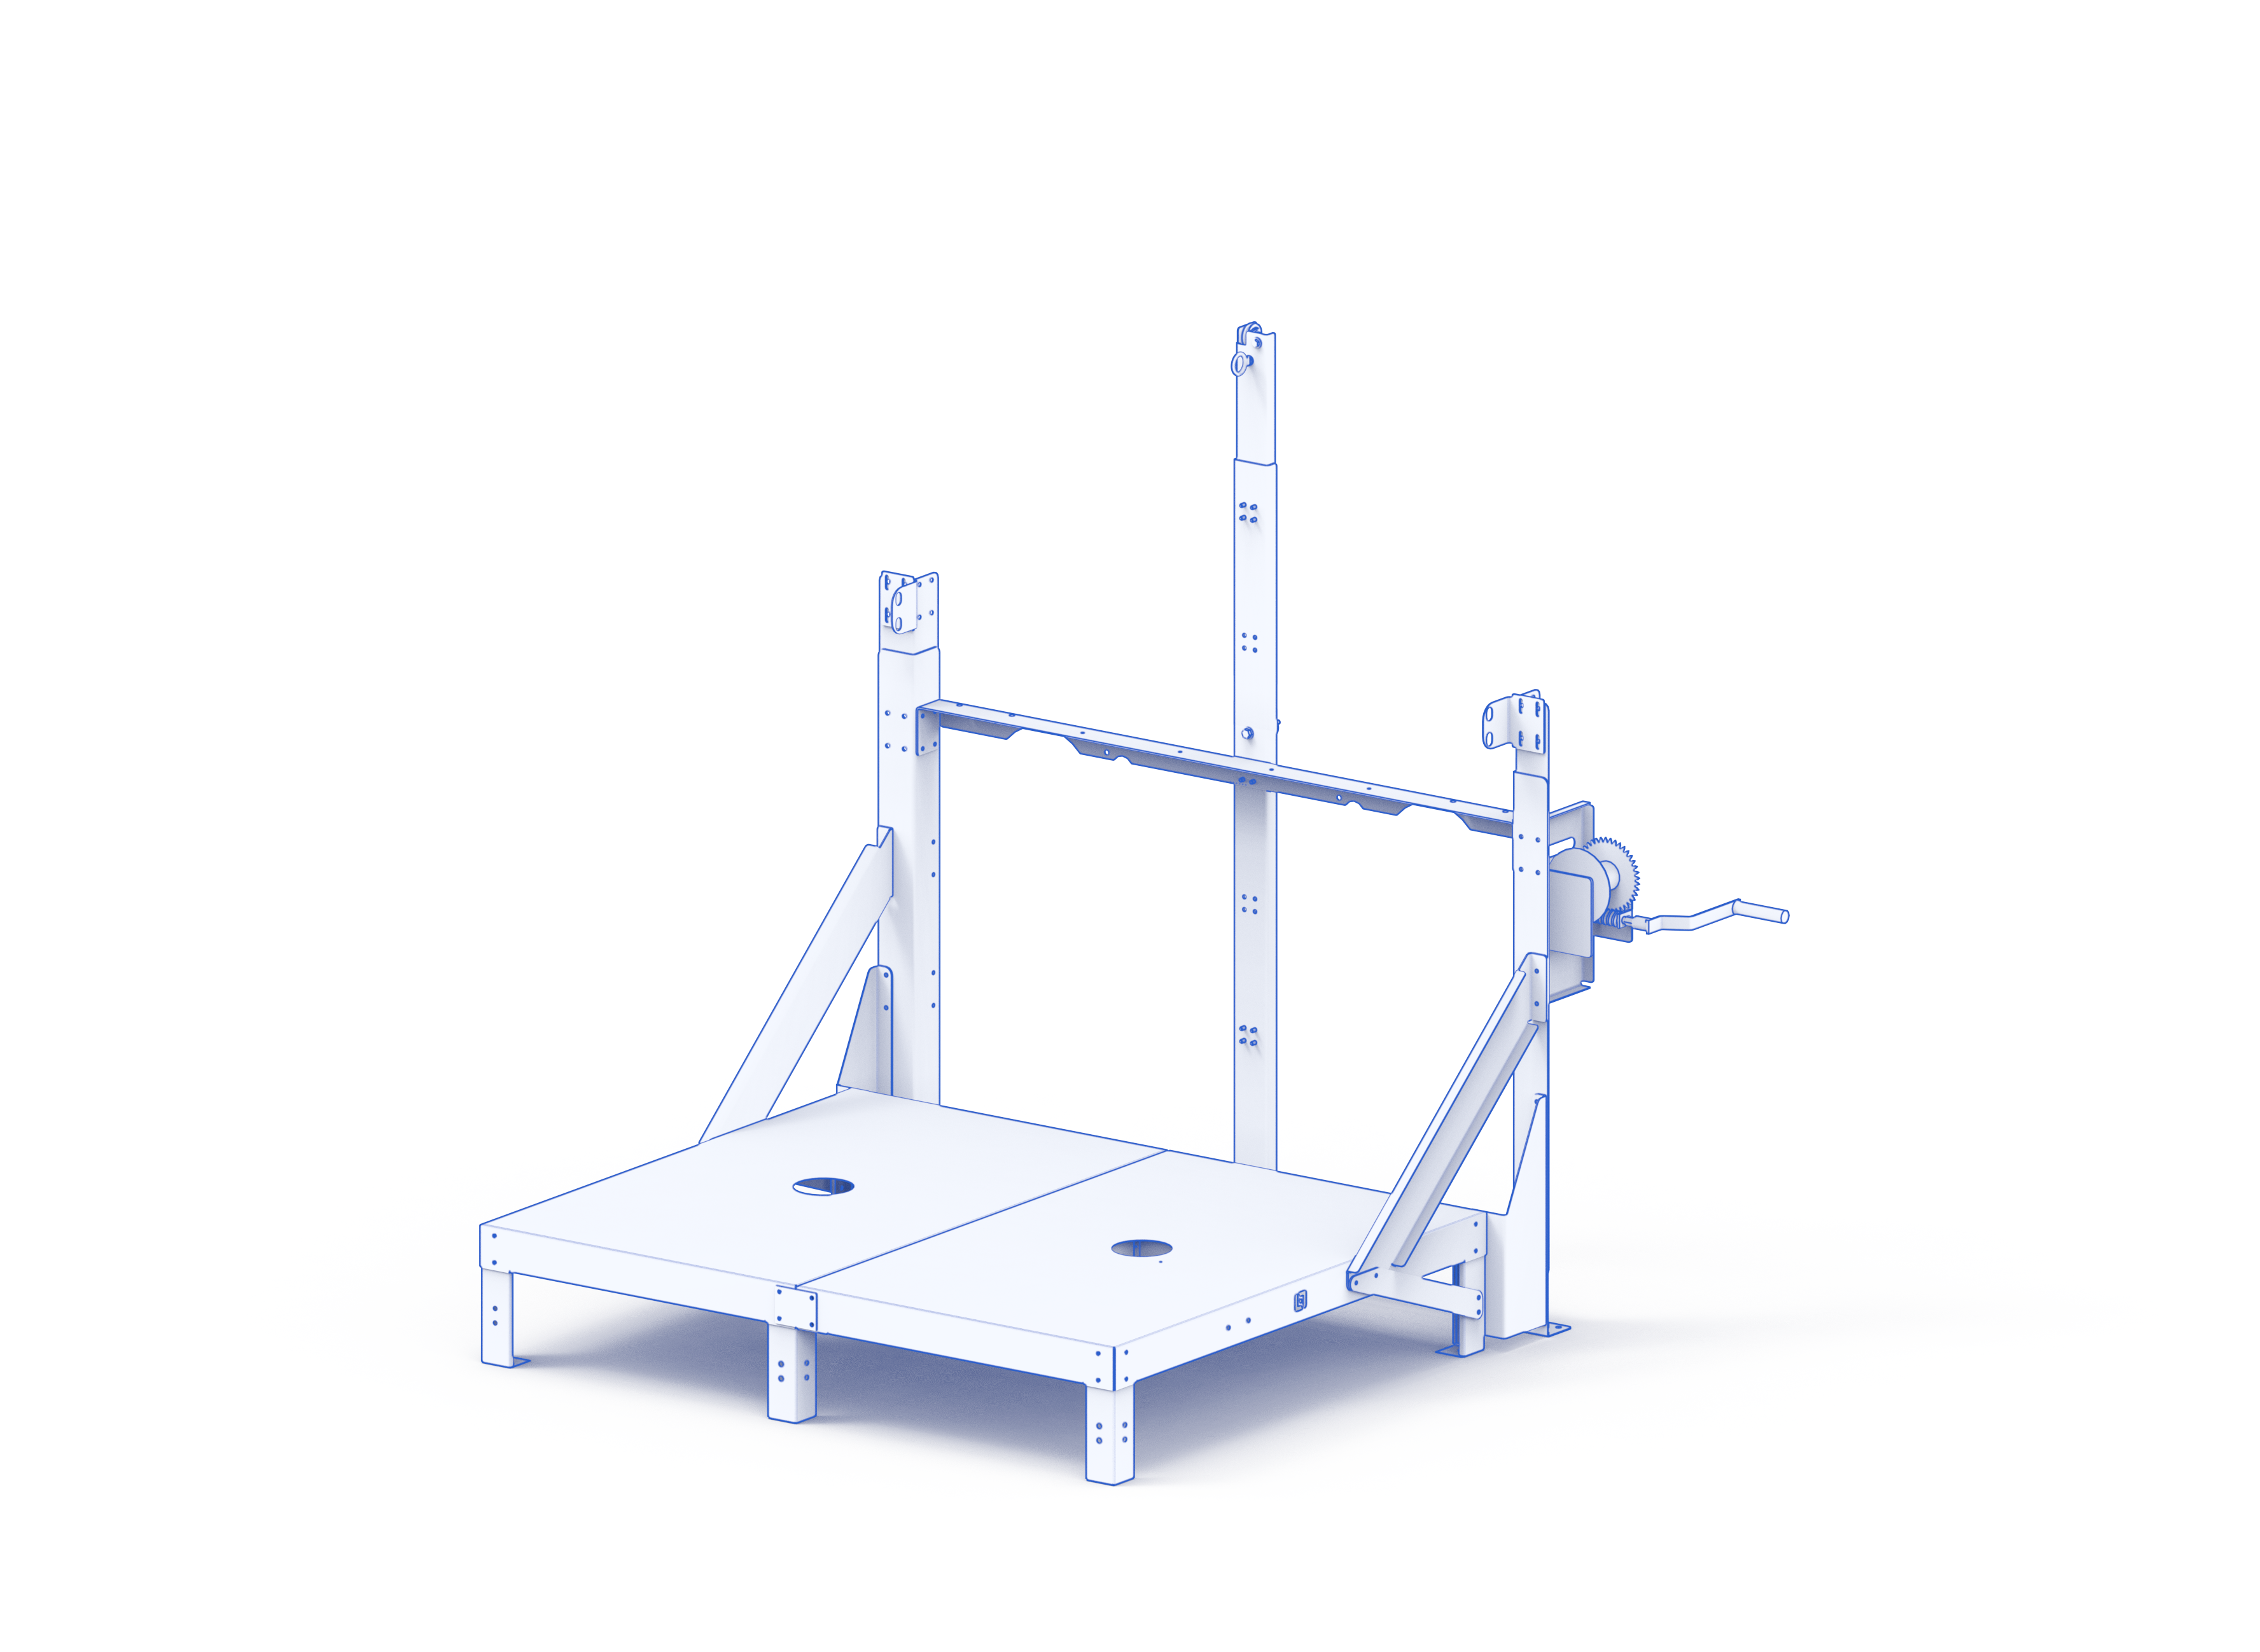
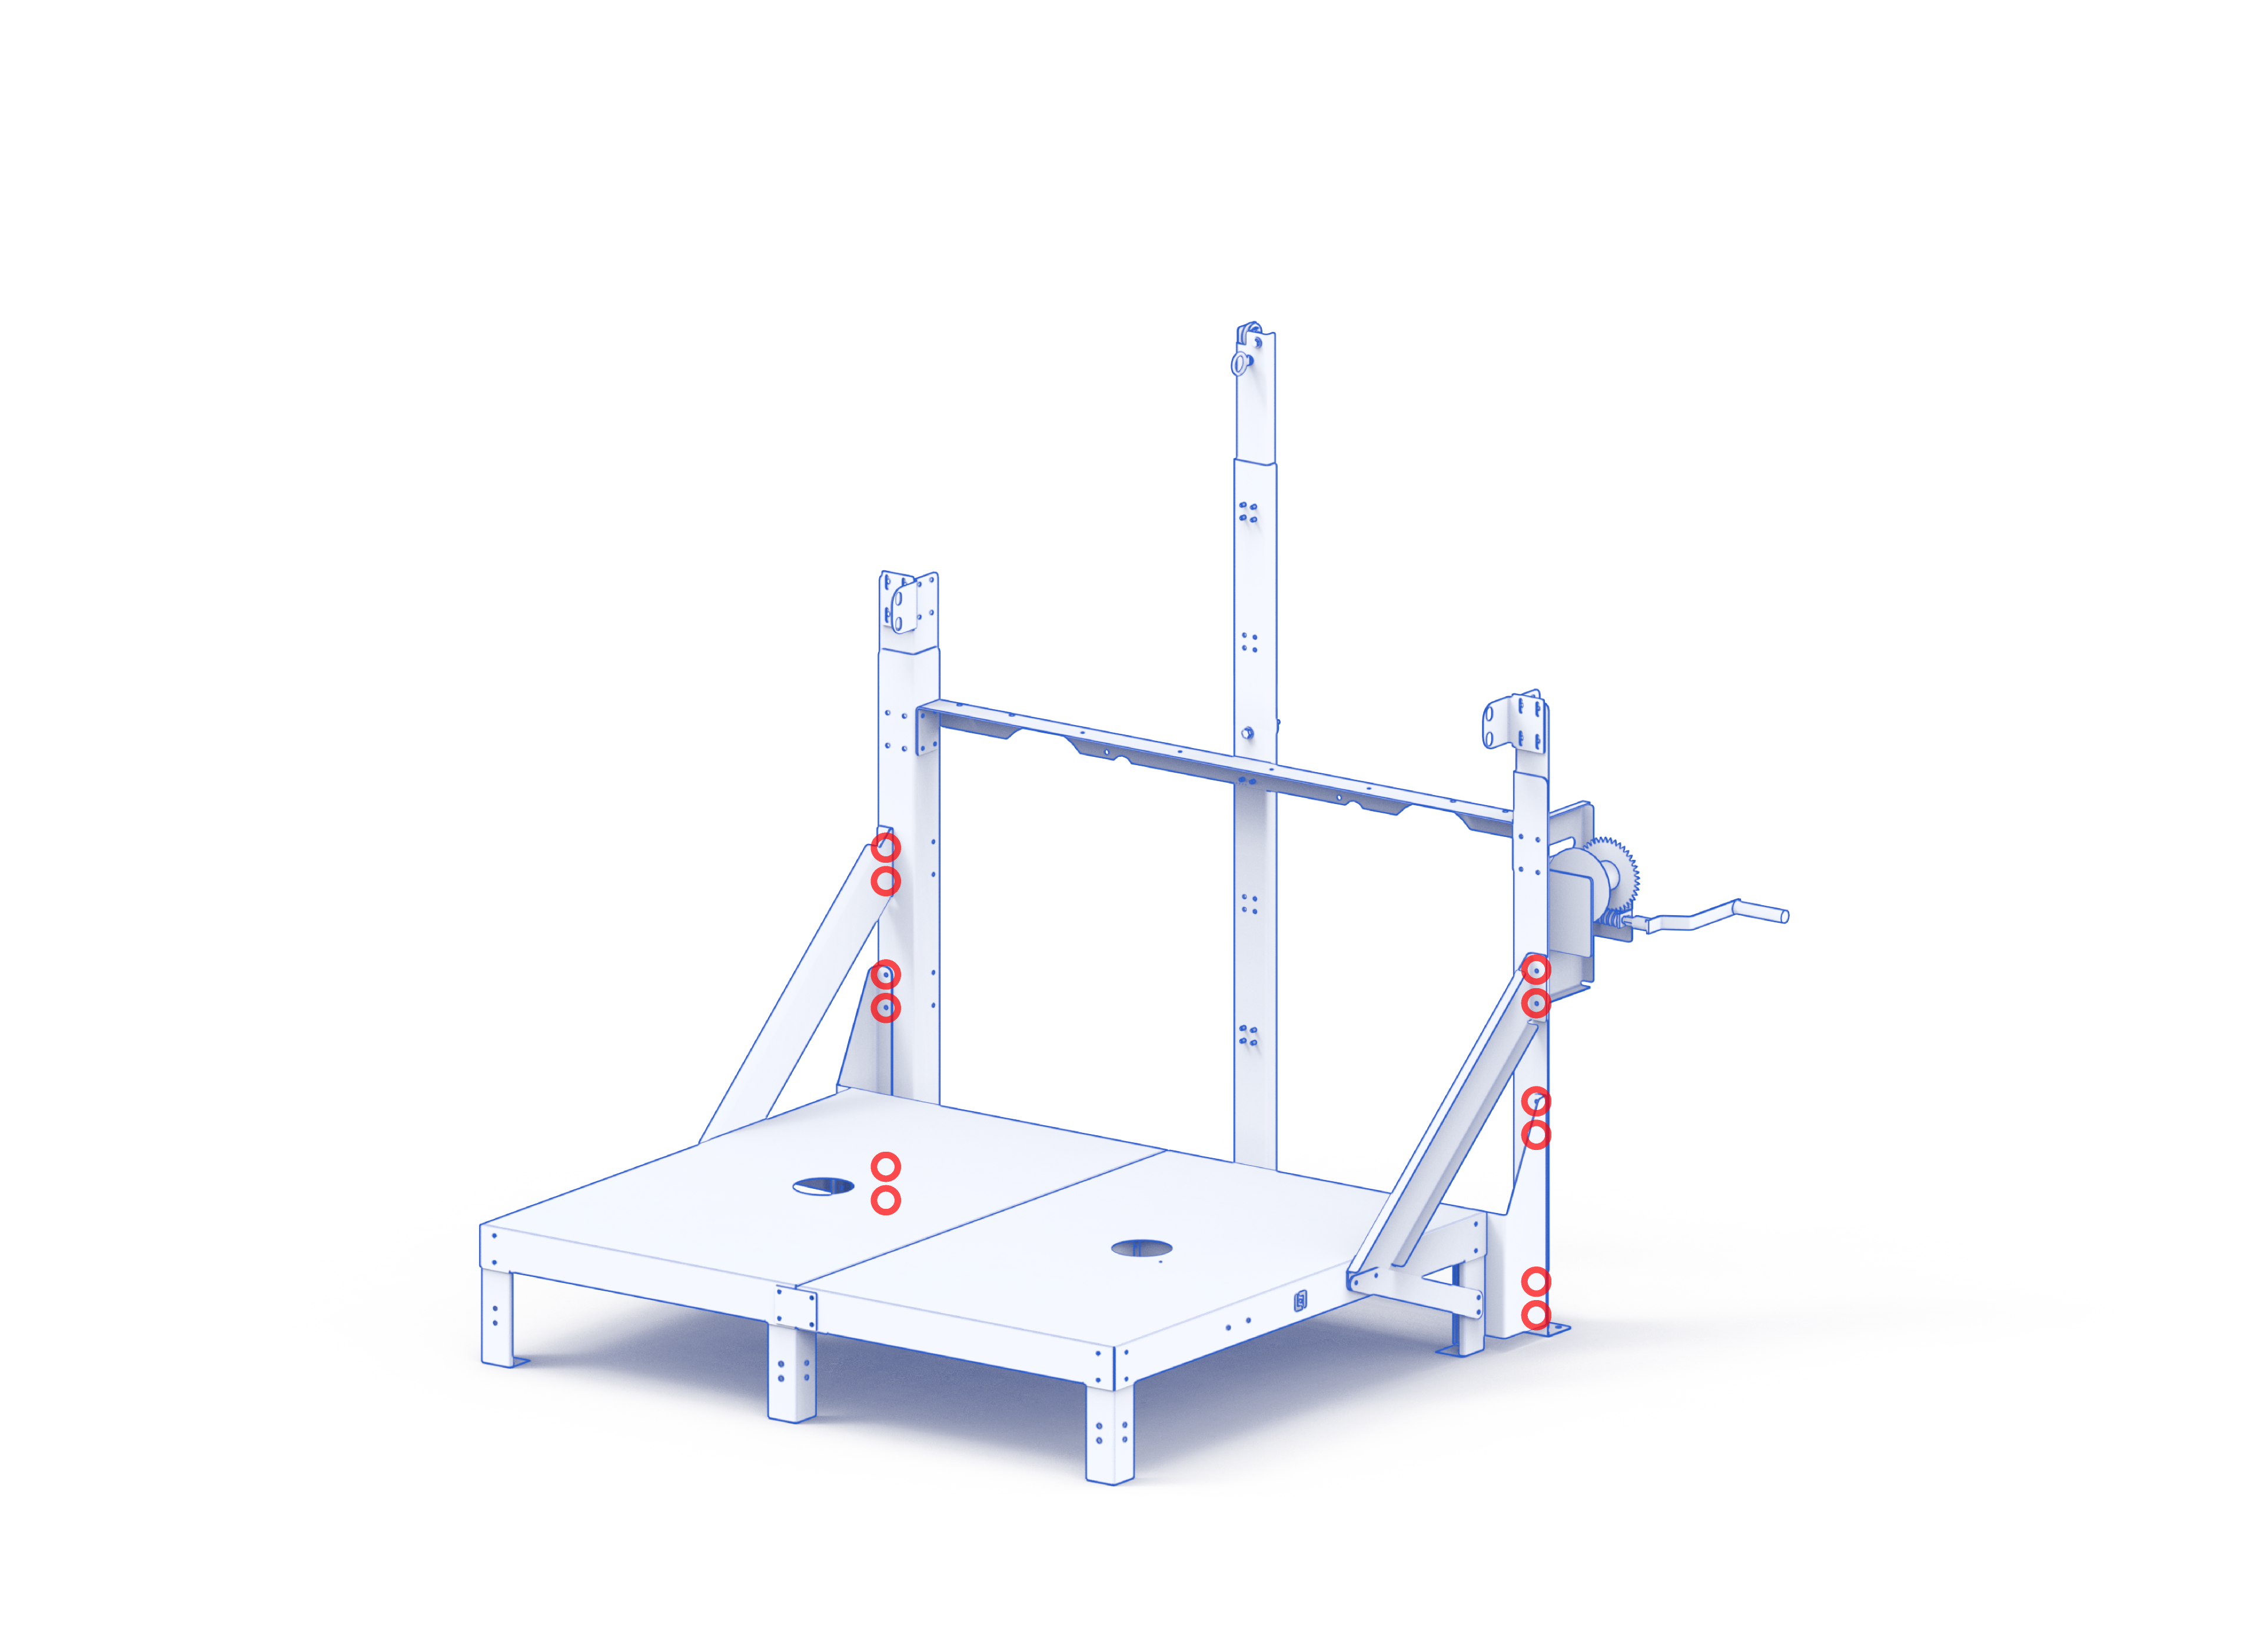
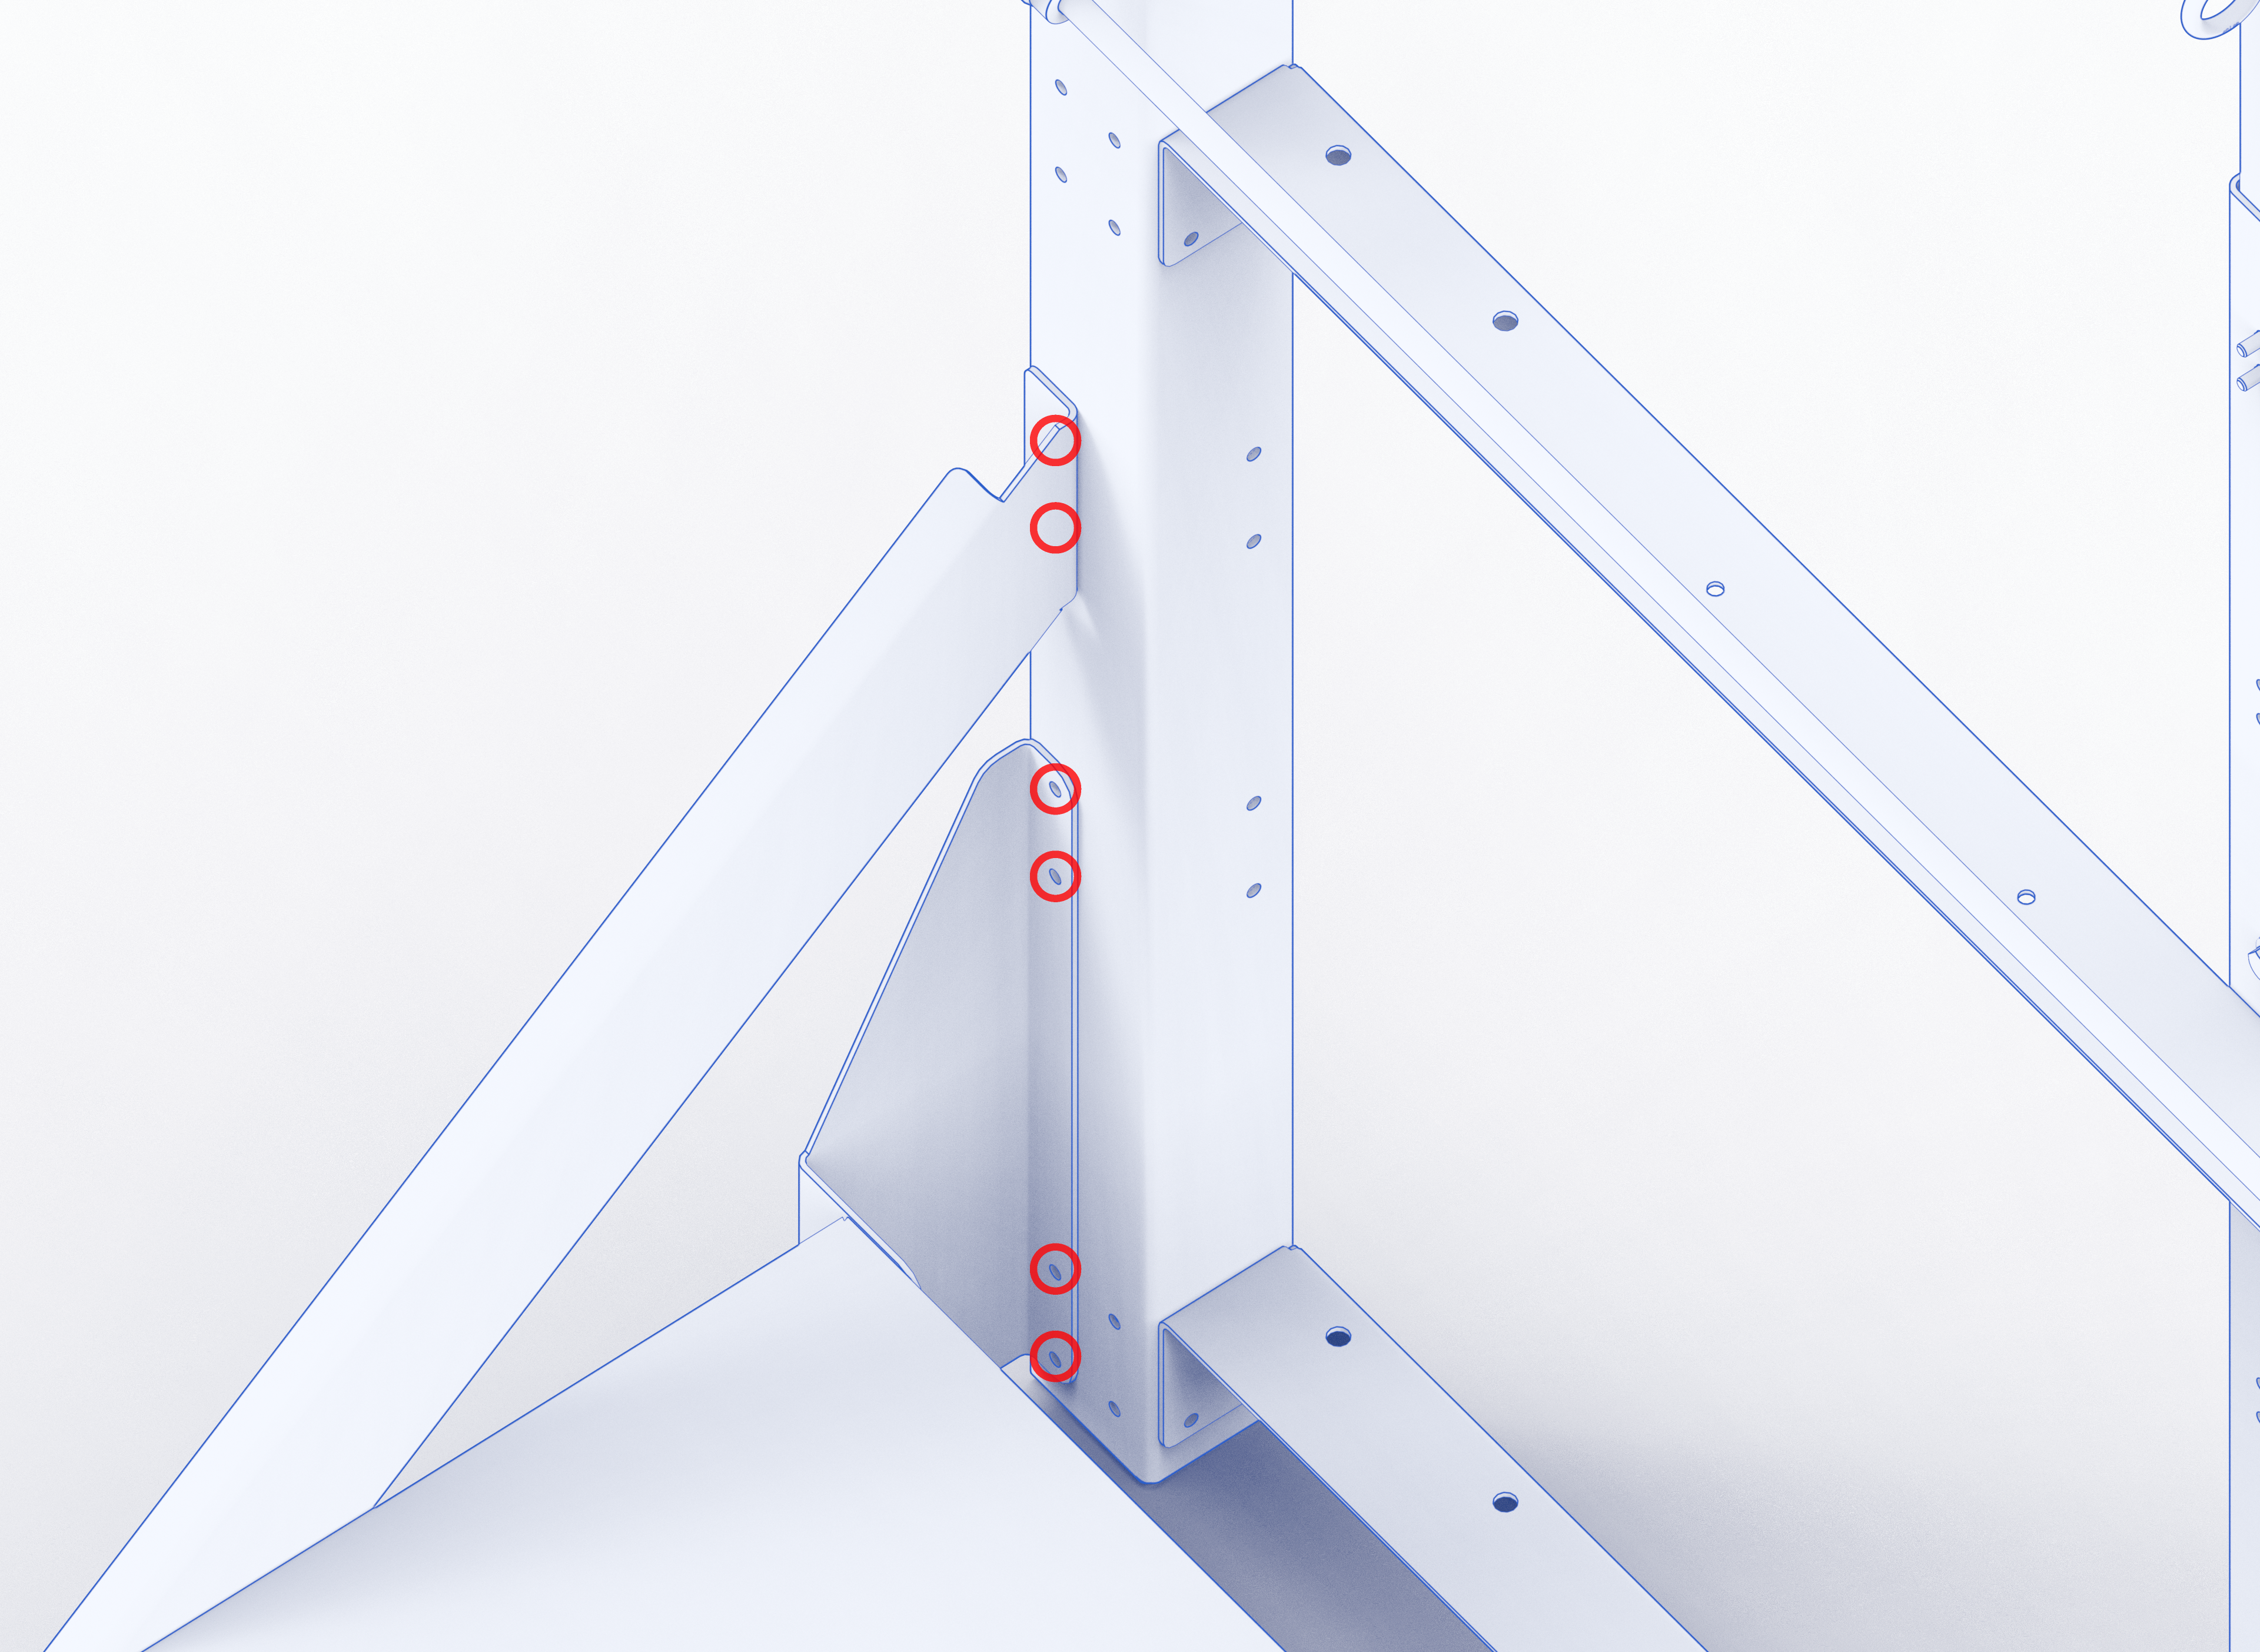
- Place the Winch Assembly directly behind the kiln stand. Ensure that the bolt holes are aligned.
- Attach the assembly to the stand using 12 provided nuts and bolts. There will be 6 bolts on each side of the assembly.
Set lid aside
- When opening the second crate, the lid will be on top. Place the lid aside somewhere safe.
- Take note of the hinge bar and spacers. These will be important later when attaching the lid.
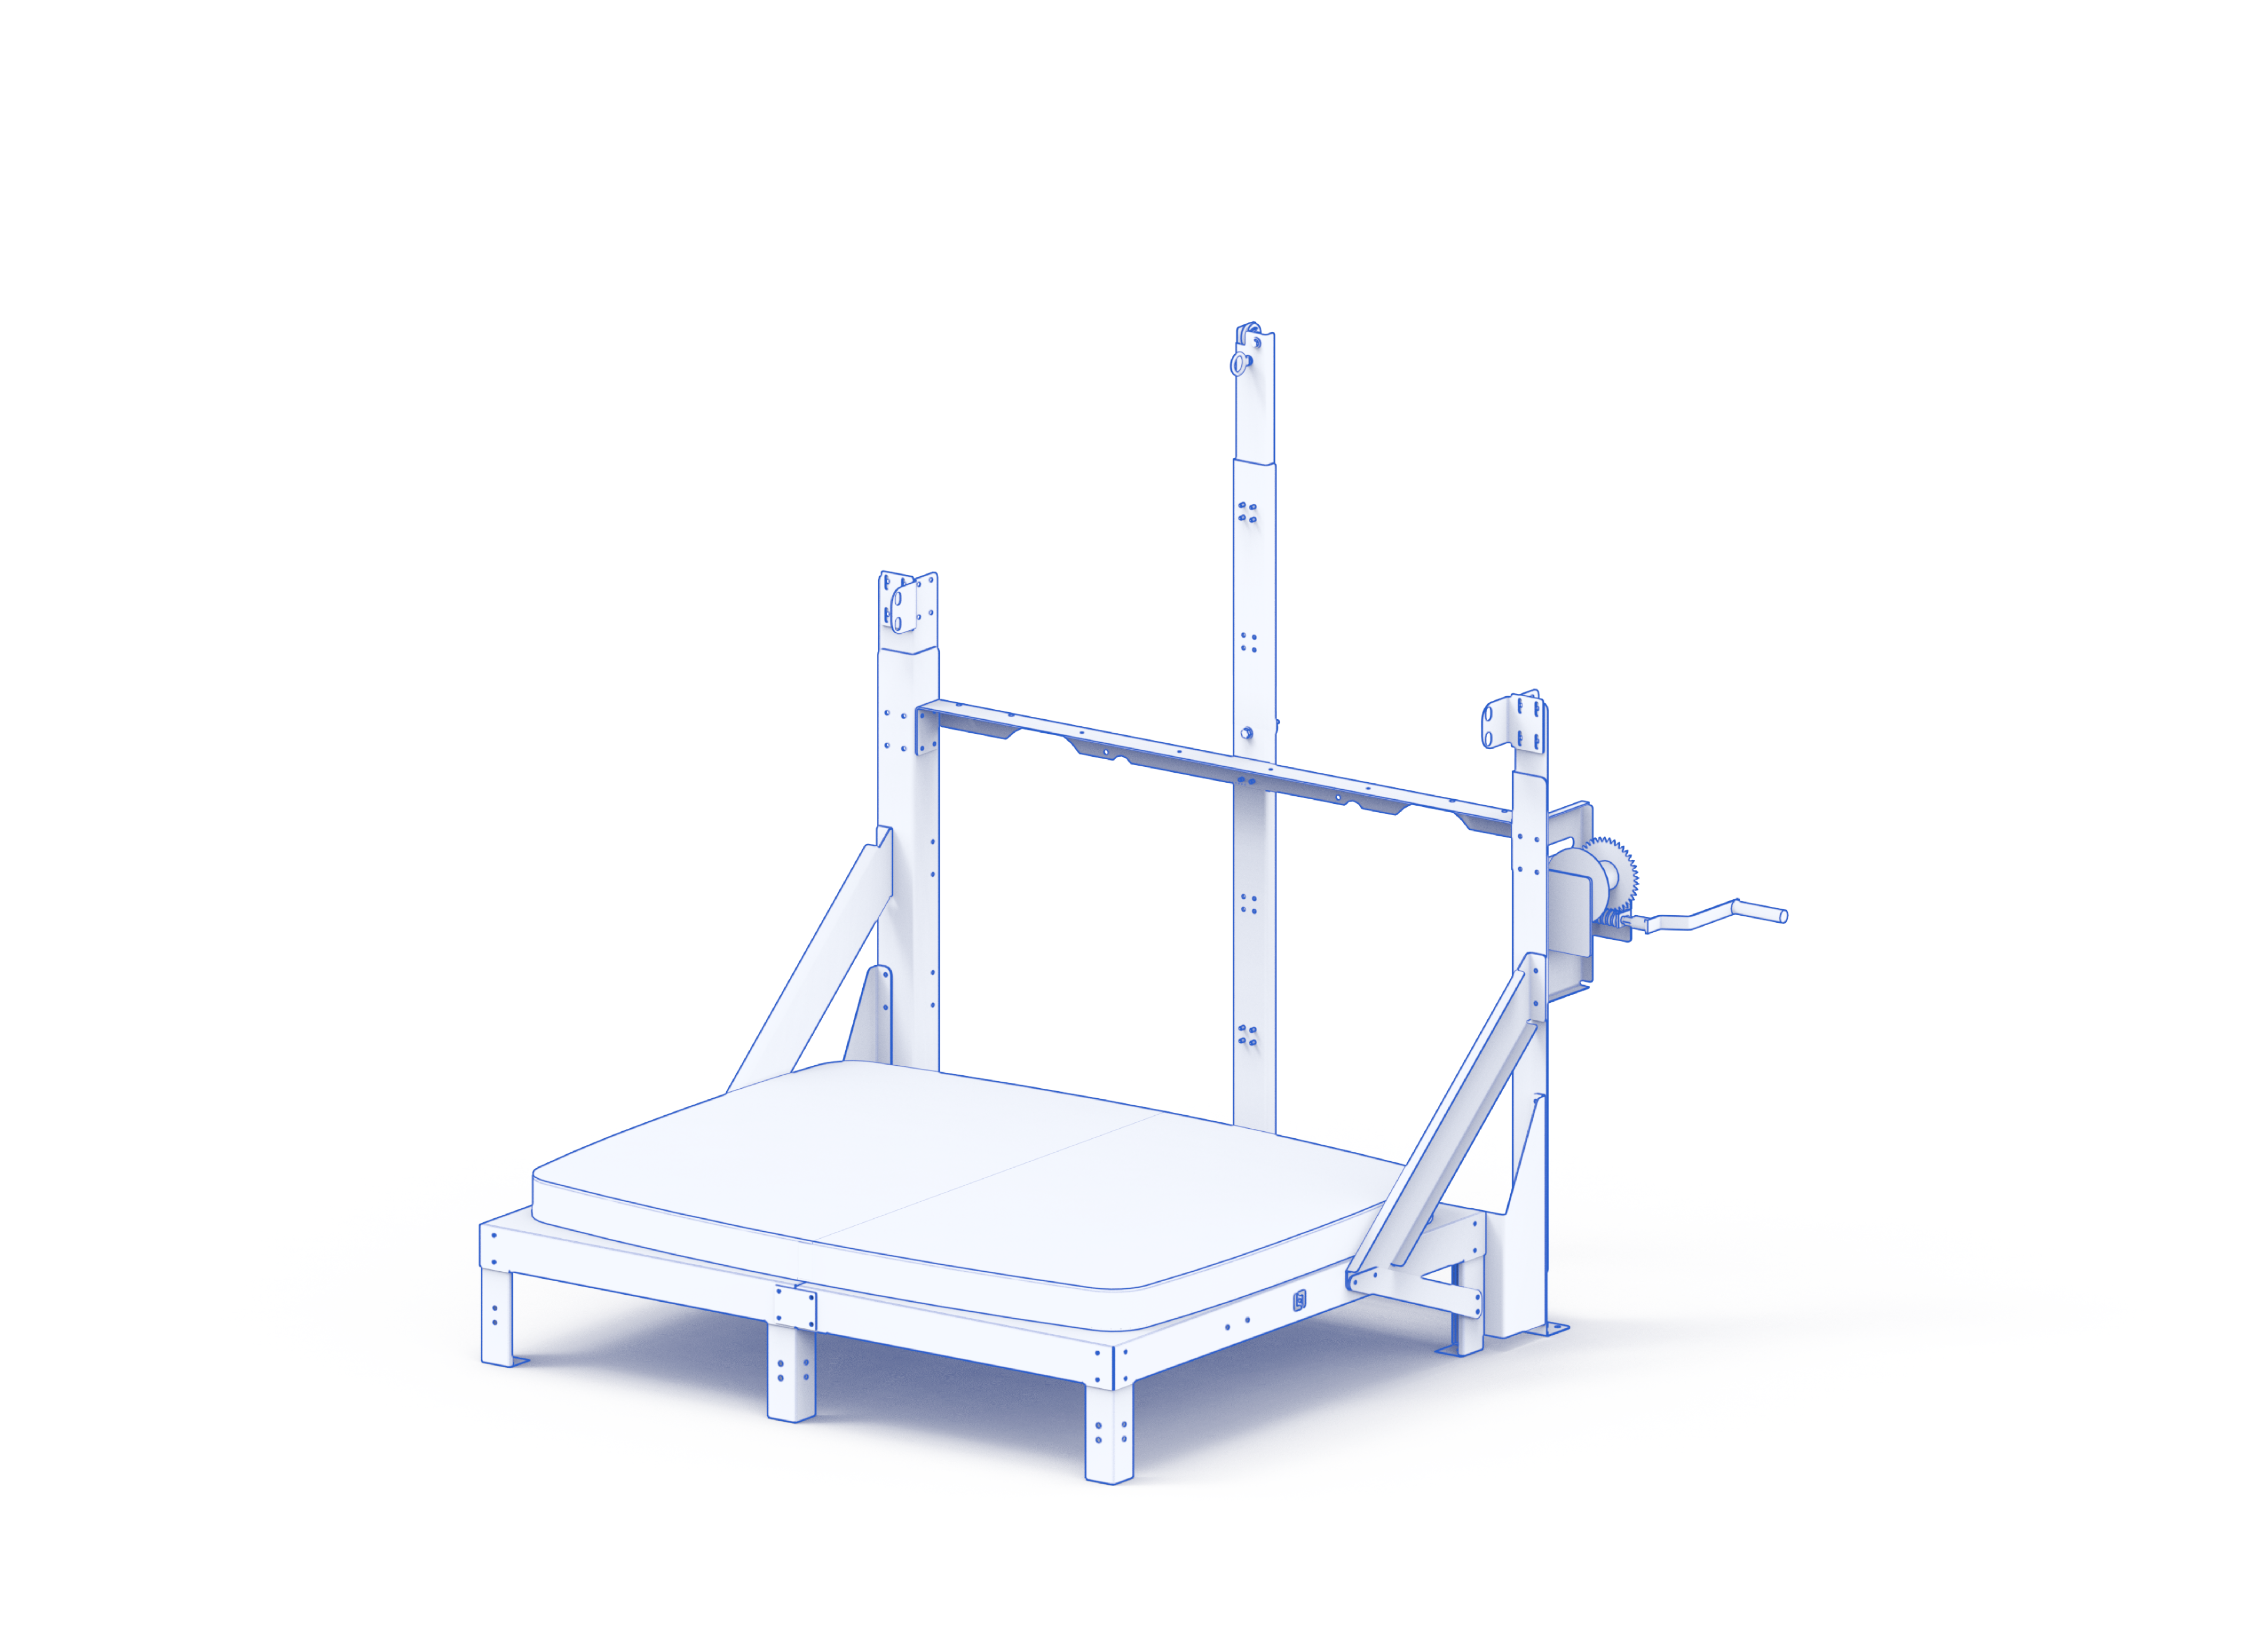
Place the Bottom Slab onto the stand
- Gently place the bottom onto the kiln stand.
- Ensure that the slab is perfectly centered on the kiln stand.
Stack the Kiln Sections
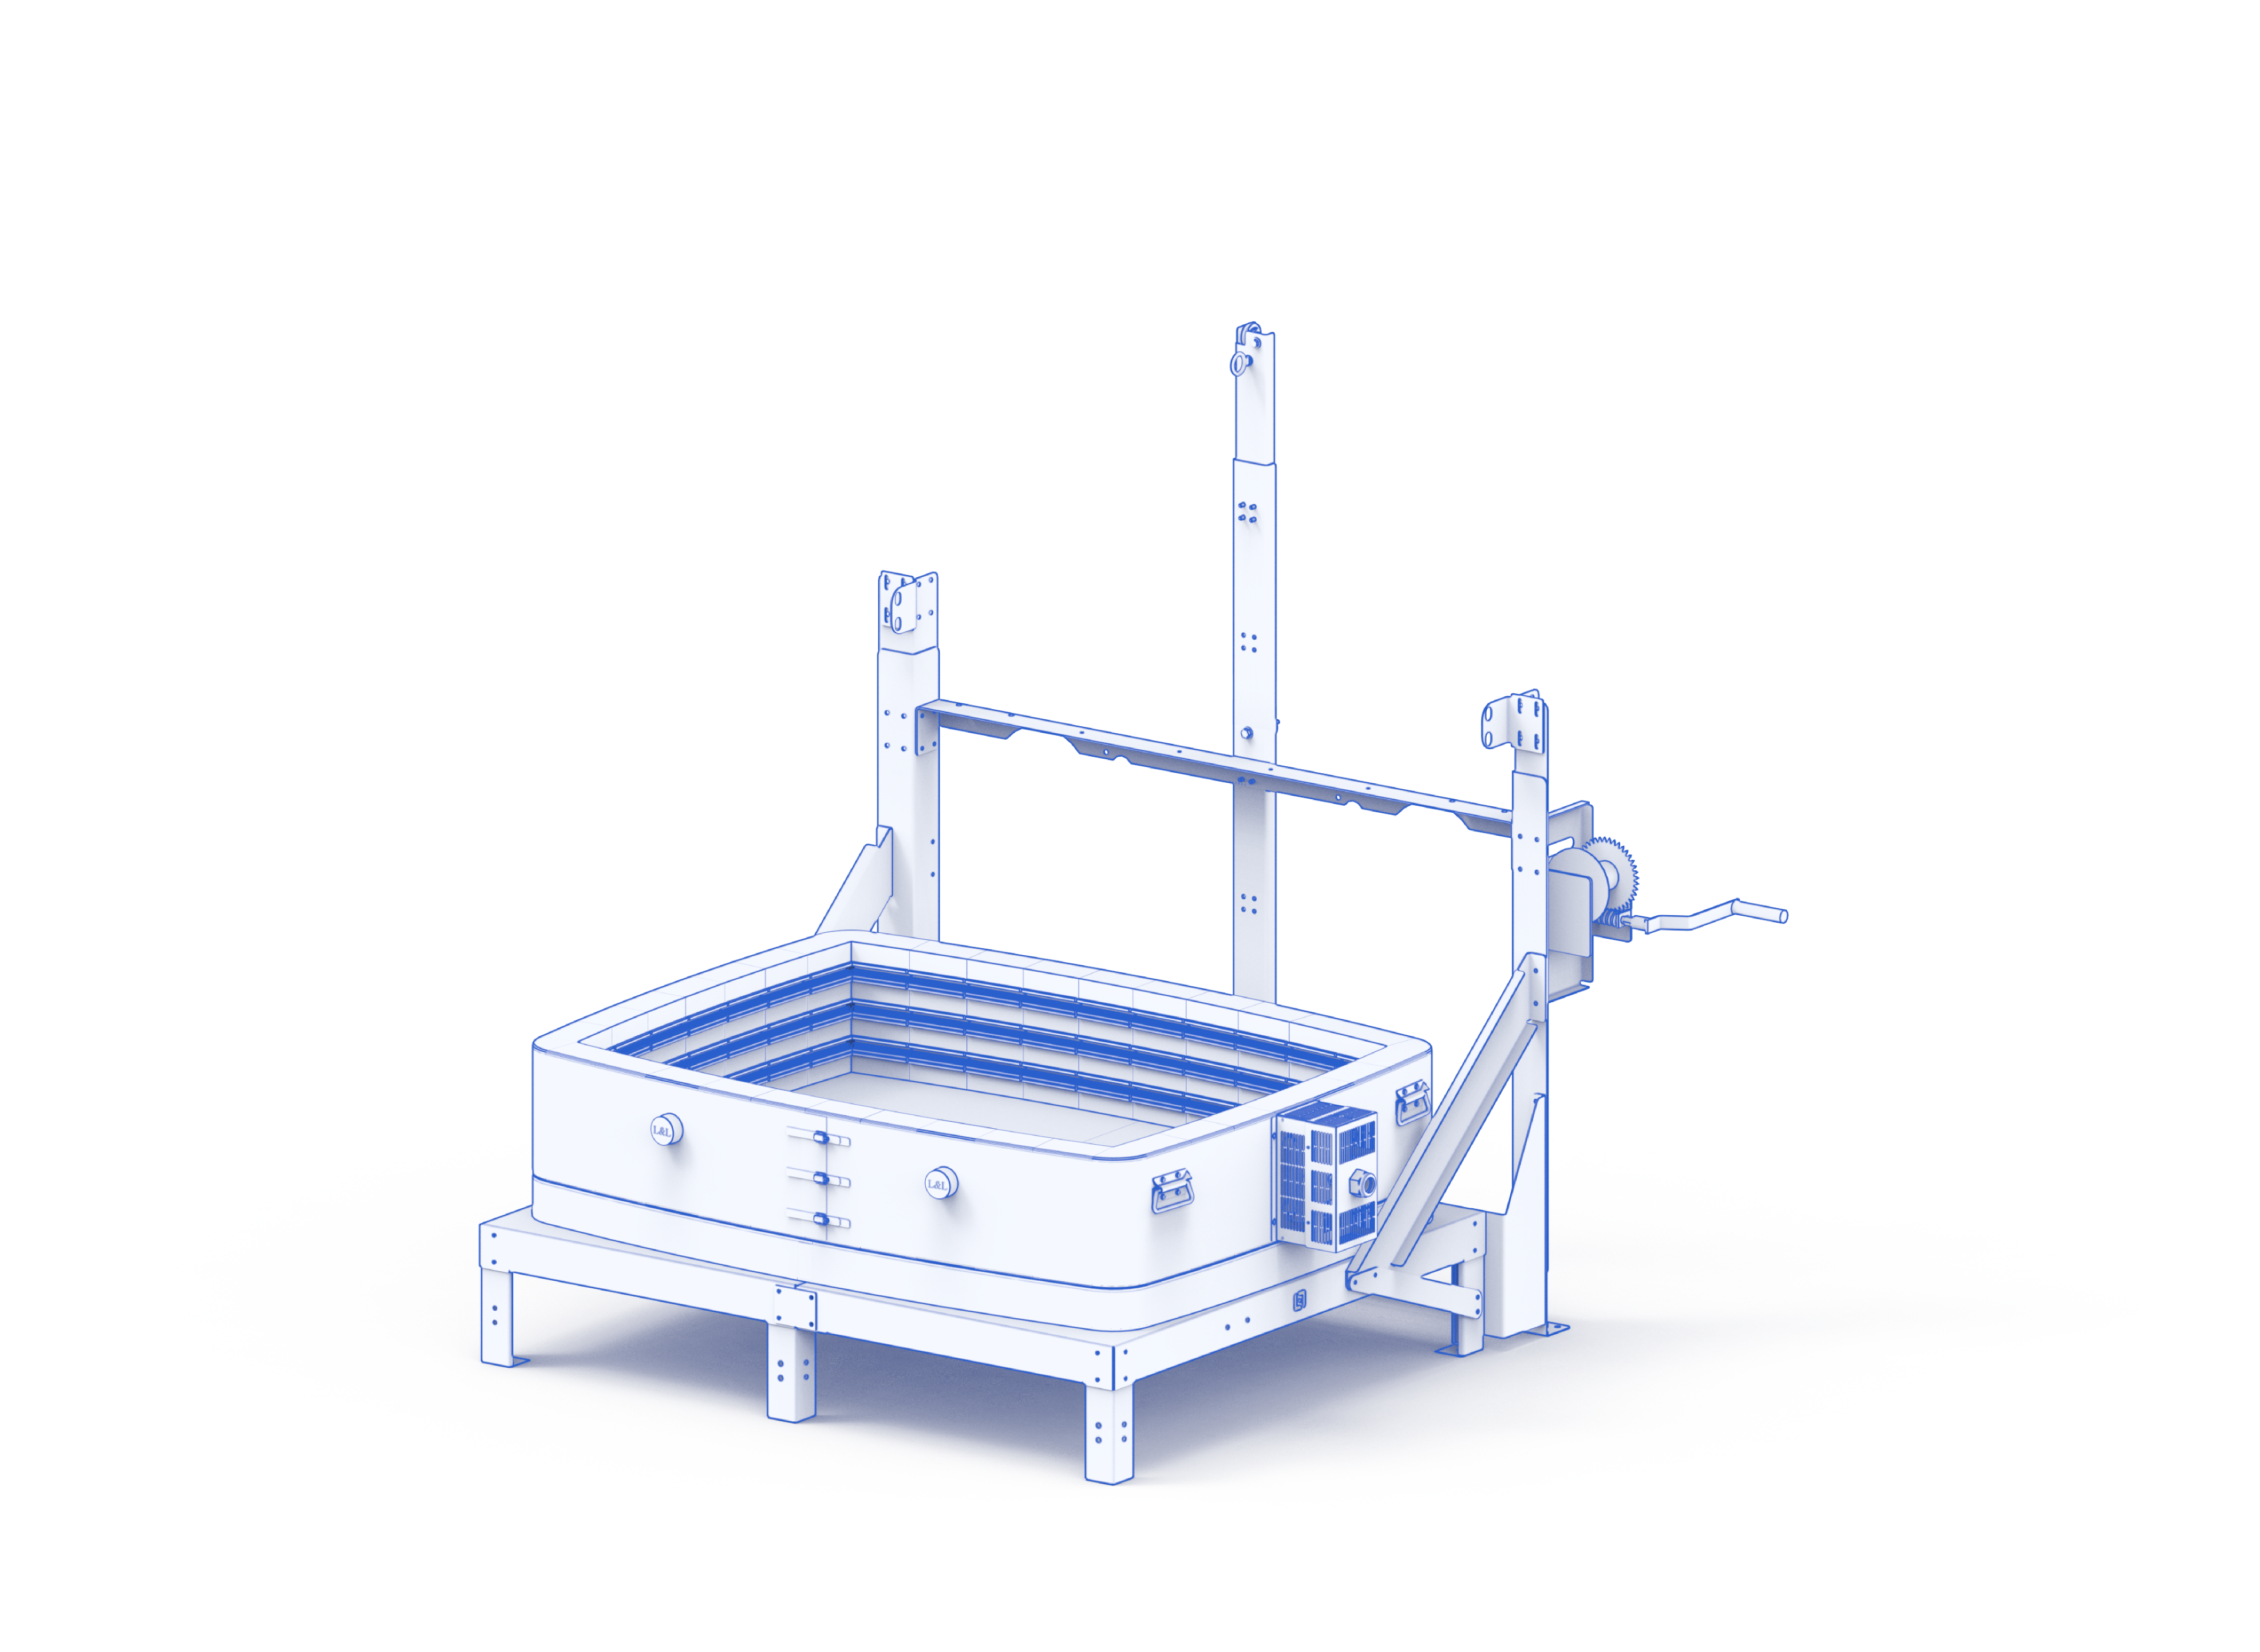
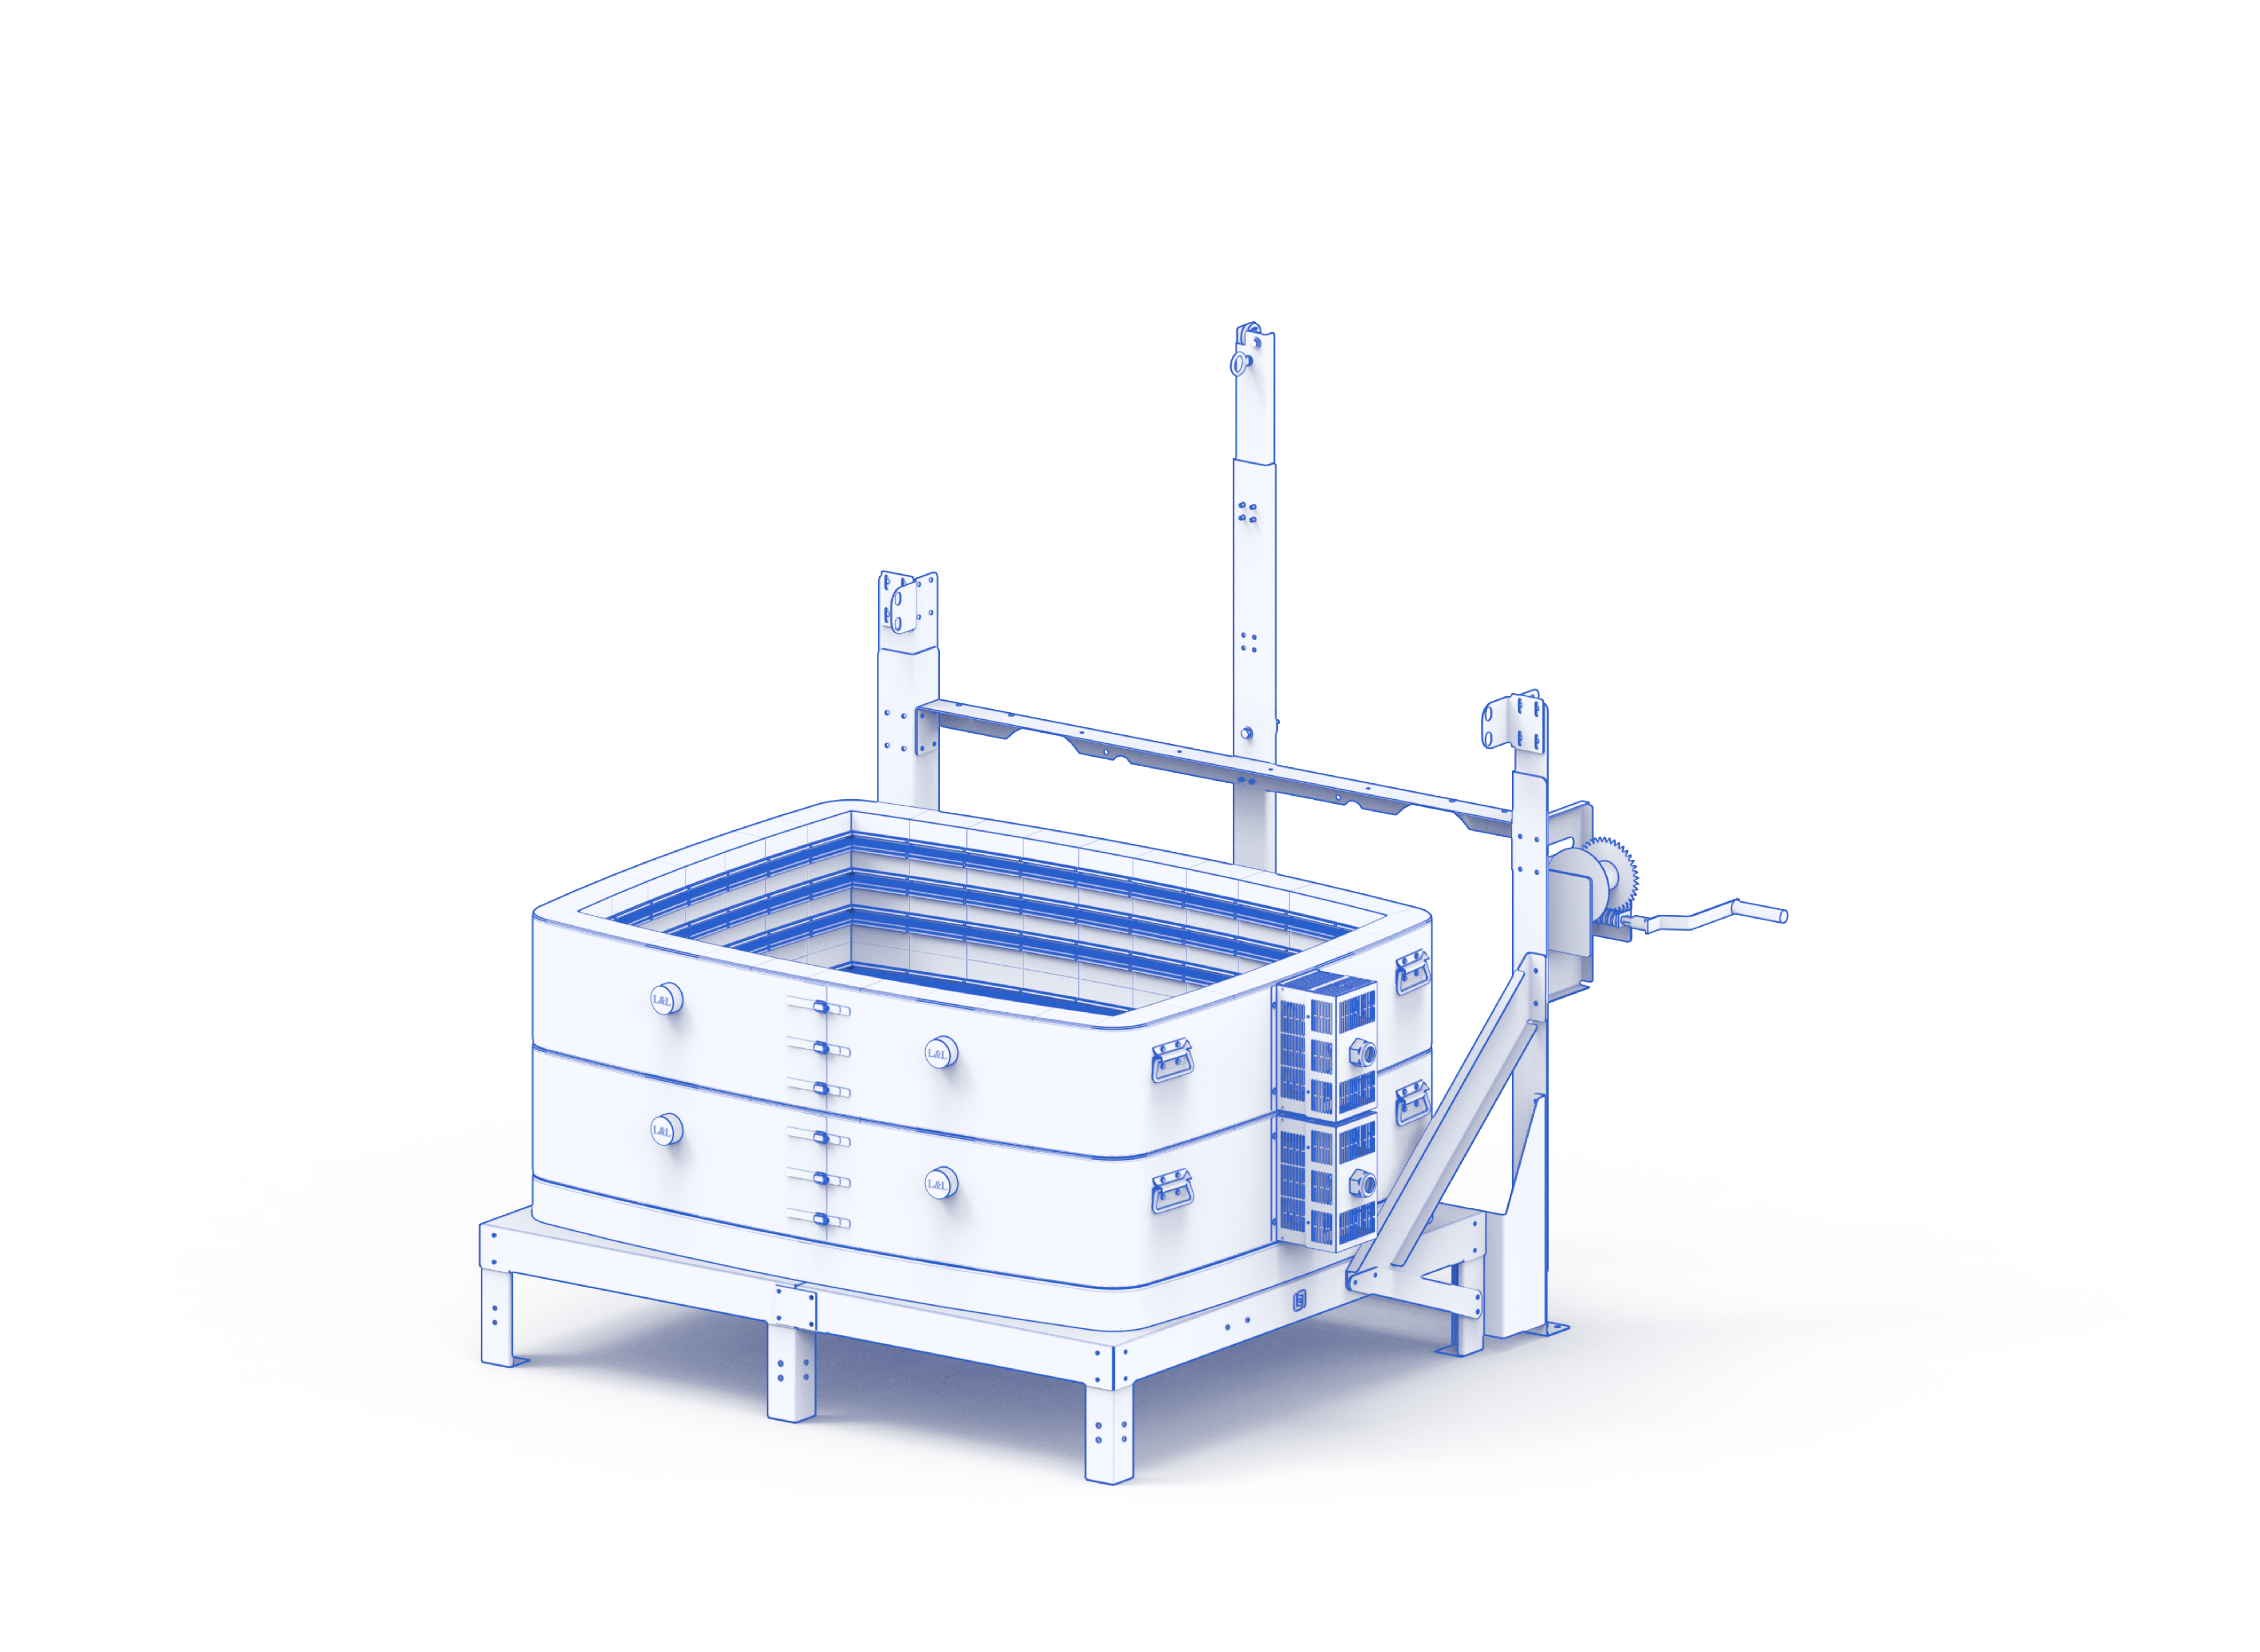
- Each kiln section has a numbered power cord (called an “element box jumper cord”): the top kiln section is always labeled “#1.” The bottom kiln section is “#2” on a two-section kiln, “#3” on a three-section kiln, and so on.
- When delivered, the sections will be stacked in the opposite order. The top section in the crate will be the first one you place on the slab.
- Stack the sections in the correct order, ensuring the numbers match. Keep them aligned and flush with the Bottom Slab
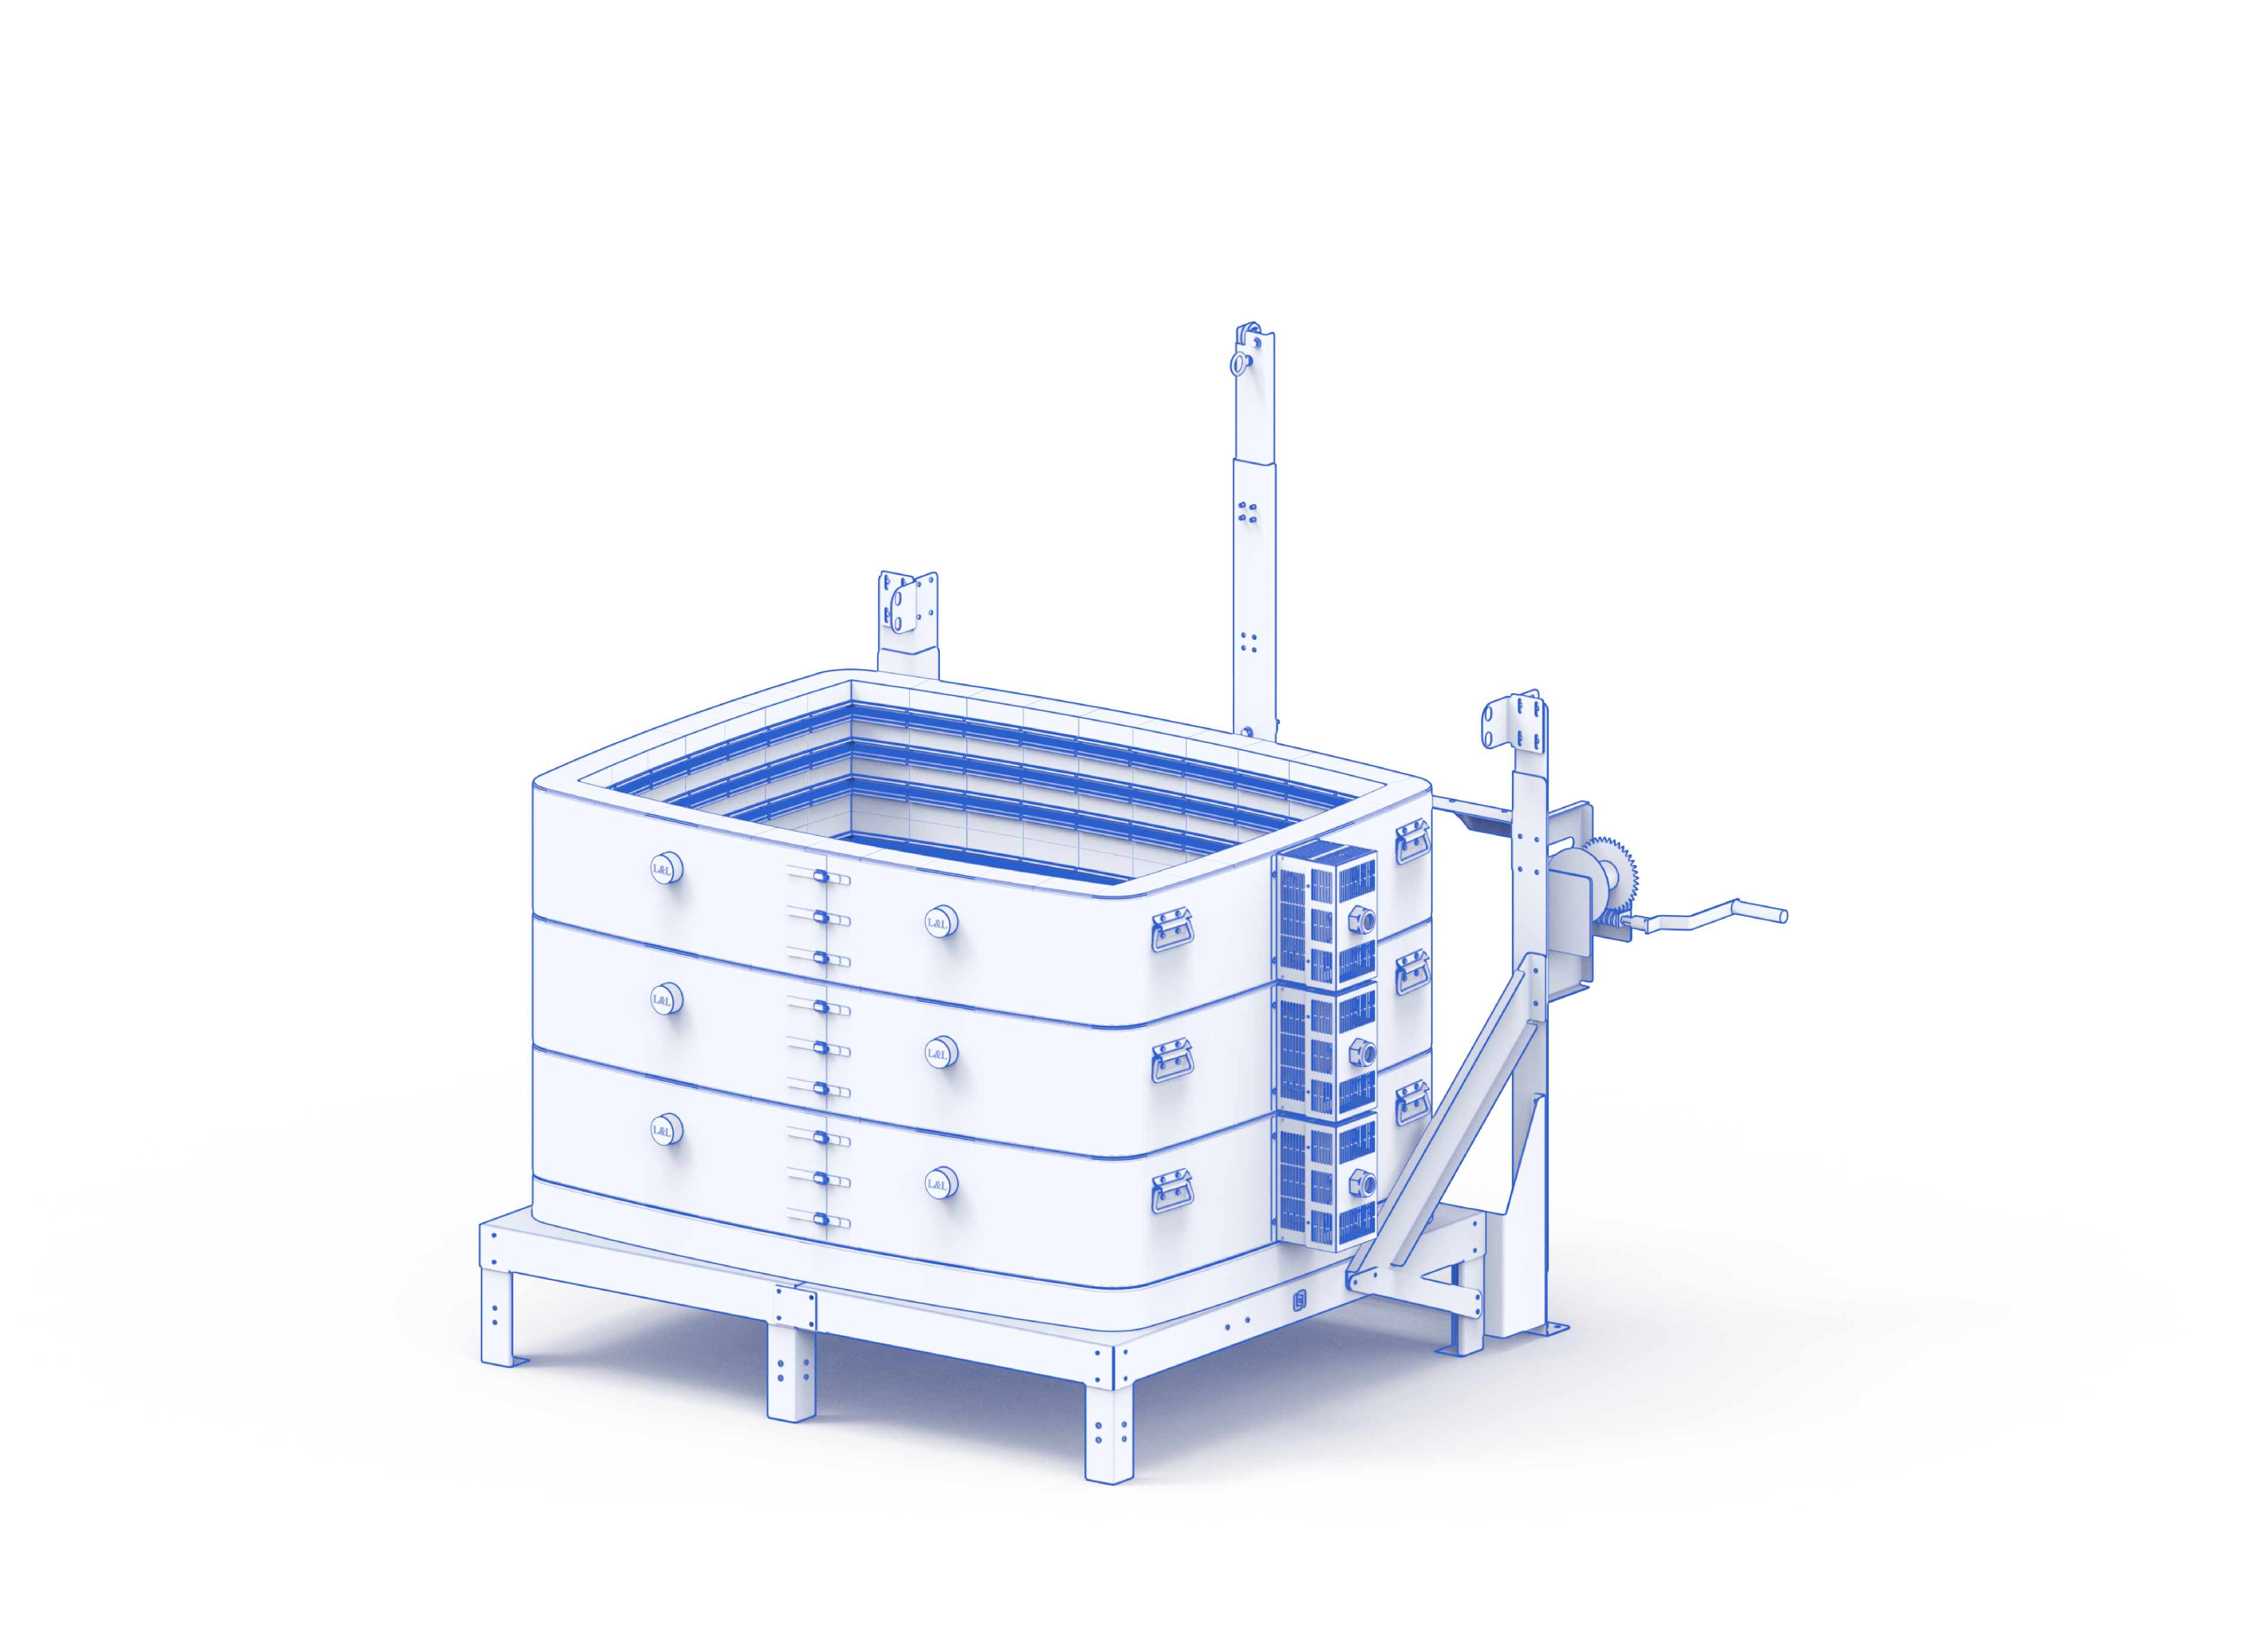
Attach the lid
- Remove the hinge bar and the eight shaft collars from the lid.
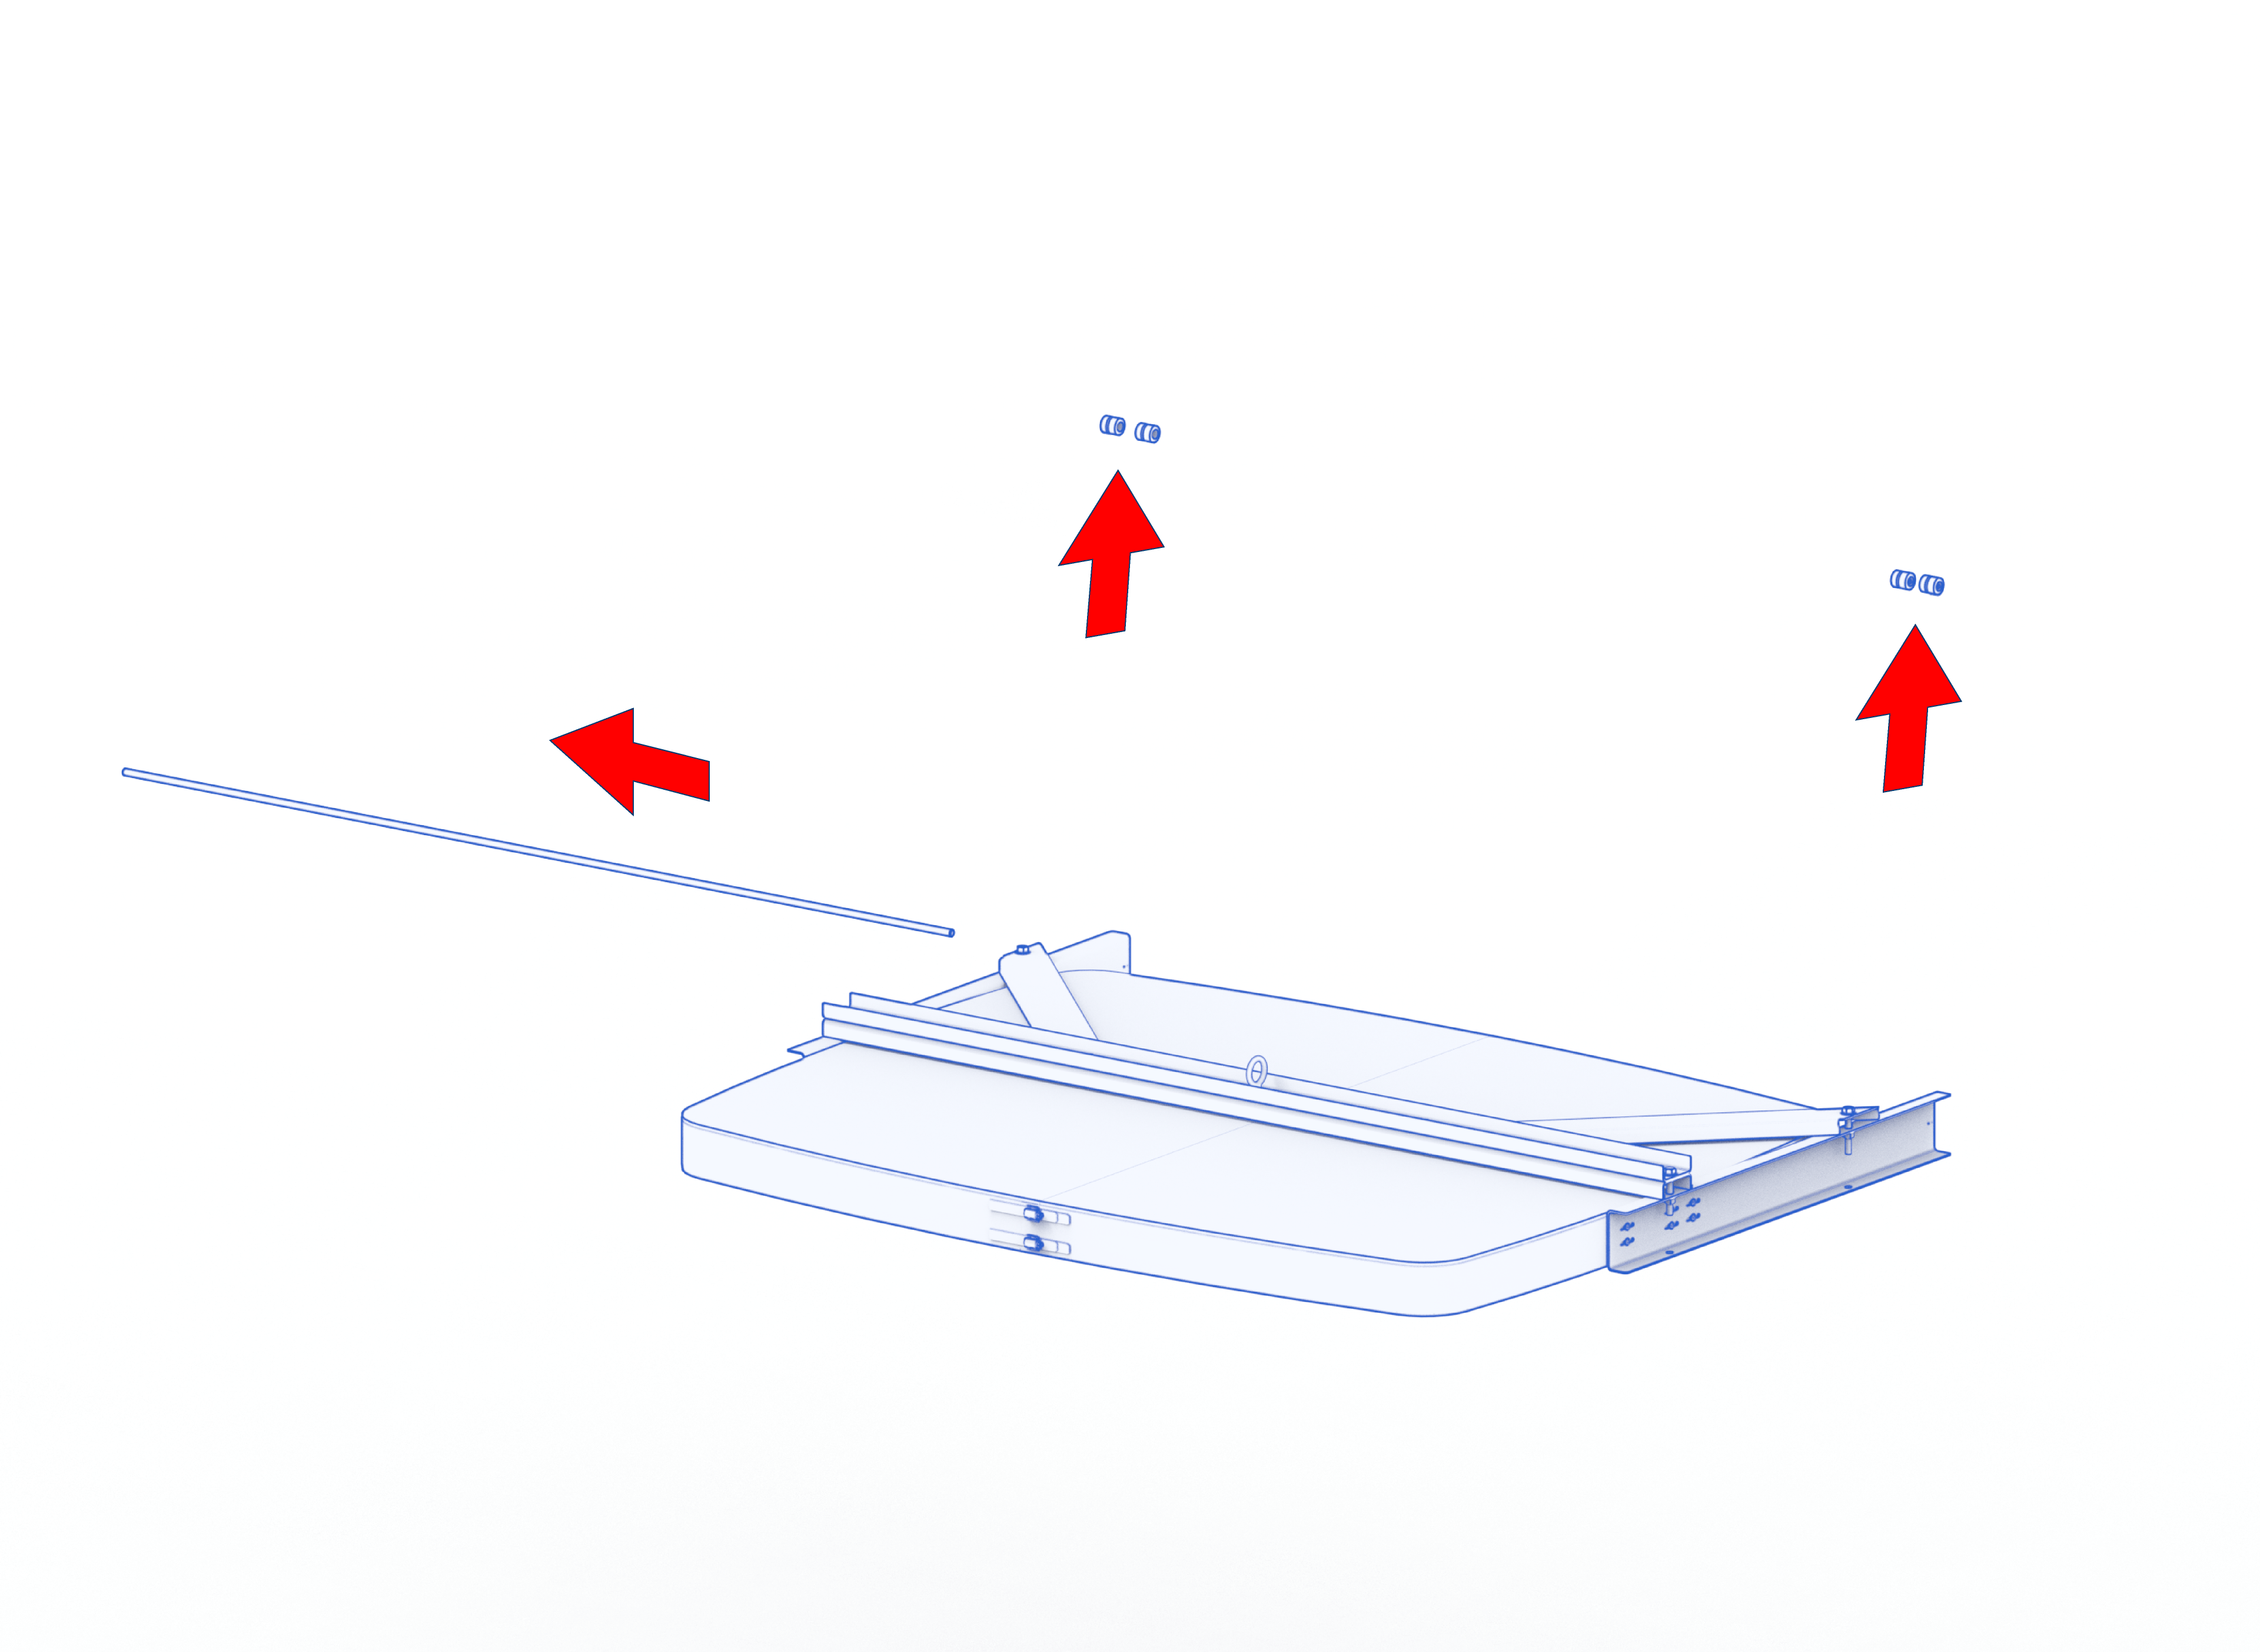
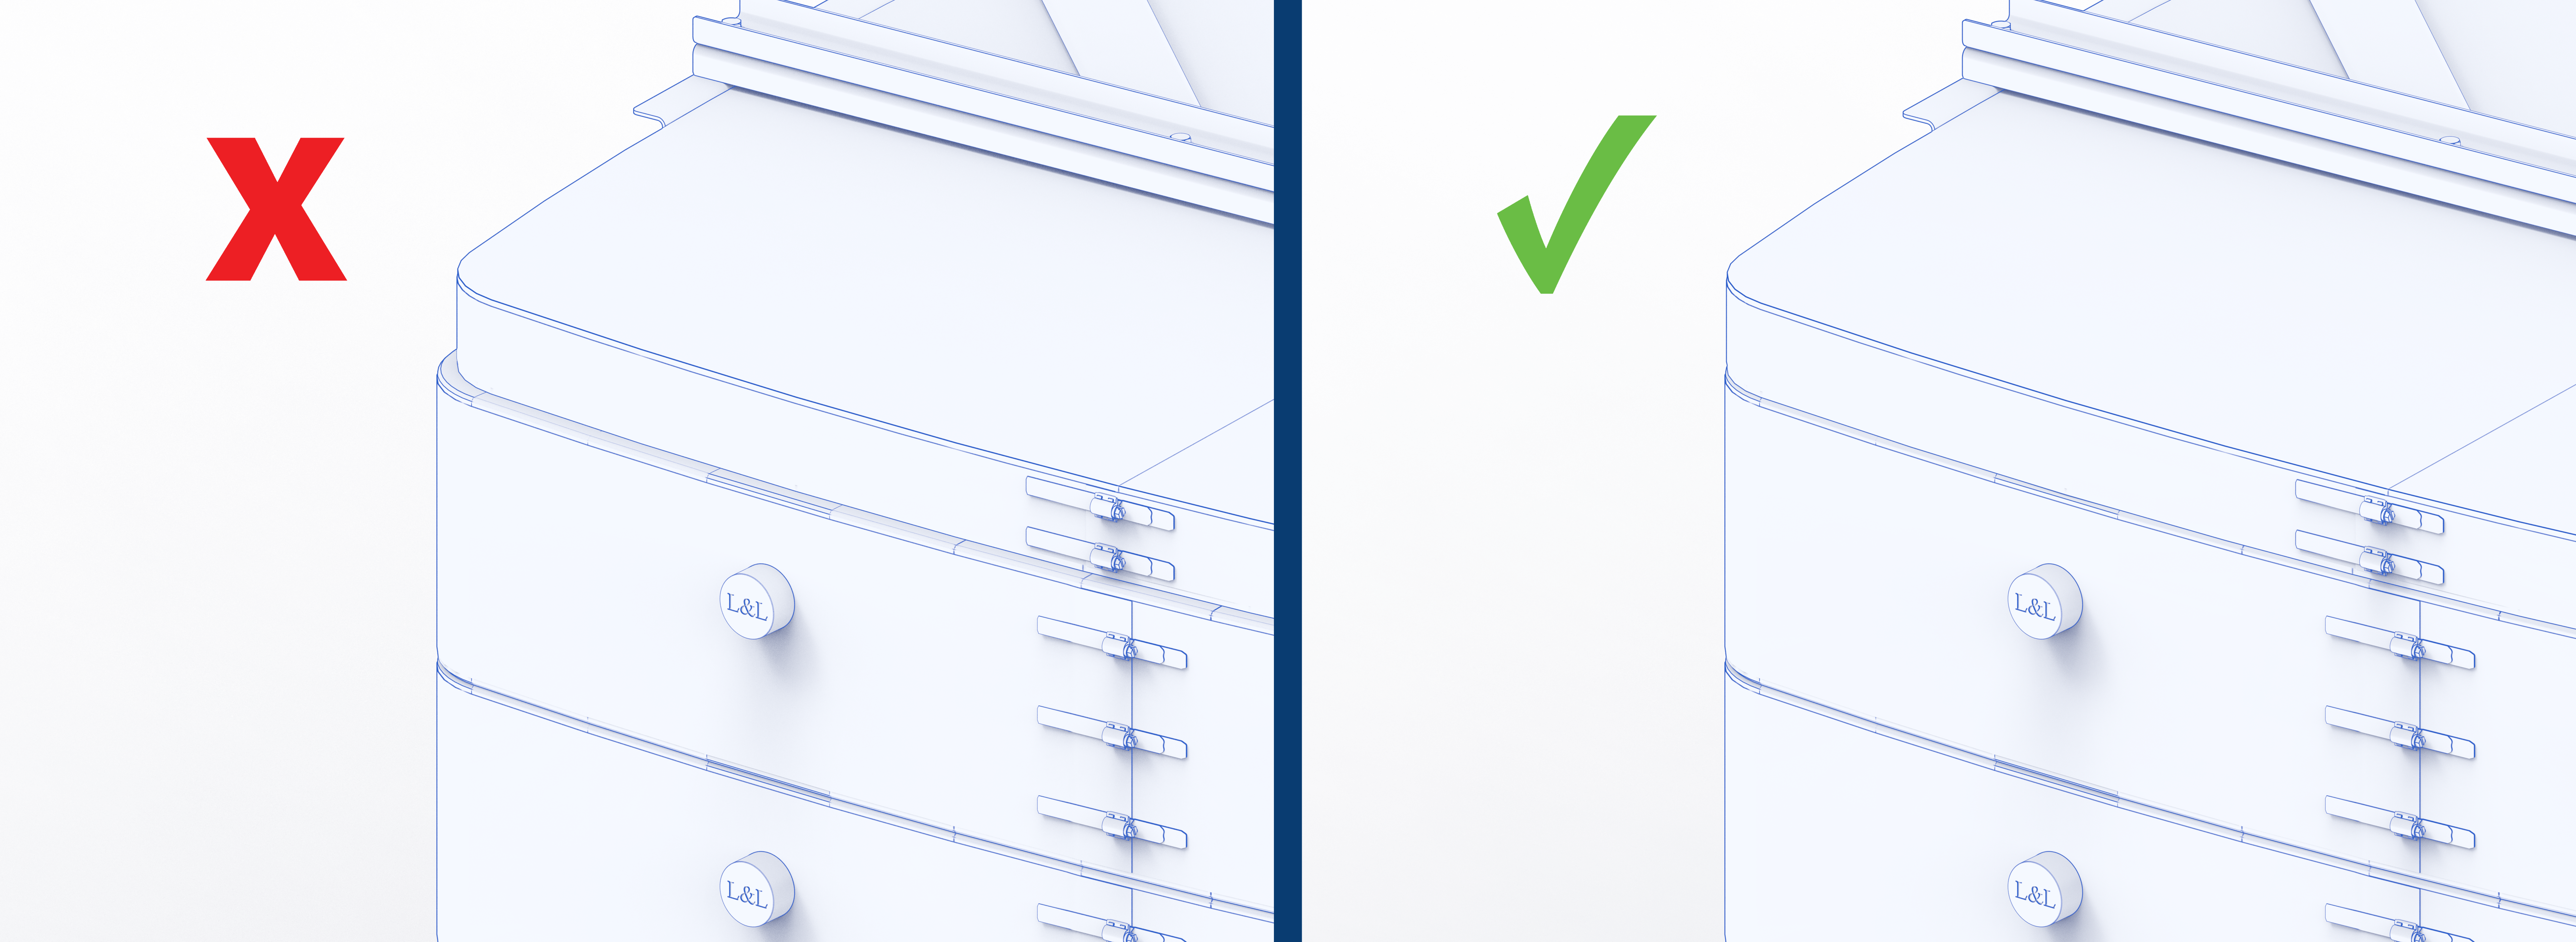
- Once removed, place the lid on top of the kiln. Ensure that it is flush with the kiln body and that the hinge holes are aligned. If something isn't aligned, you may need to adjust it until it is.
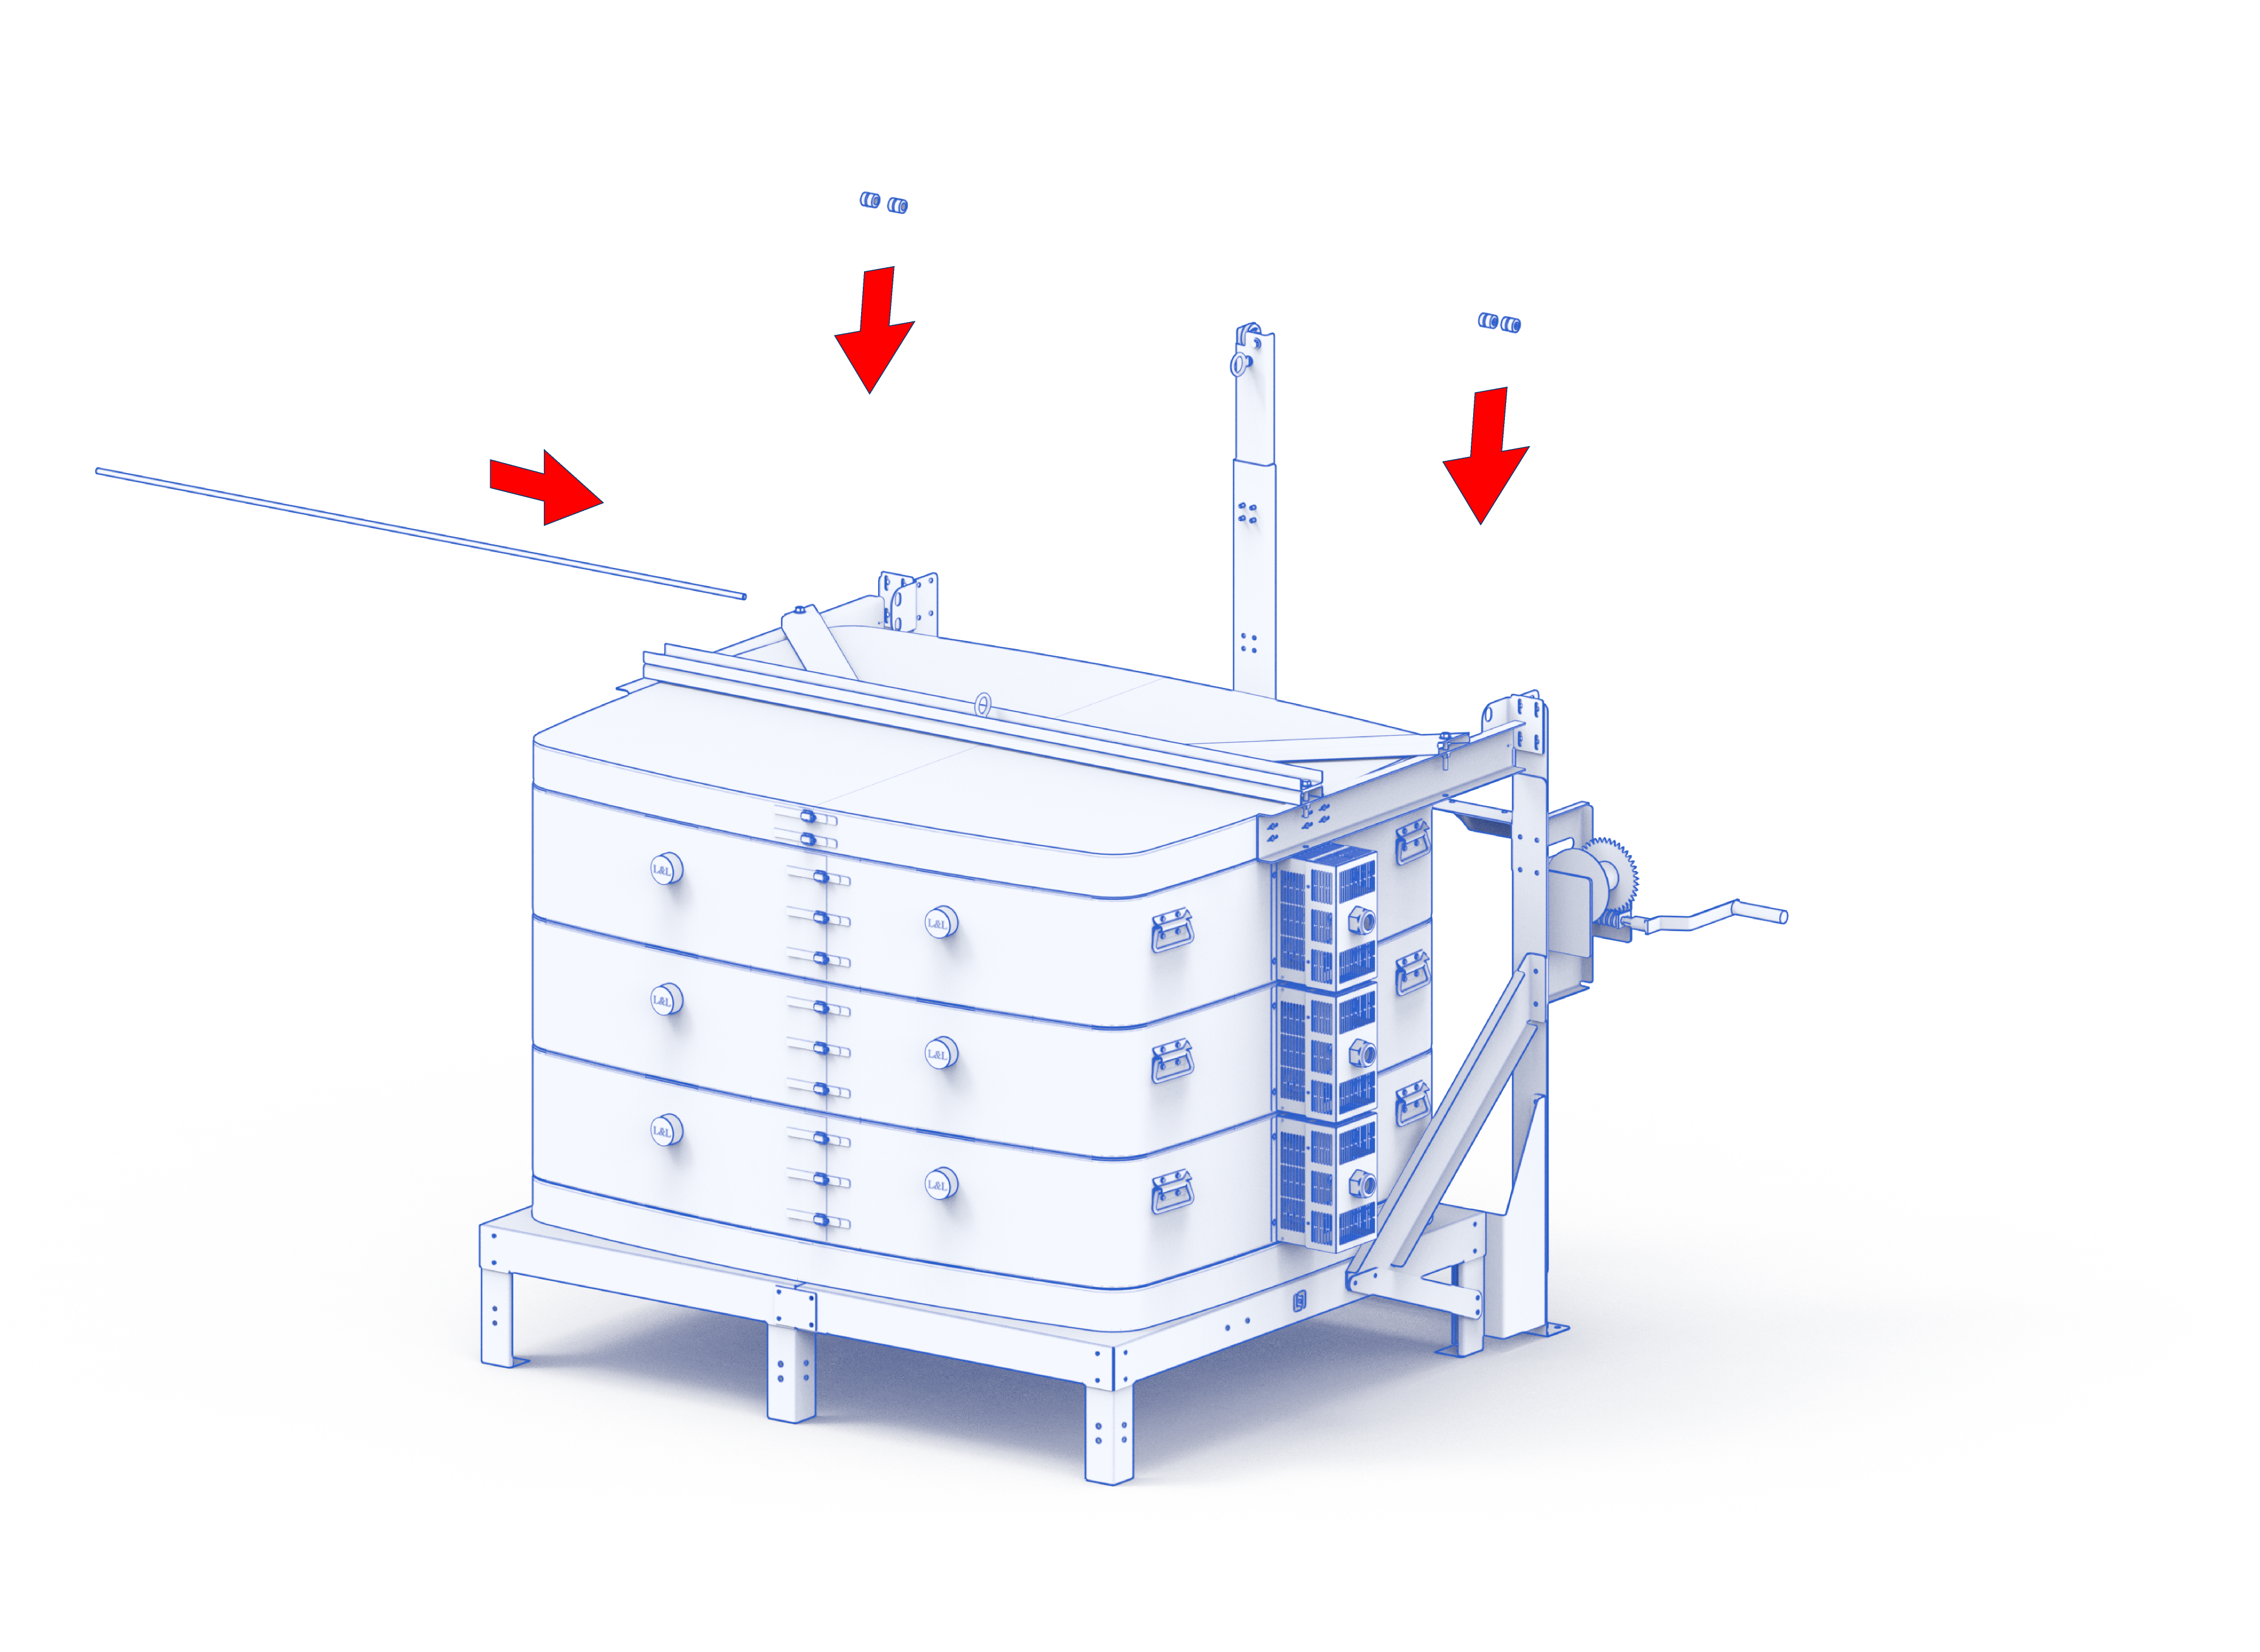
- Once the lid is seated properly, insert the hinge bar back through the lid, the winch assembly, and the eight shaft collars.
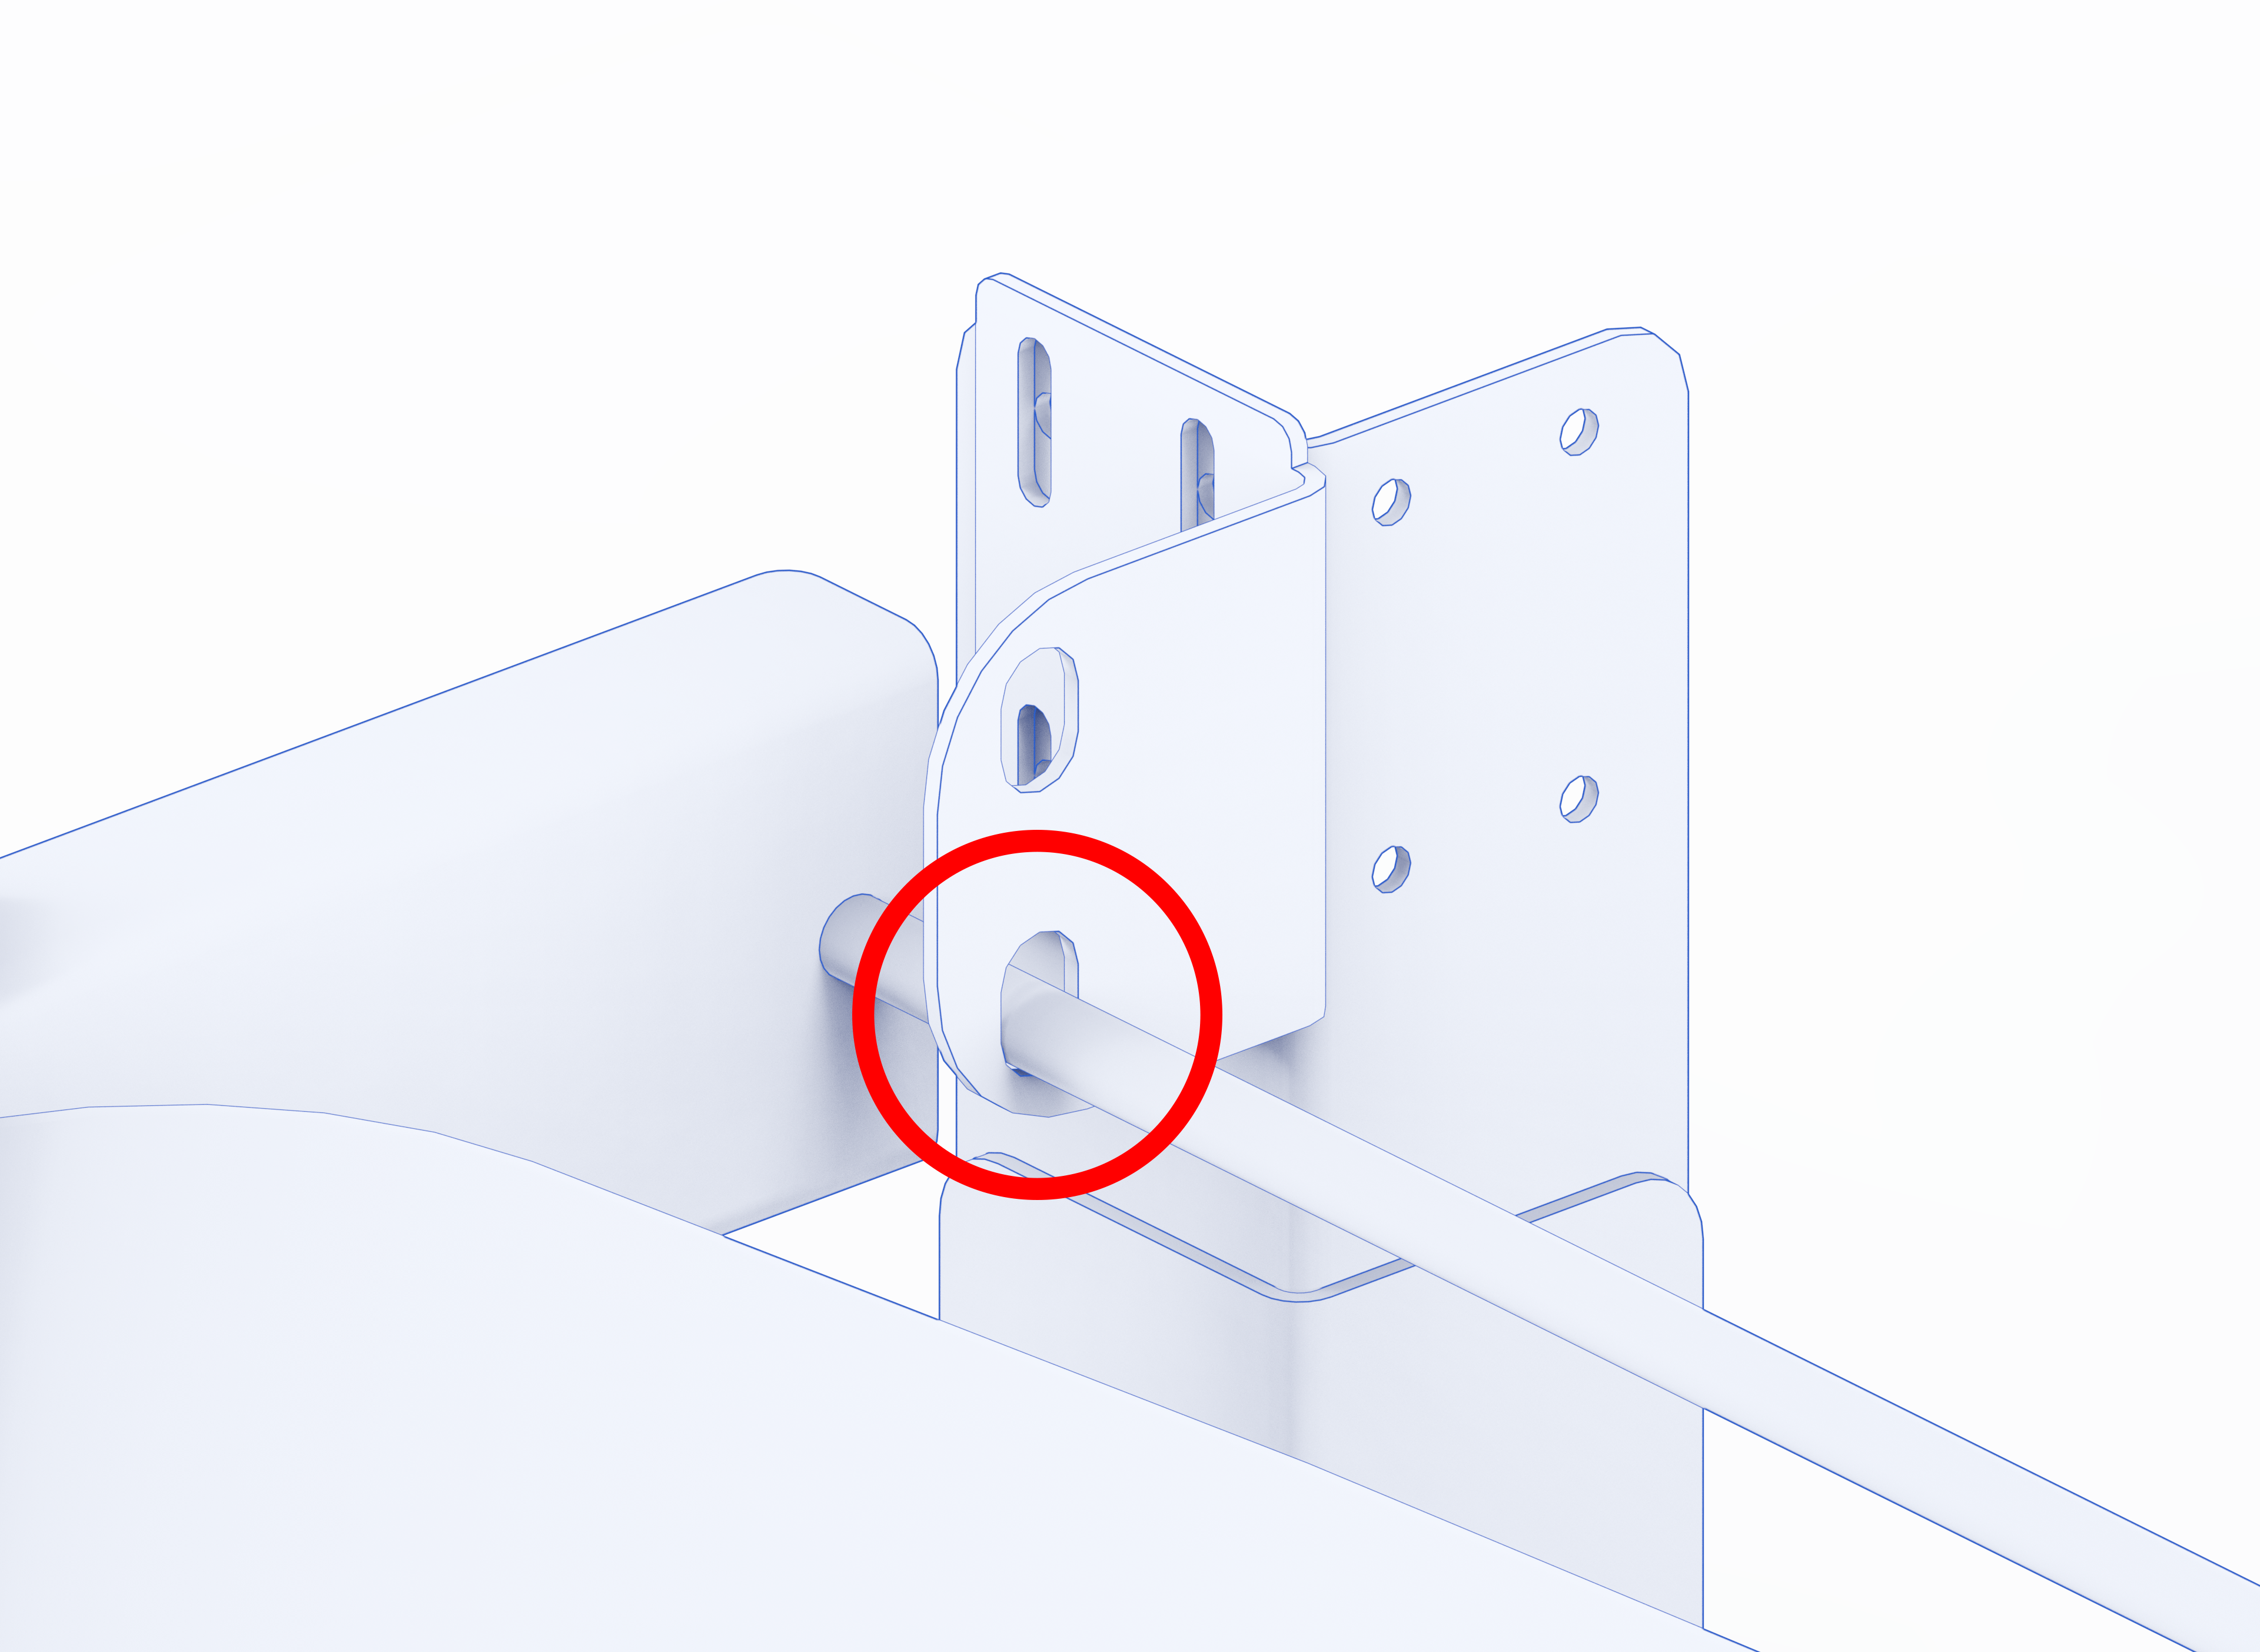
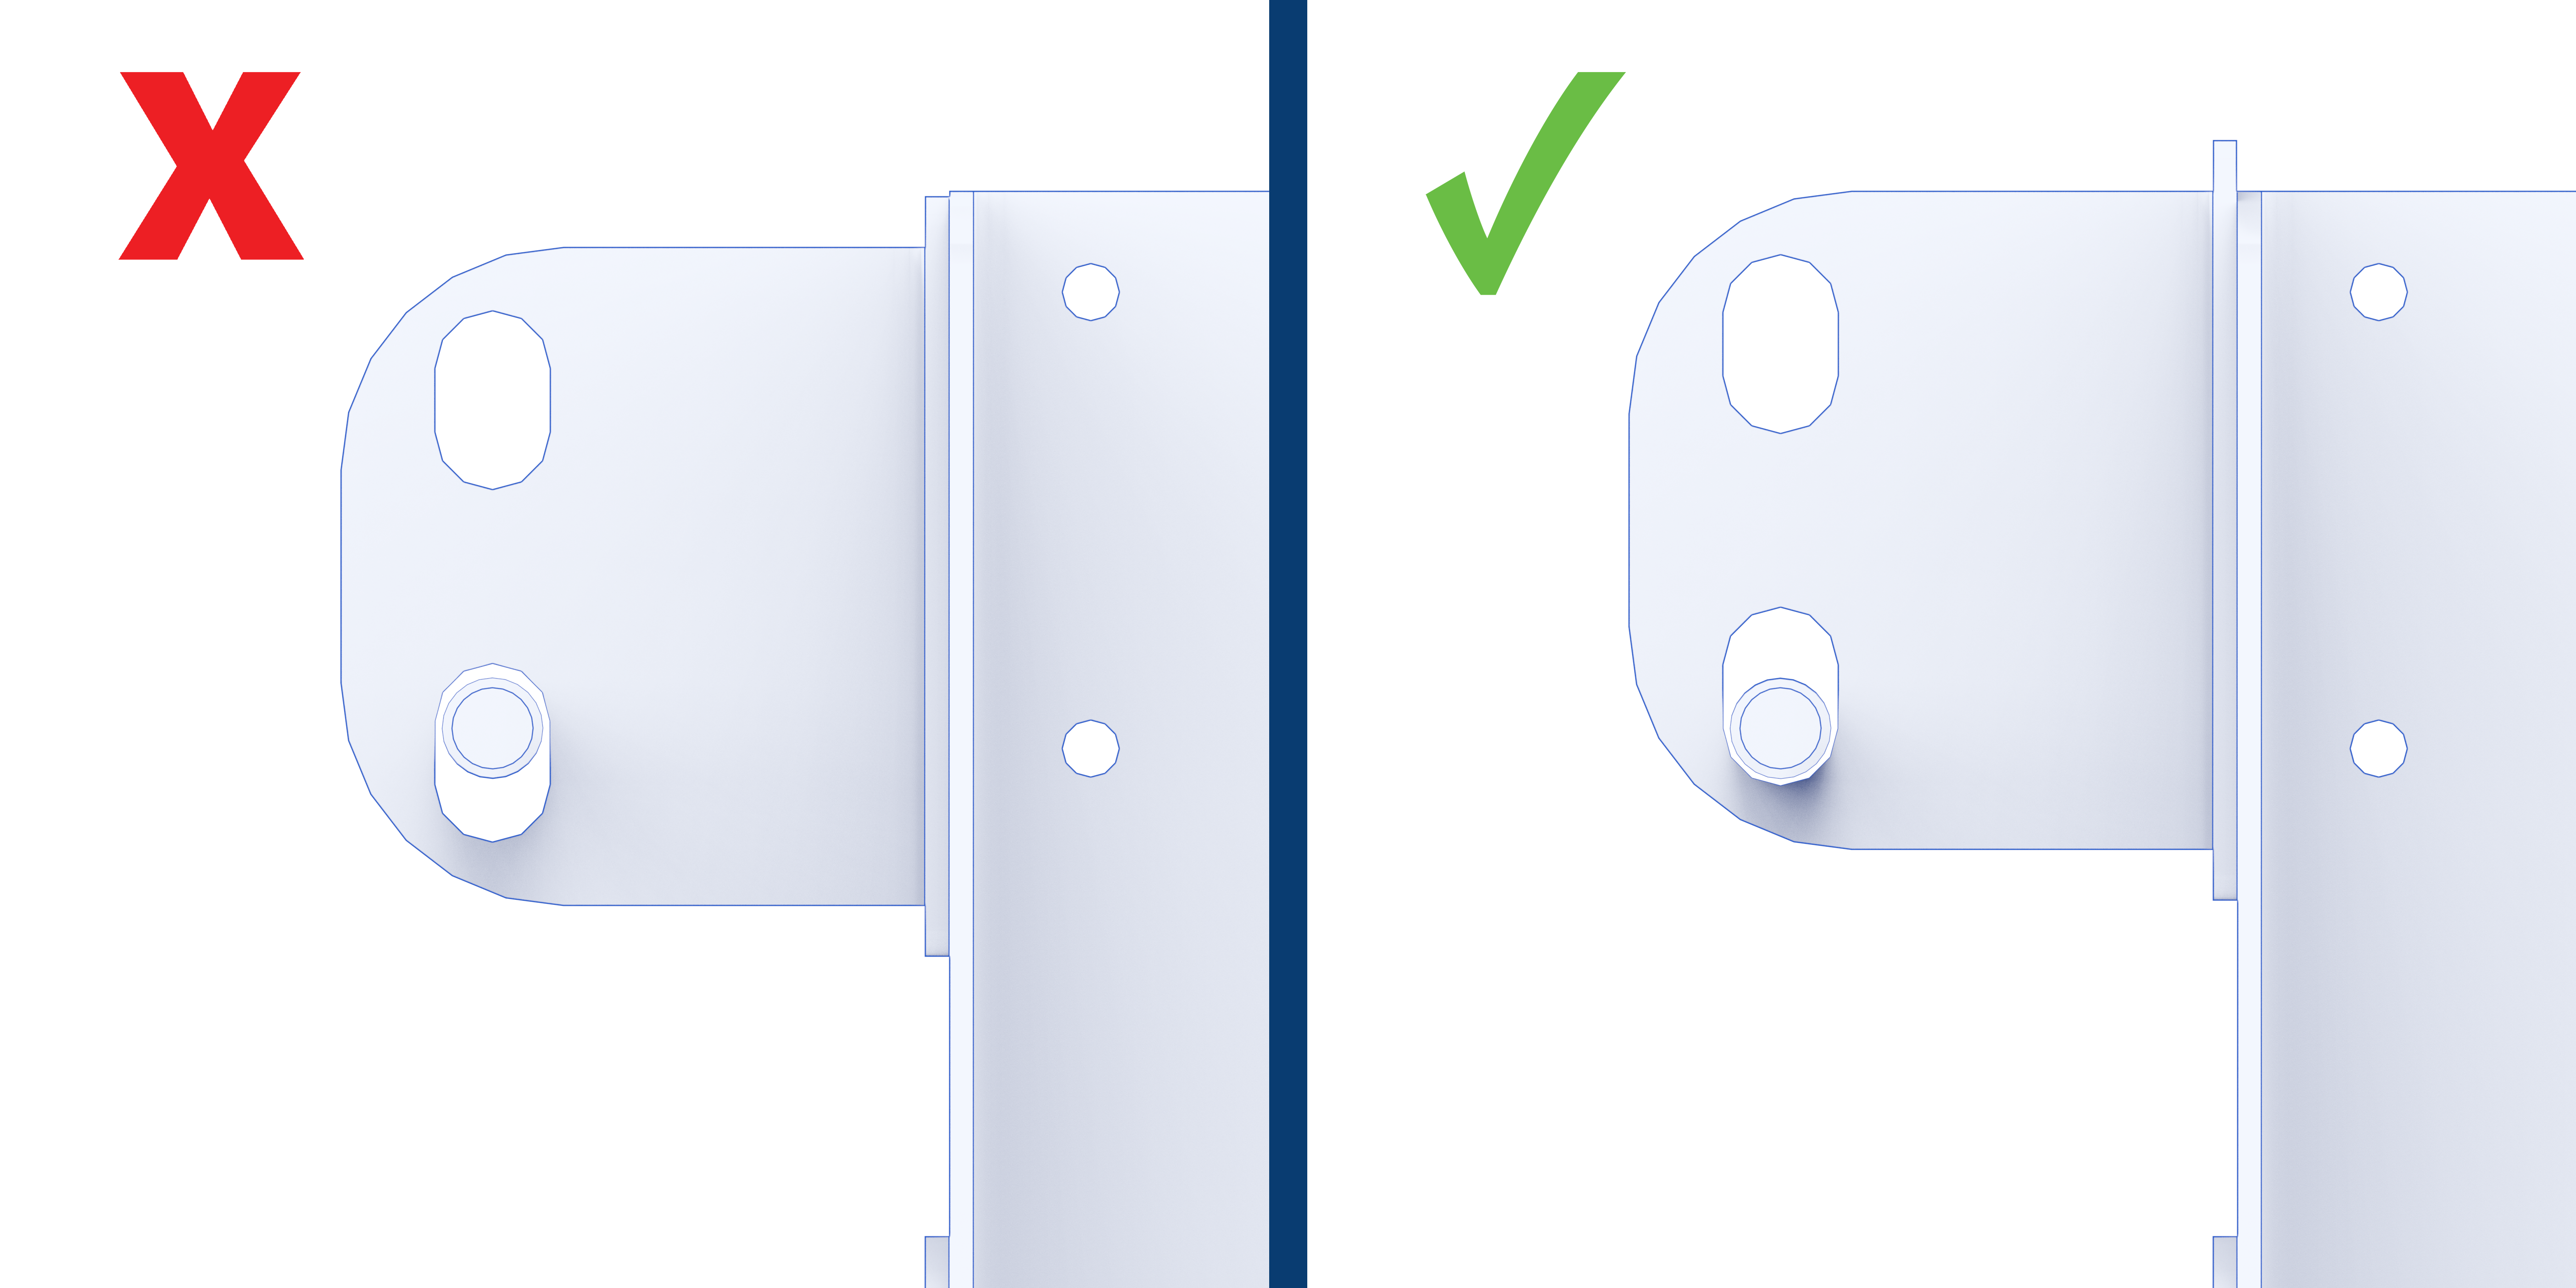
- the hinge brackets on the winch assembly have slotted holes. Ensure the hinge bar sits at the bottom of these slots. if the hinge bar sits above the bottom, you will need to loosten the hinge brackets, adjust, and retighten them.
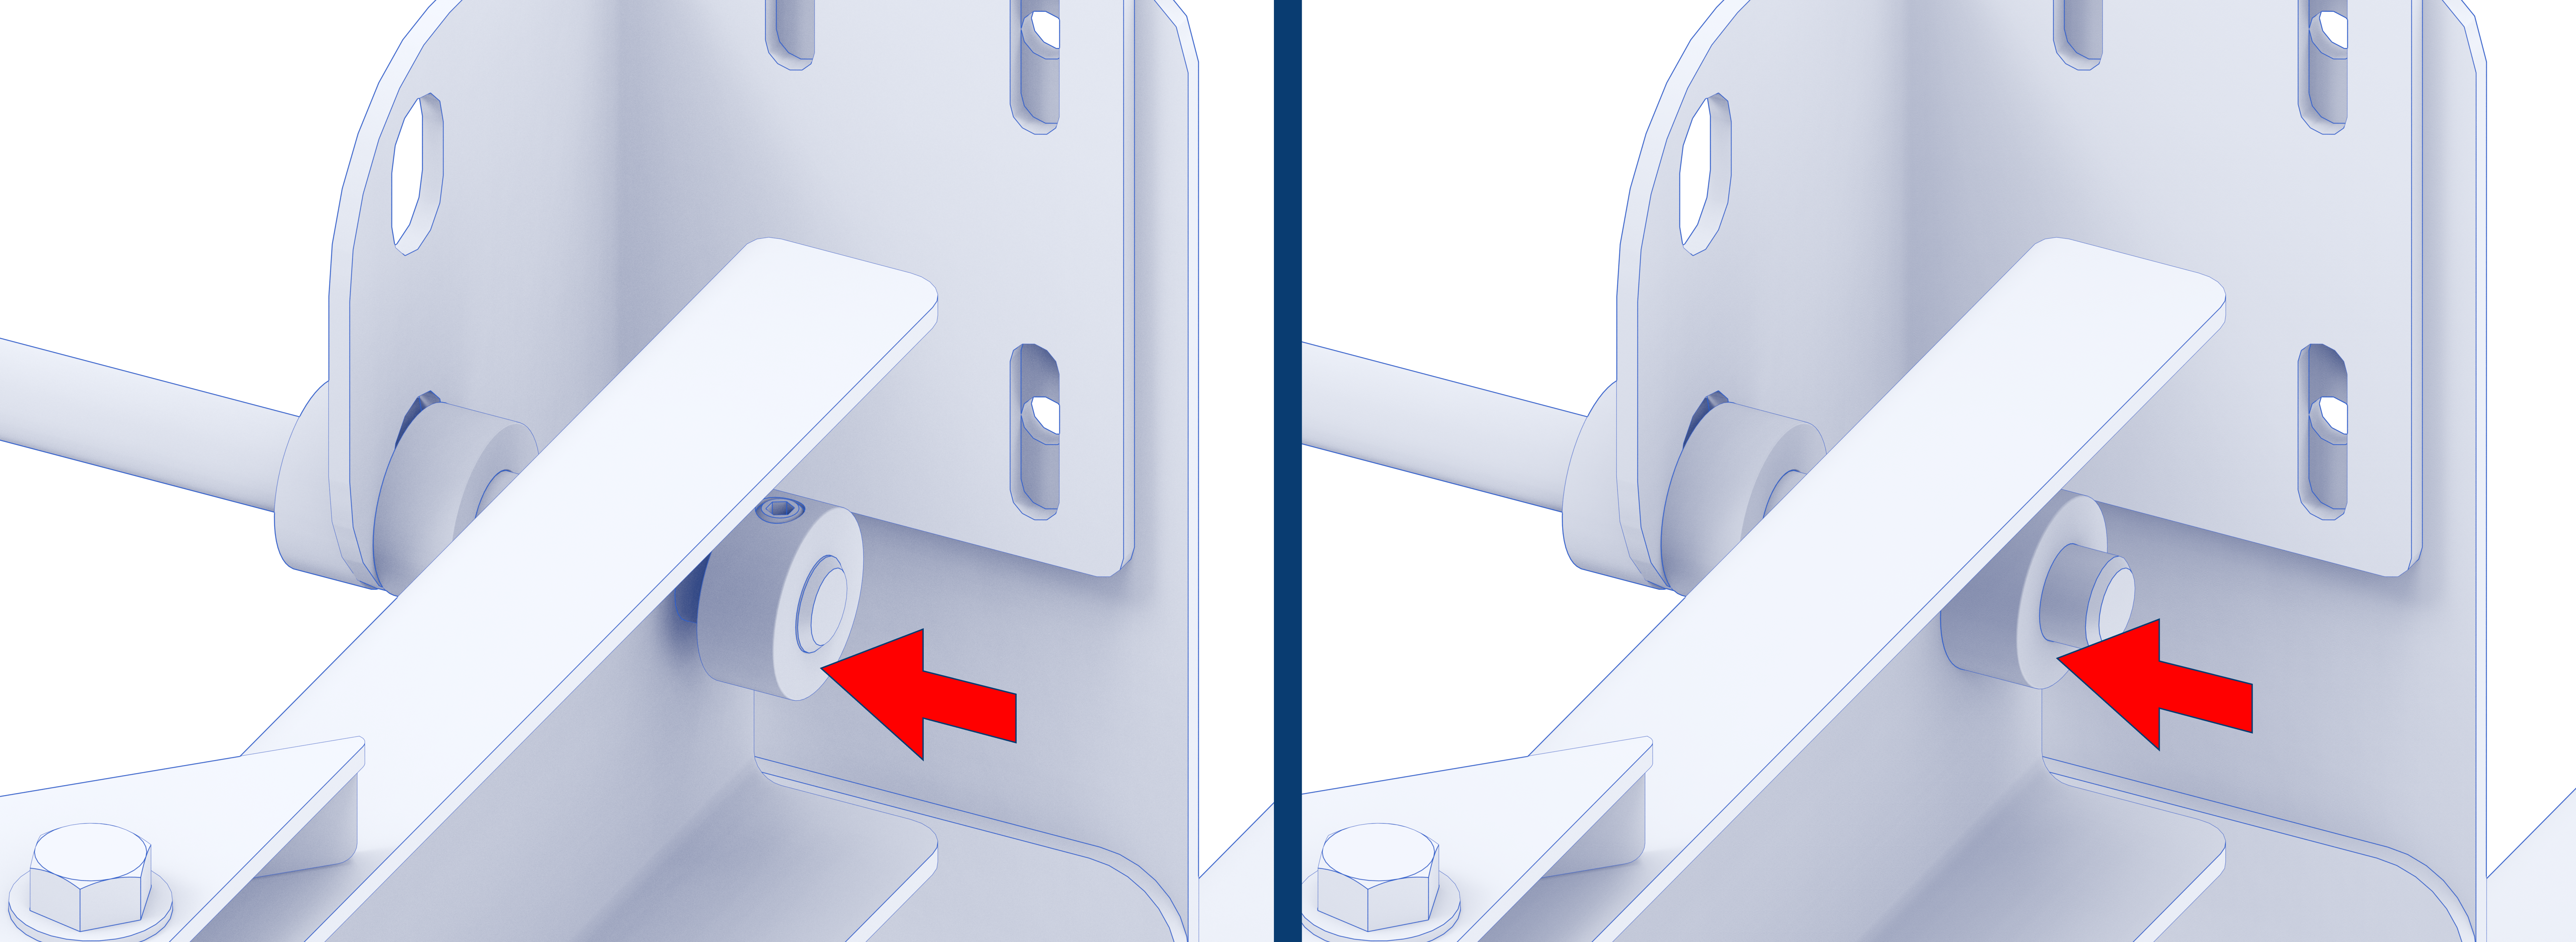
- Ensure that all 8 shaft collars are pushed flush against either side of each piece of the hinge. Once pushed flush, secure them in place with the set screw
Connect the Winch Cable
- To attach the cable, unwind the winch while keeping tension on the cable with your other hand.
- The winch can be driven by a power drill or with an included hand crank.
- Continue keeping tension on the cable as you unhook it and attach it to the eye bolt on the top of the lid.
Re-wind the winch until the cable is under its own tension.
- If the cable loses tension while unwinding, you will need to fully unspool and then respool the cable.
Attaching Davinci Winch Cable

See https://www.youtube.com/video/_1cyQyebdIg
Testing the lid
- With the winch cable now attached and under tension, fully lift the lid
- With the lid lifted, it is a good idea to test the safety chain and ensure it reaches.
- If the lid lifts properly, gently lower the lid back on top of the kiln. There should be no grinding from the brick of the lid to the top kiln section.
- Examine the lid to ensure it has remained completely flush with the kiln sections below. If it hasn't, you will need to re-adjust the kiln sections until centered. Make these adjustments from the bottom slab.
Hooking up the control panel.
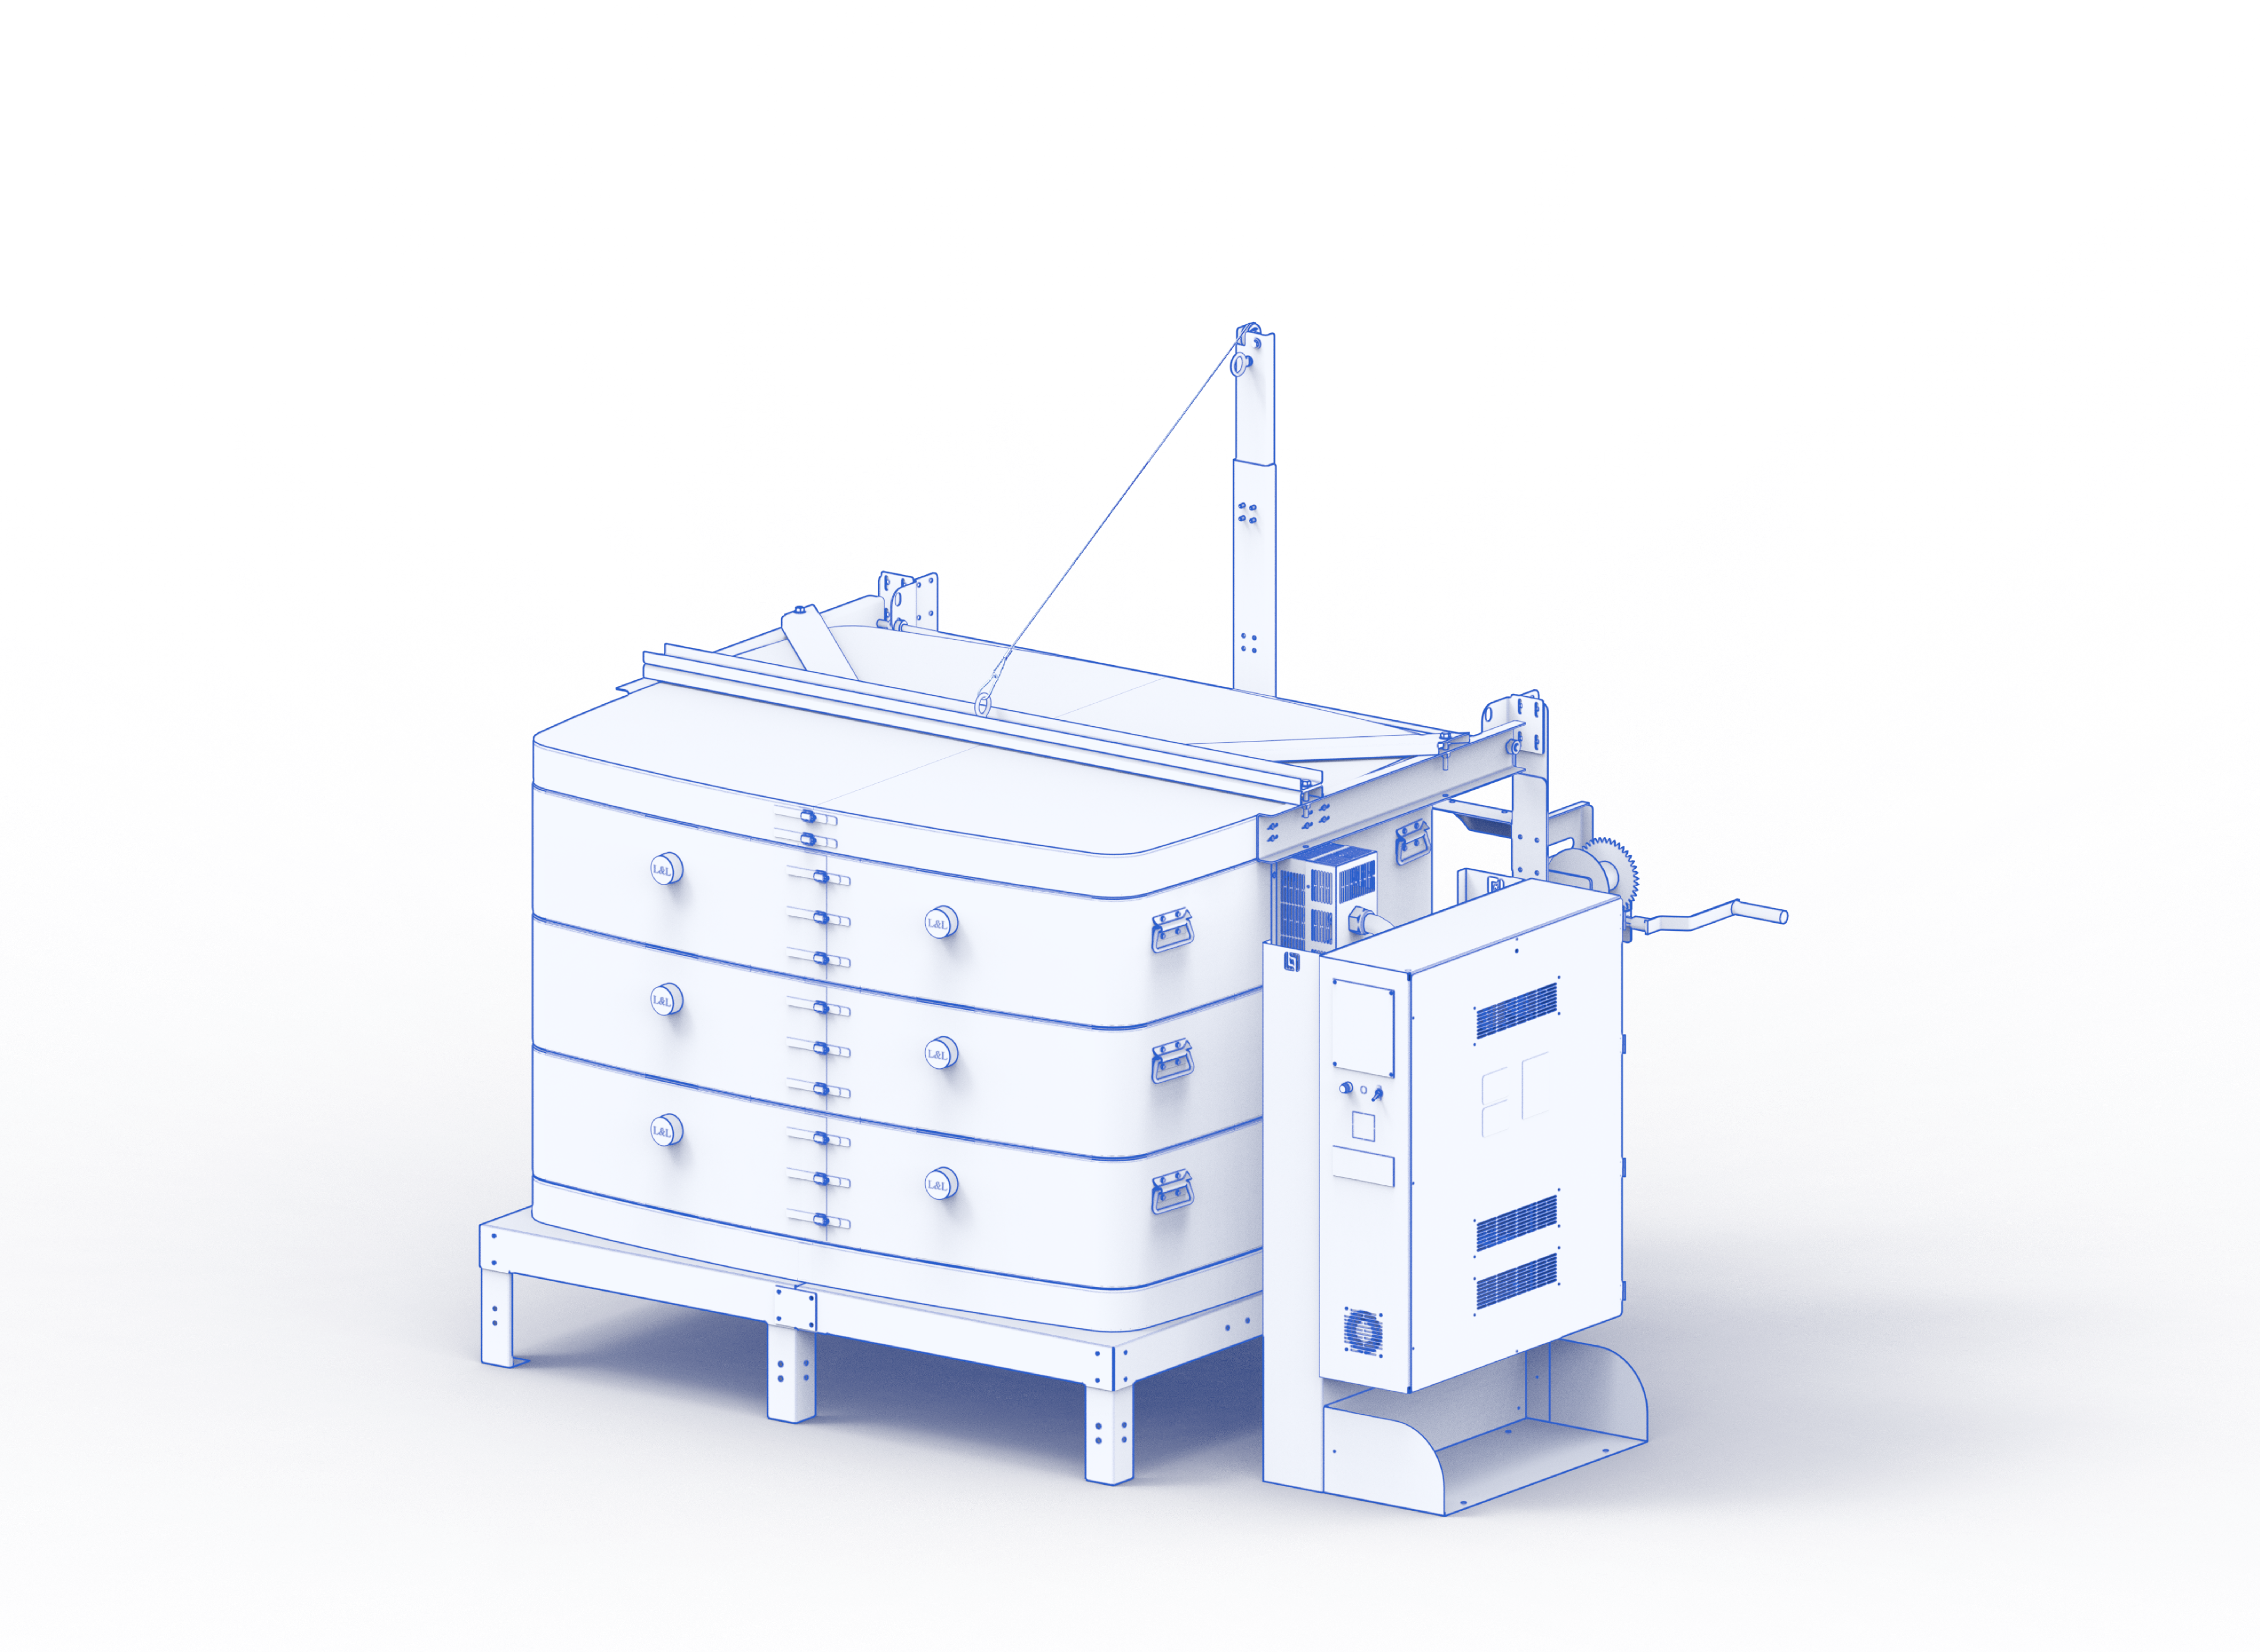
- Place the control panel onto the right side of the kiln. Have a professional electrician hook up the panel to power.
- Once hooked up by an electrician, you can hook up the element box jumper cords and the thermocouple wires. Ensure each cord and thermocouple wire on the kiln is attached to the correct corresponding connector on the control panel (TC1 is the top, TC2 the middle, and TC3 the bottom thermocouple). On a 2-section high DaVinci, TC2 is the bottom TC.
Final Steps
- Install the vent (if equipped):
- Attach the vent fan and run exhaust tubing to the outside. See the Vent-Sure Downdraft System Instructions.
- Read “Cautions” carefully:
- Vacuum the Element Holders:
- Make sure the kiln is disconnected from power before vacuuming.
- Perform a test firing:
- Refer to the First Kiln Firing Instructions